# AWS Specific Notes
## Number of routes and integration limit
The AWS API Gateway has limits on how many routes/integrations can be added to 1 API:
https://docs.aws.amazon.com/apigateway/latest/developerguide/limits.html#api-gateway-limits:
Resource or operation | Default quota | Can be increased
-- | -- | --
Routes per API | 300 | Yes
Integrations per API | 300 | No
Maximum integration timeout | 30 seconds | No
Using the _naive_ approach to create a route/integration pair for each deployed helix service
version will soon exhaust those limits:
```
/helix-services/foo_1.8.3/ -----> integration:1234 ----> function:my-function:1.8.3
/helix-services/foo_1.8.3/{path+} --/
```
when (sym)linking release versions, there are more routes, eg:
```
/helix-services/foo_1.8.3/ ------------> integration:1234 ----> function:my-function:1.8.3
/helix-services/foo_1.8.3/{path+} ----/
/
/helix-services/foo_v1 -------------/
/helix-services/foo_v1{path+} -----/
/helix-services/foo_v1.8----------/
/helix-services/foo_v1.8{path+} -/
```
### Proxy functions
The multiplex / proxy functions are used keep the number of routes small. Those functions
forward the request to the respective function using the [invoke] api.
The is 1 function per package with the following routes
```
ANY /helix-services/{action}/{version}
ANY /helix-services/{action}/{version}/{path+}
```
There are still routes created for the released (symlnked) functions in order to keep them fast.
```
/helix-services/{action}/{version} ------------> integration:proxty ----> function:proxy:1.0
/helix-services/{action}/{version}/{path+} ----/
/helix-services/foo/v1 --------------------> integration:foo ---> function:foo:1.8.1
/helix-services/foo/v1/{path+} -----------/
/helix-services/foo/v1.8 ----------------/
/helix-services/foo/v1.8/{path+} -------/
```
### Proxy functions (helix-pages)
Helix pages has some special requirement, as it is not (yet) deployed like a _normal_ service.
The routes for `helix-pages` look like:
```
ANY /{package}/{action}
ANY /{package}/{action}/{path+}
```
Note that the `package` path parameter needs to match `pages_{version}`. The pages proxy then
[invoke]s `pages--${action}:${version}`.
### Installation
The is no automatic installation of the proxy functions (yet).
[invoke]: https://docs.aws.amazon.com/lambda/latest/dg/API_Invoke.html
## Getting started with `hedy` on AWS
### 1. Create a Starter Project
Create a simple JavaScript starter project.
src/index.js:
```
const { Response } = require('@adobe/fetch');
/**
* This is the main function
* @param {Request} req Universal API Request
* @param {HEDYContext} context Universal API Context
* @returns {Response} a status response
*/
module.exports.main = async function main(req, context) {
const result = '{"result": "it works!"}';
return new Response(result, {
status: 200,
});
}
```
package.json:
```
{
"name": "my-project",
"version": "1.0",
"private": true,
"main": "src/index.js",
"dependencies": {
"@adobe/fetch": "4.1.0"
}
}
```
Build the project with `npm i`
### 2. Configure your AWS account
Its useful to install the AWS Command Line Interface. See [Install or update the latest version of the AWS CLI](https://docs.aws.amazon.com/cli/latest/userguide/getting-started-install.html).
If you're on MacOS you can just use `brew install awscli`.
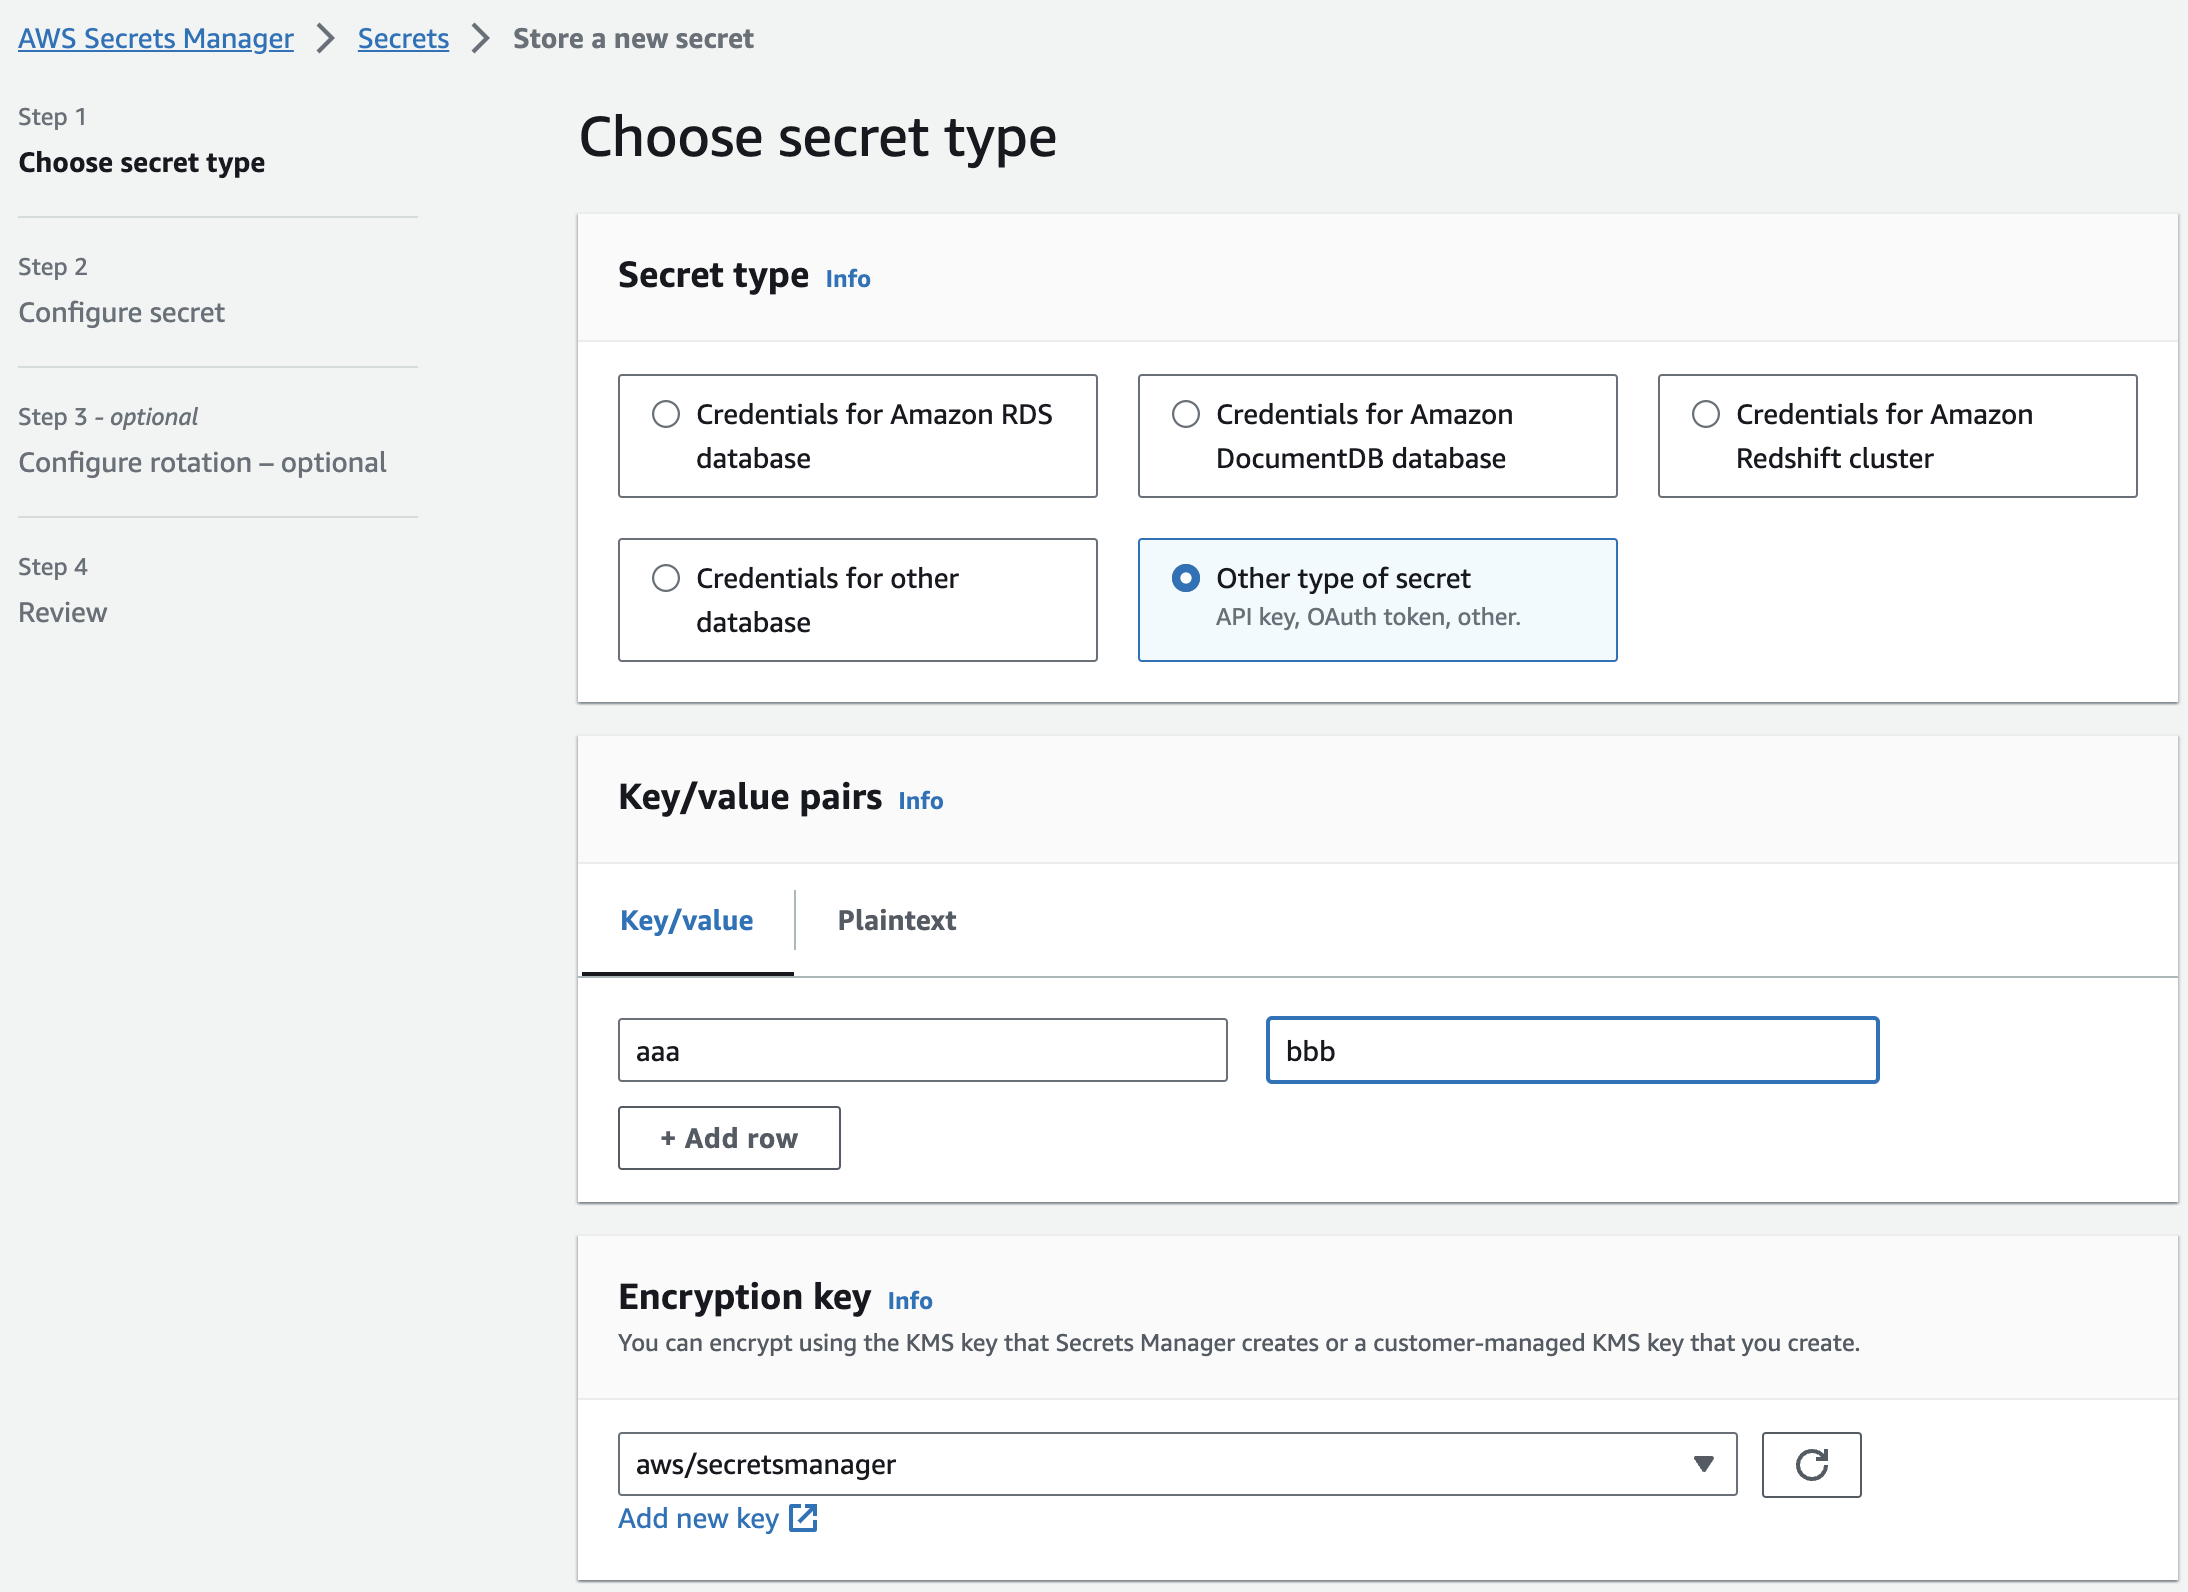
* Go to the [AWS UI](https://aws.amazon.com/) and in Secrets Manager create a secret called `/helix-deploy/default/all` you can enter a dummy key and value
for the secret and use the default values with everything else.
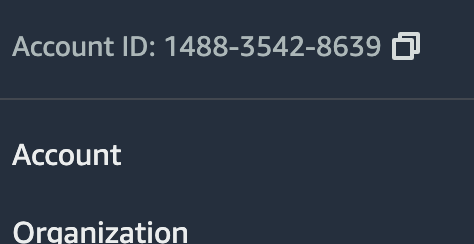
 * Copy your account number from the top right of the console
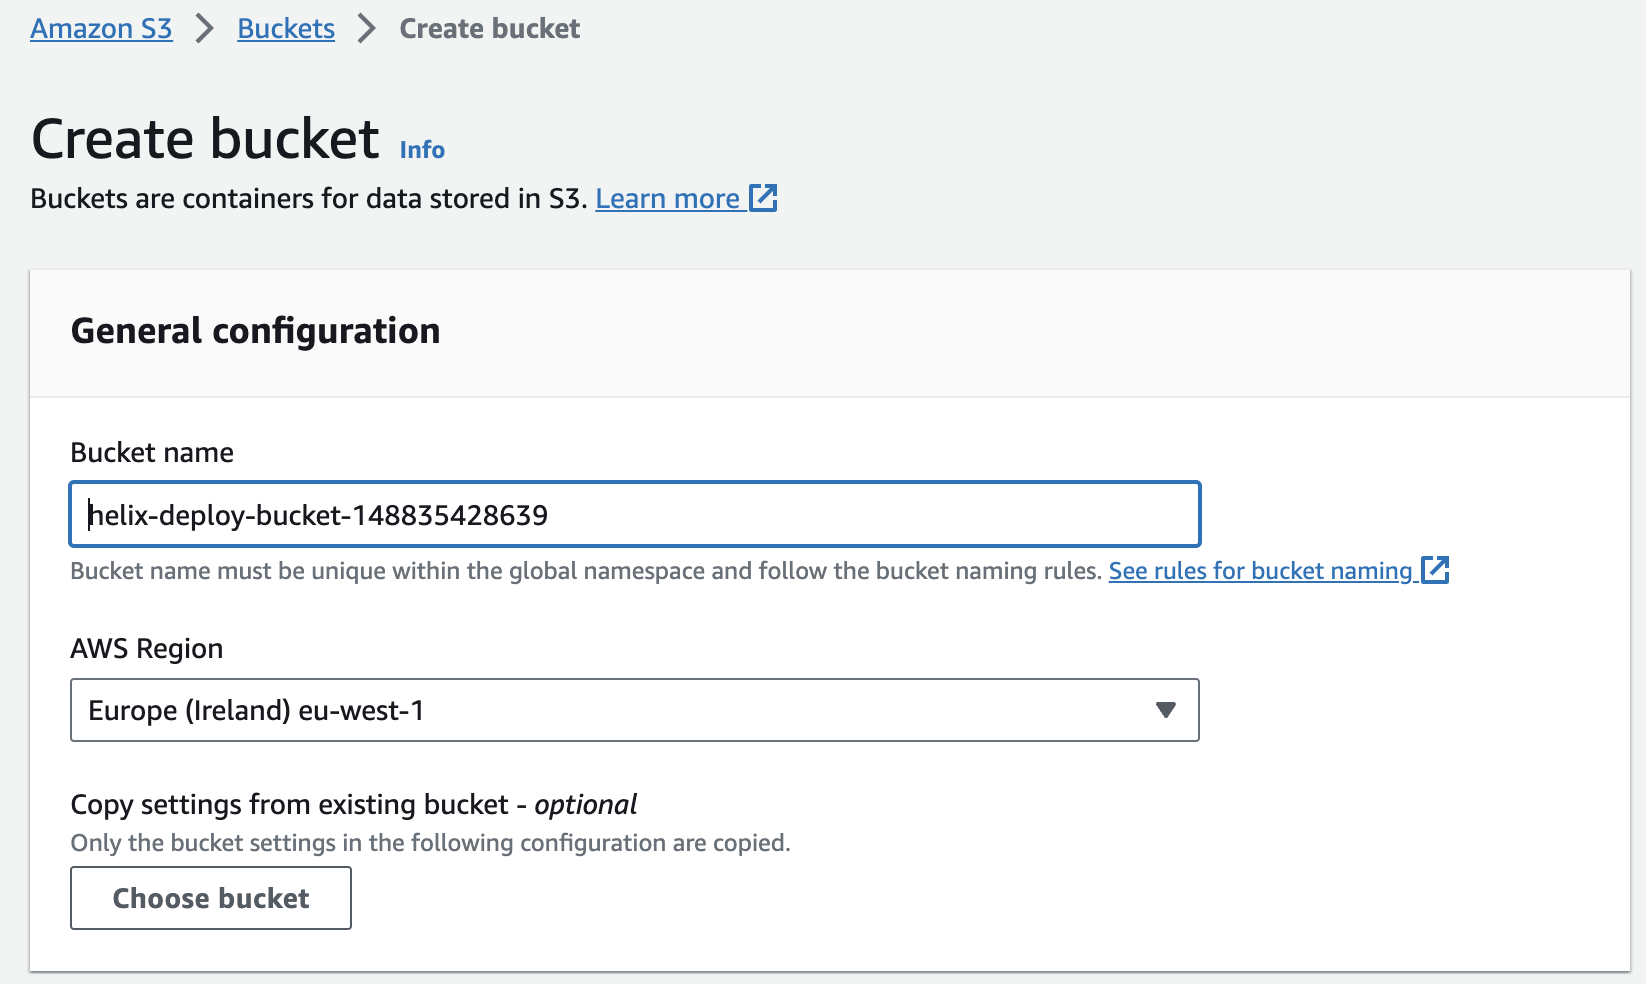
 * ... and create an associated S3 bucket named `helix-deploy-bucket-`
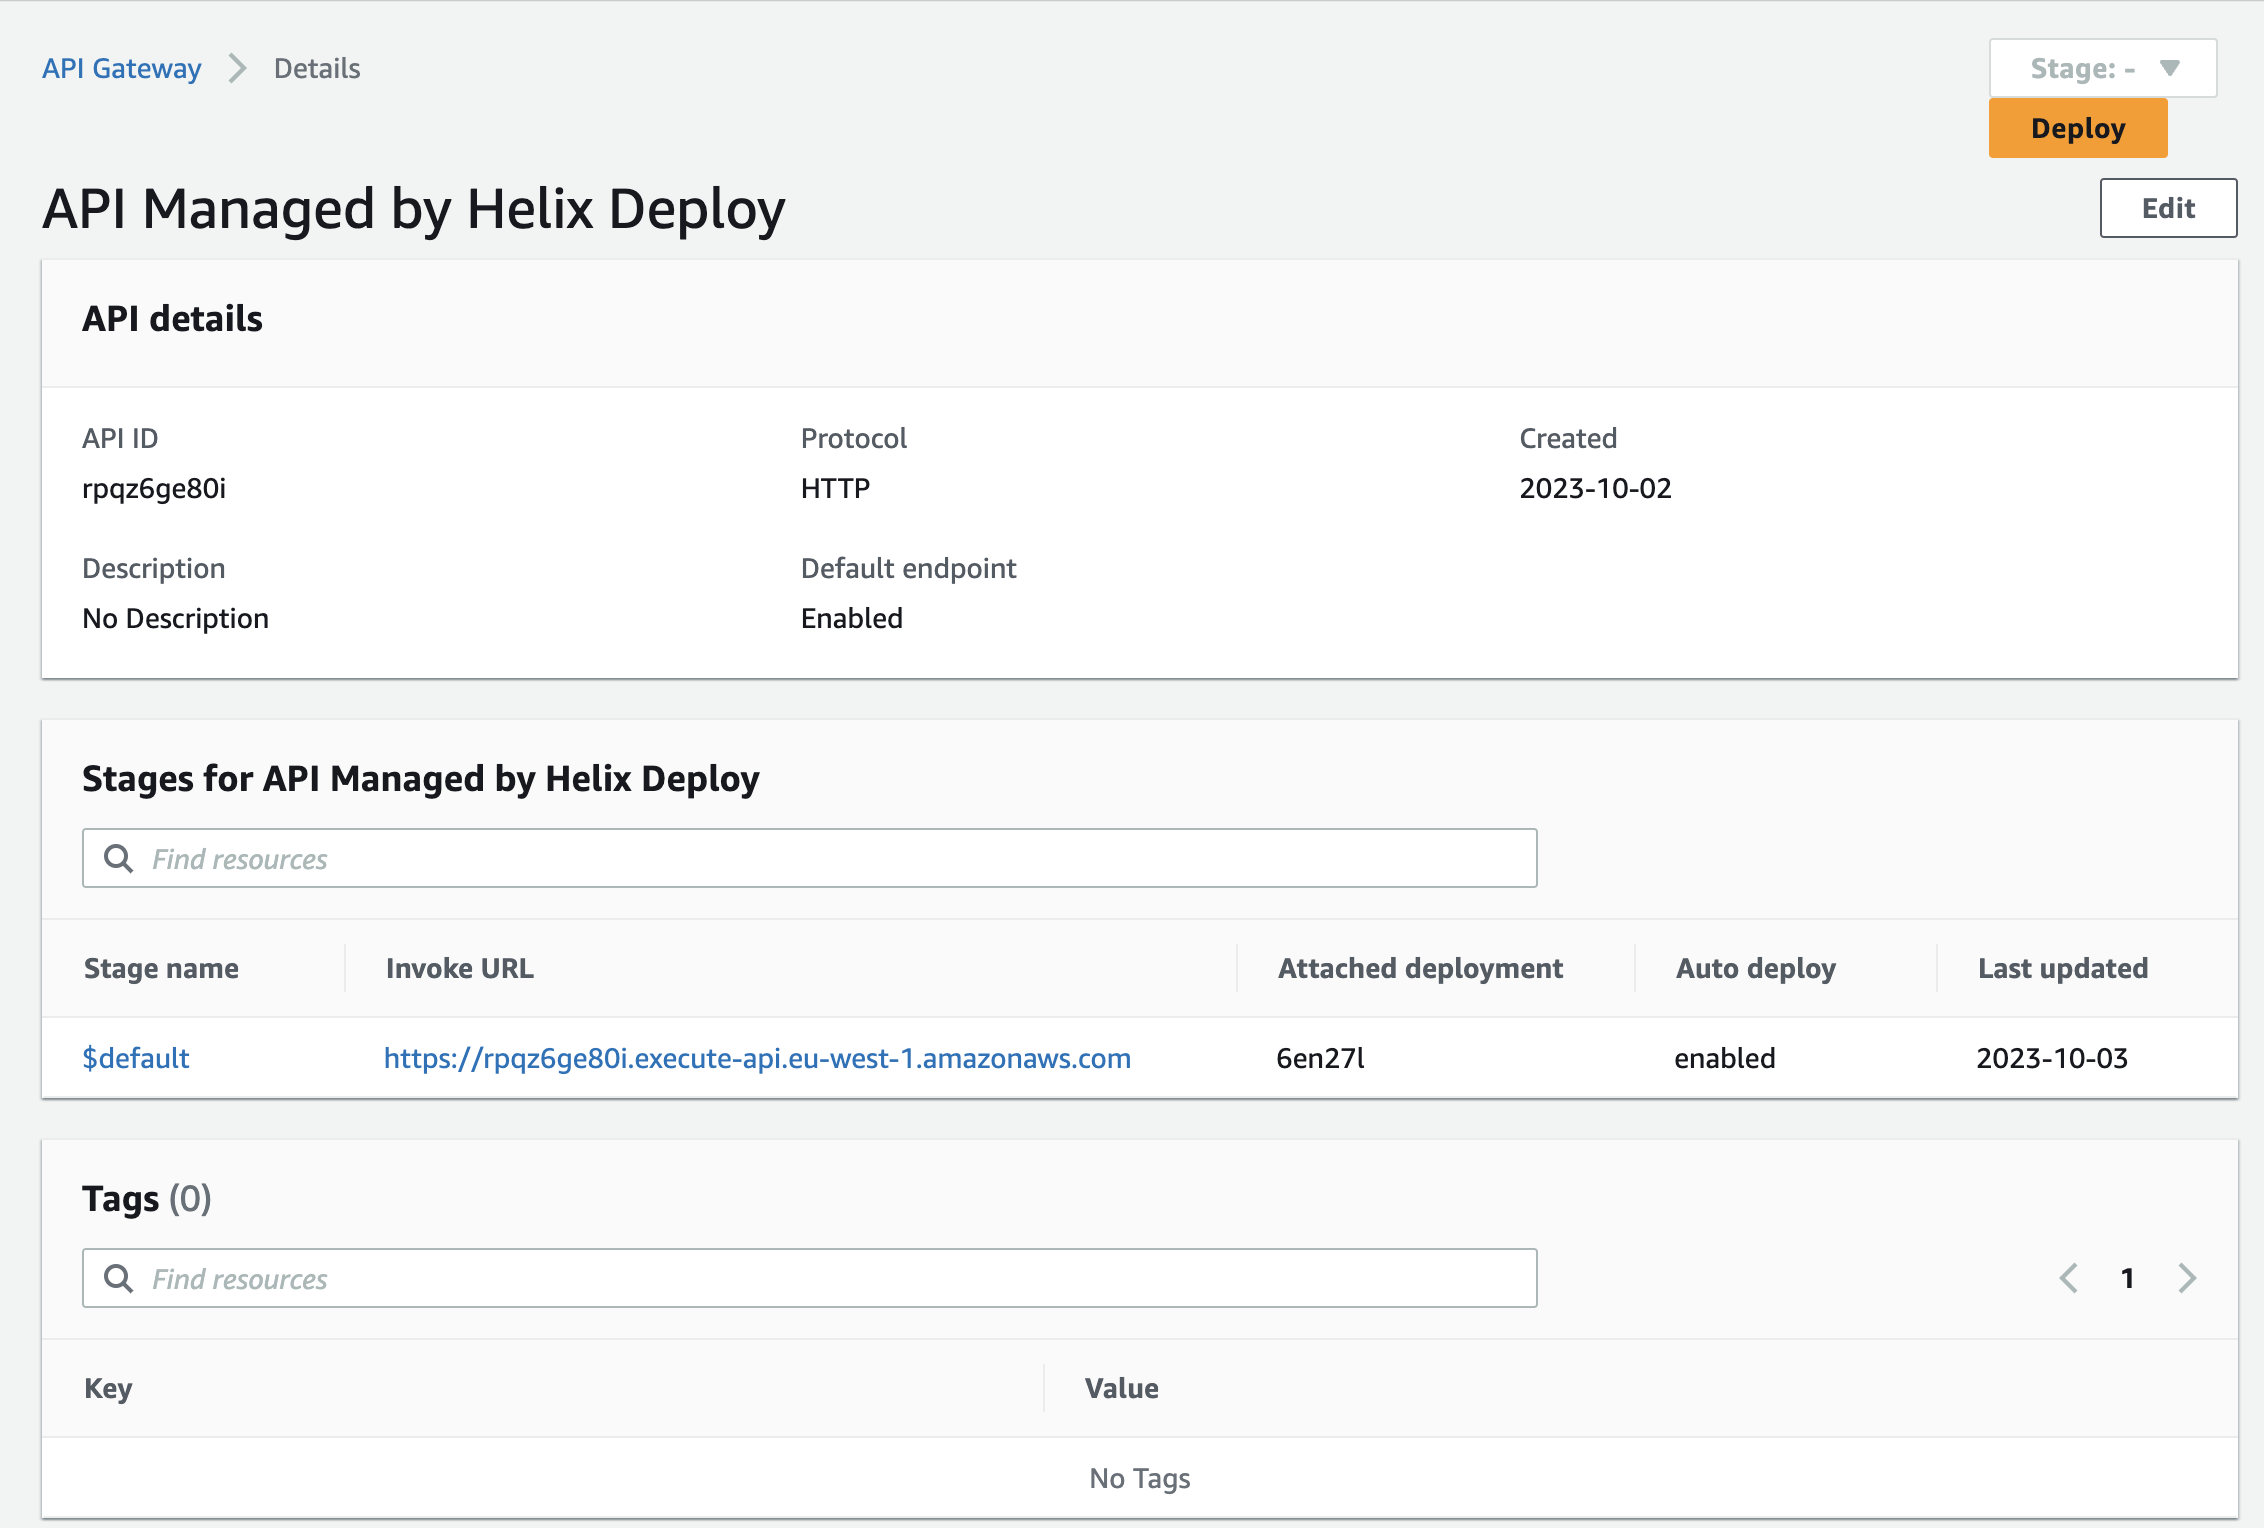
 * Create an API Gateway of type 'HTTP API' with name 'API Managed by Helix Deploy'
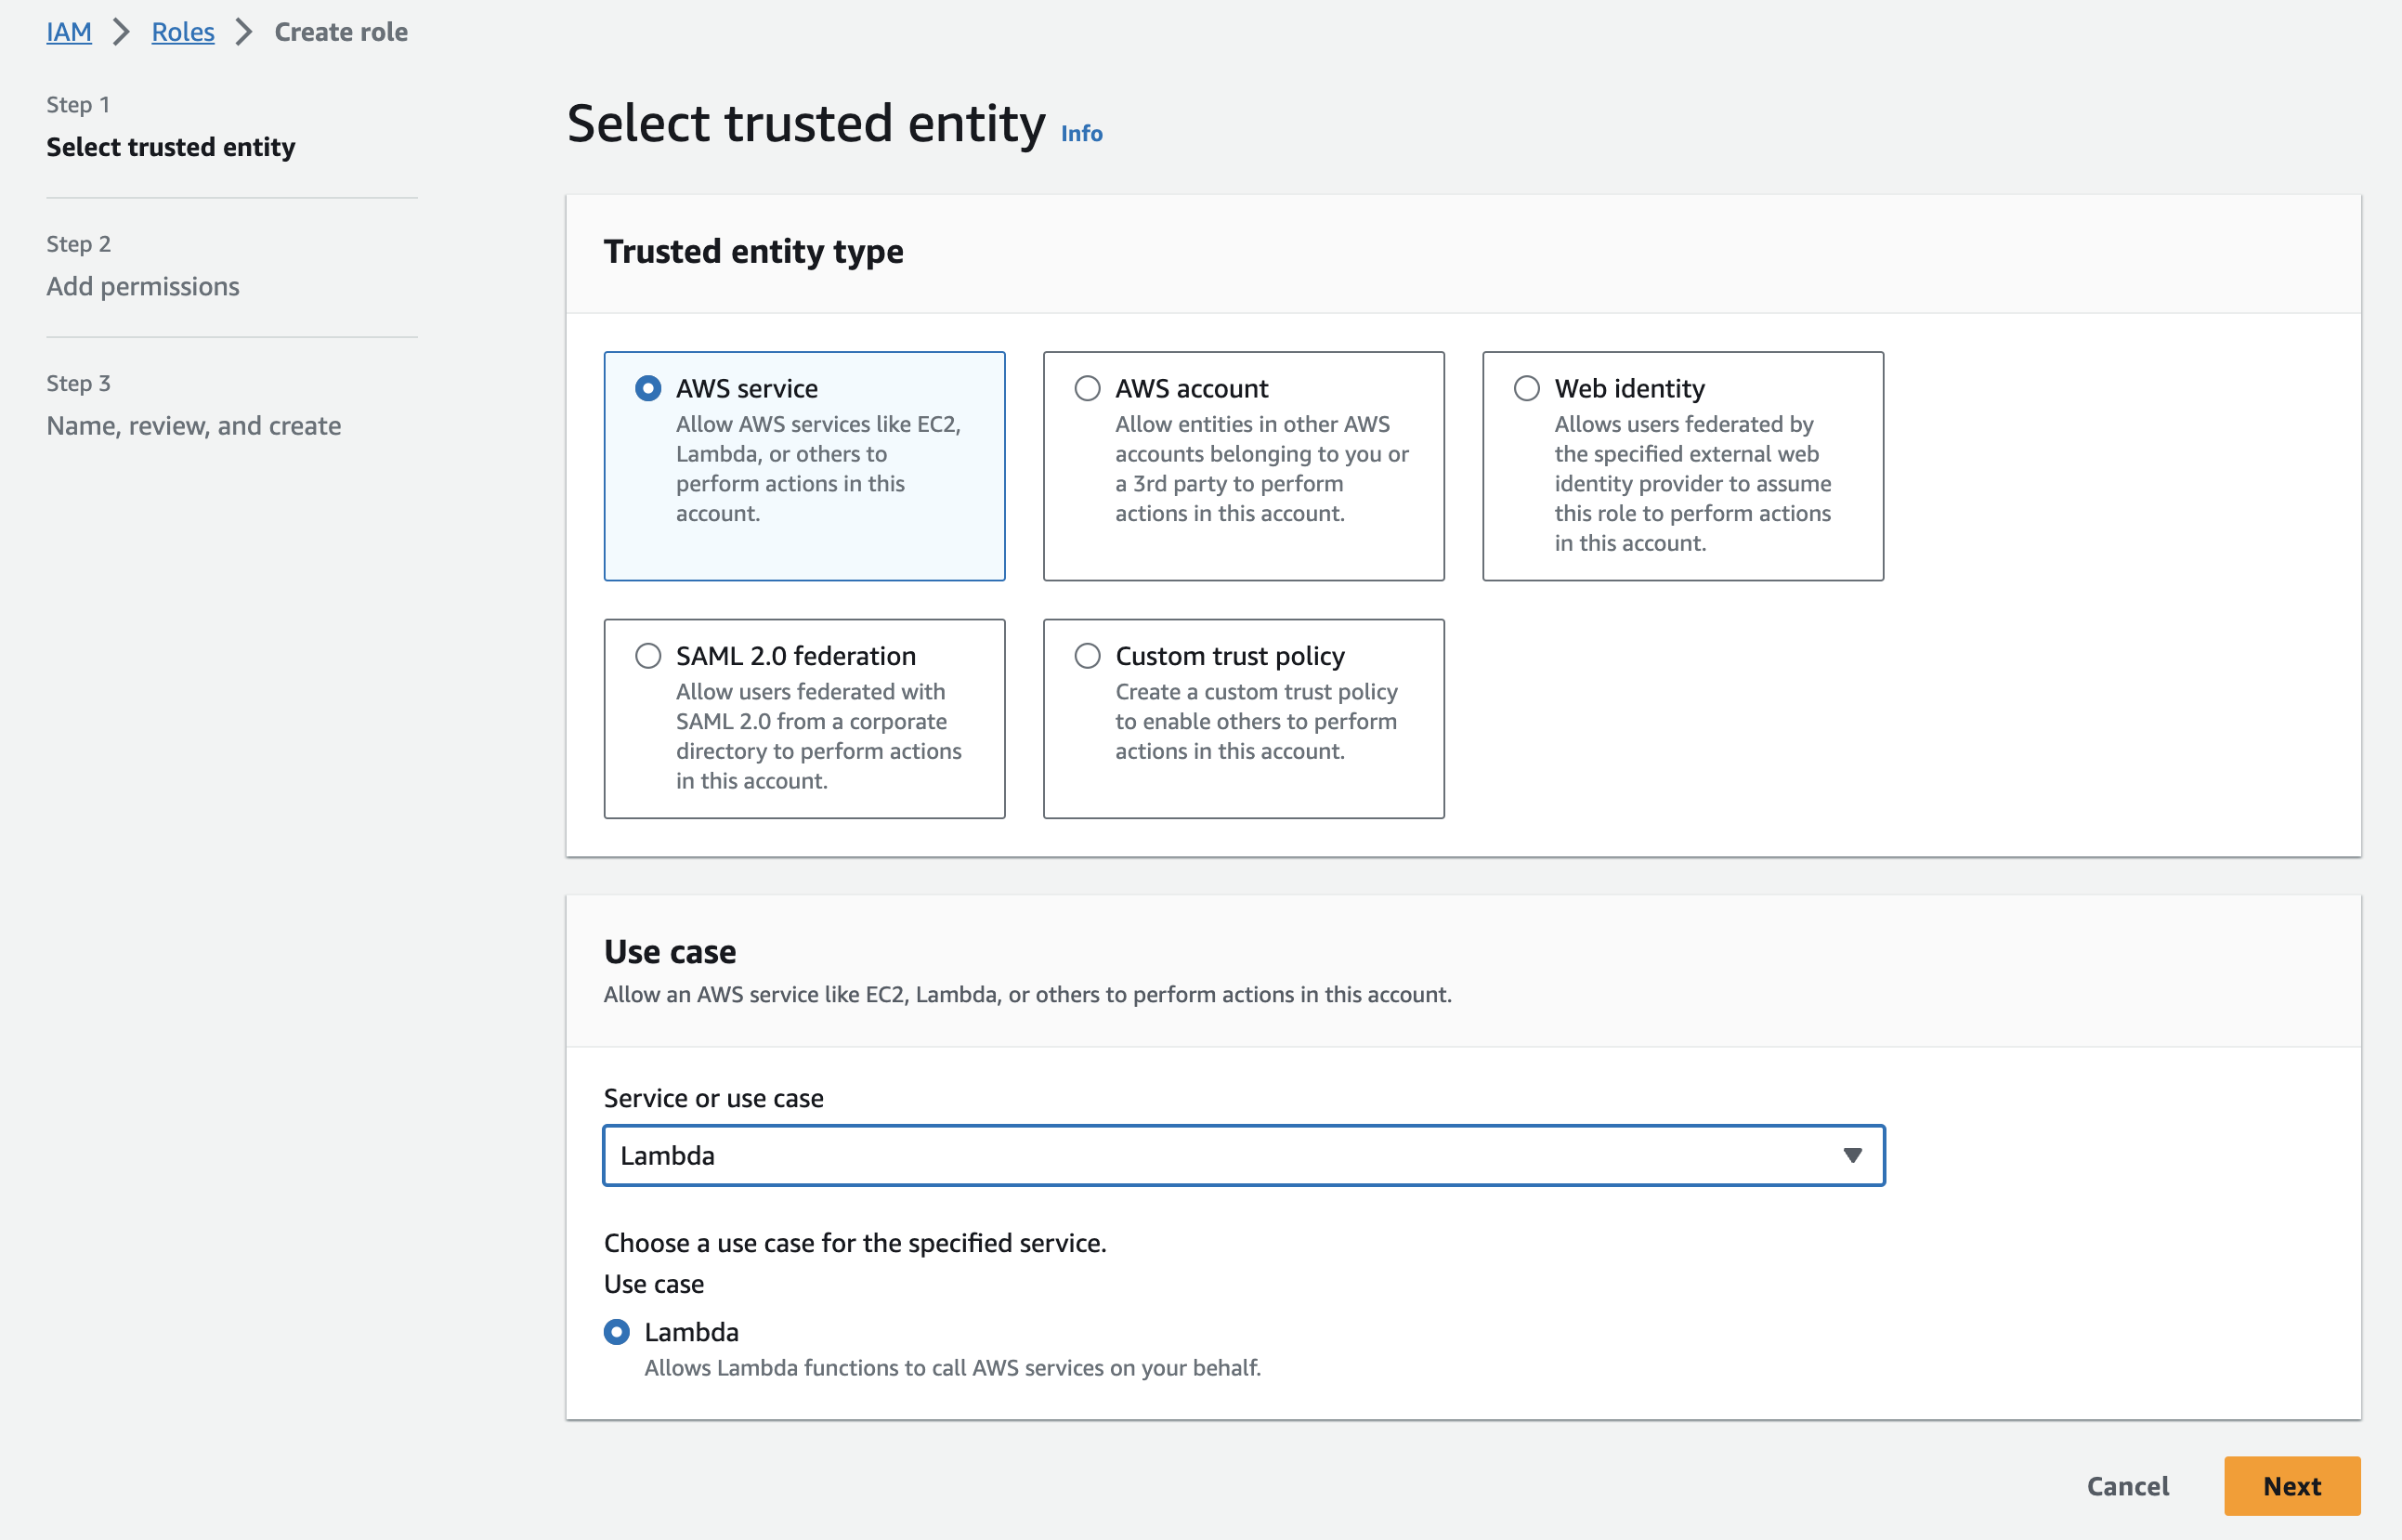
 * Create a role for invoking the Lambda. Start by giving it the `AWSLambdaBasicExecutionRole`.
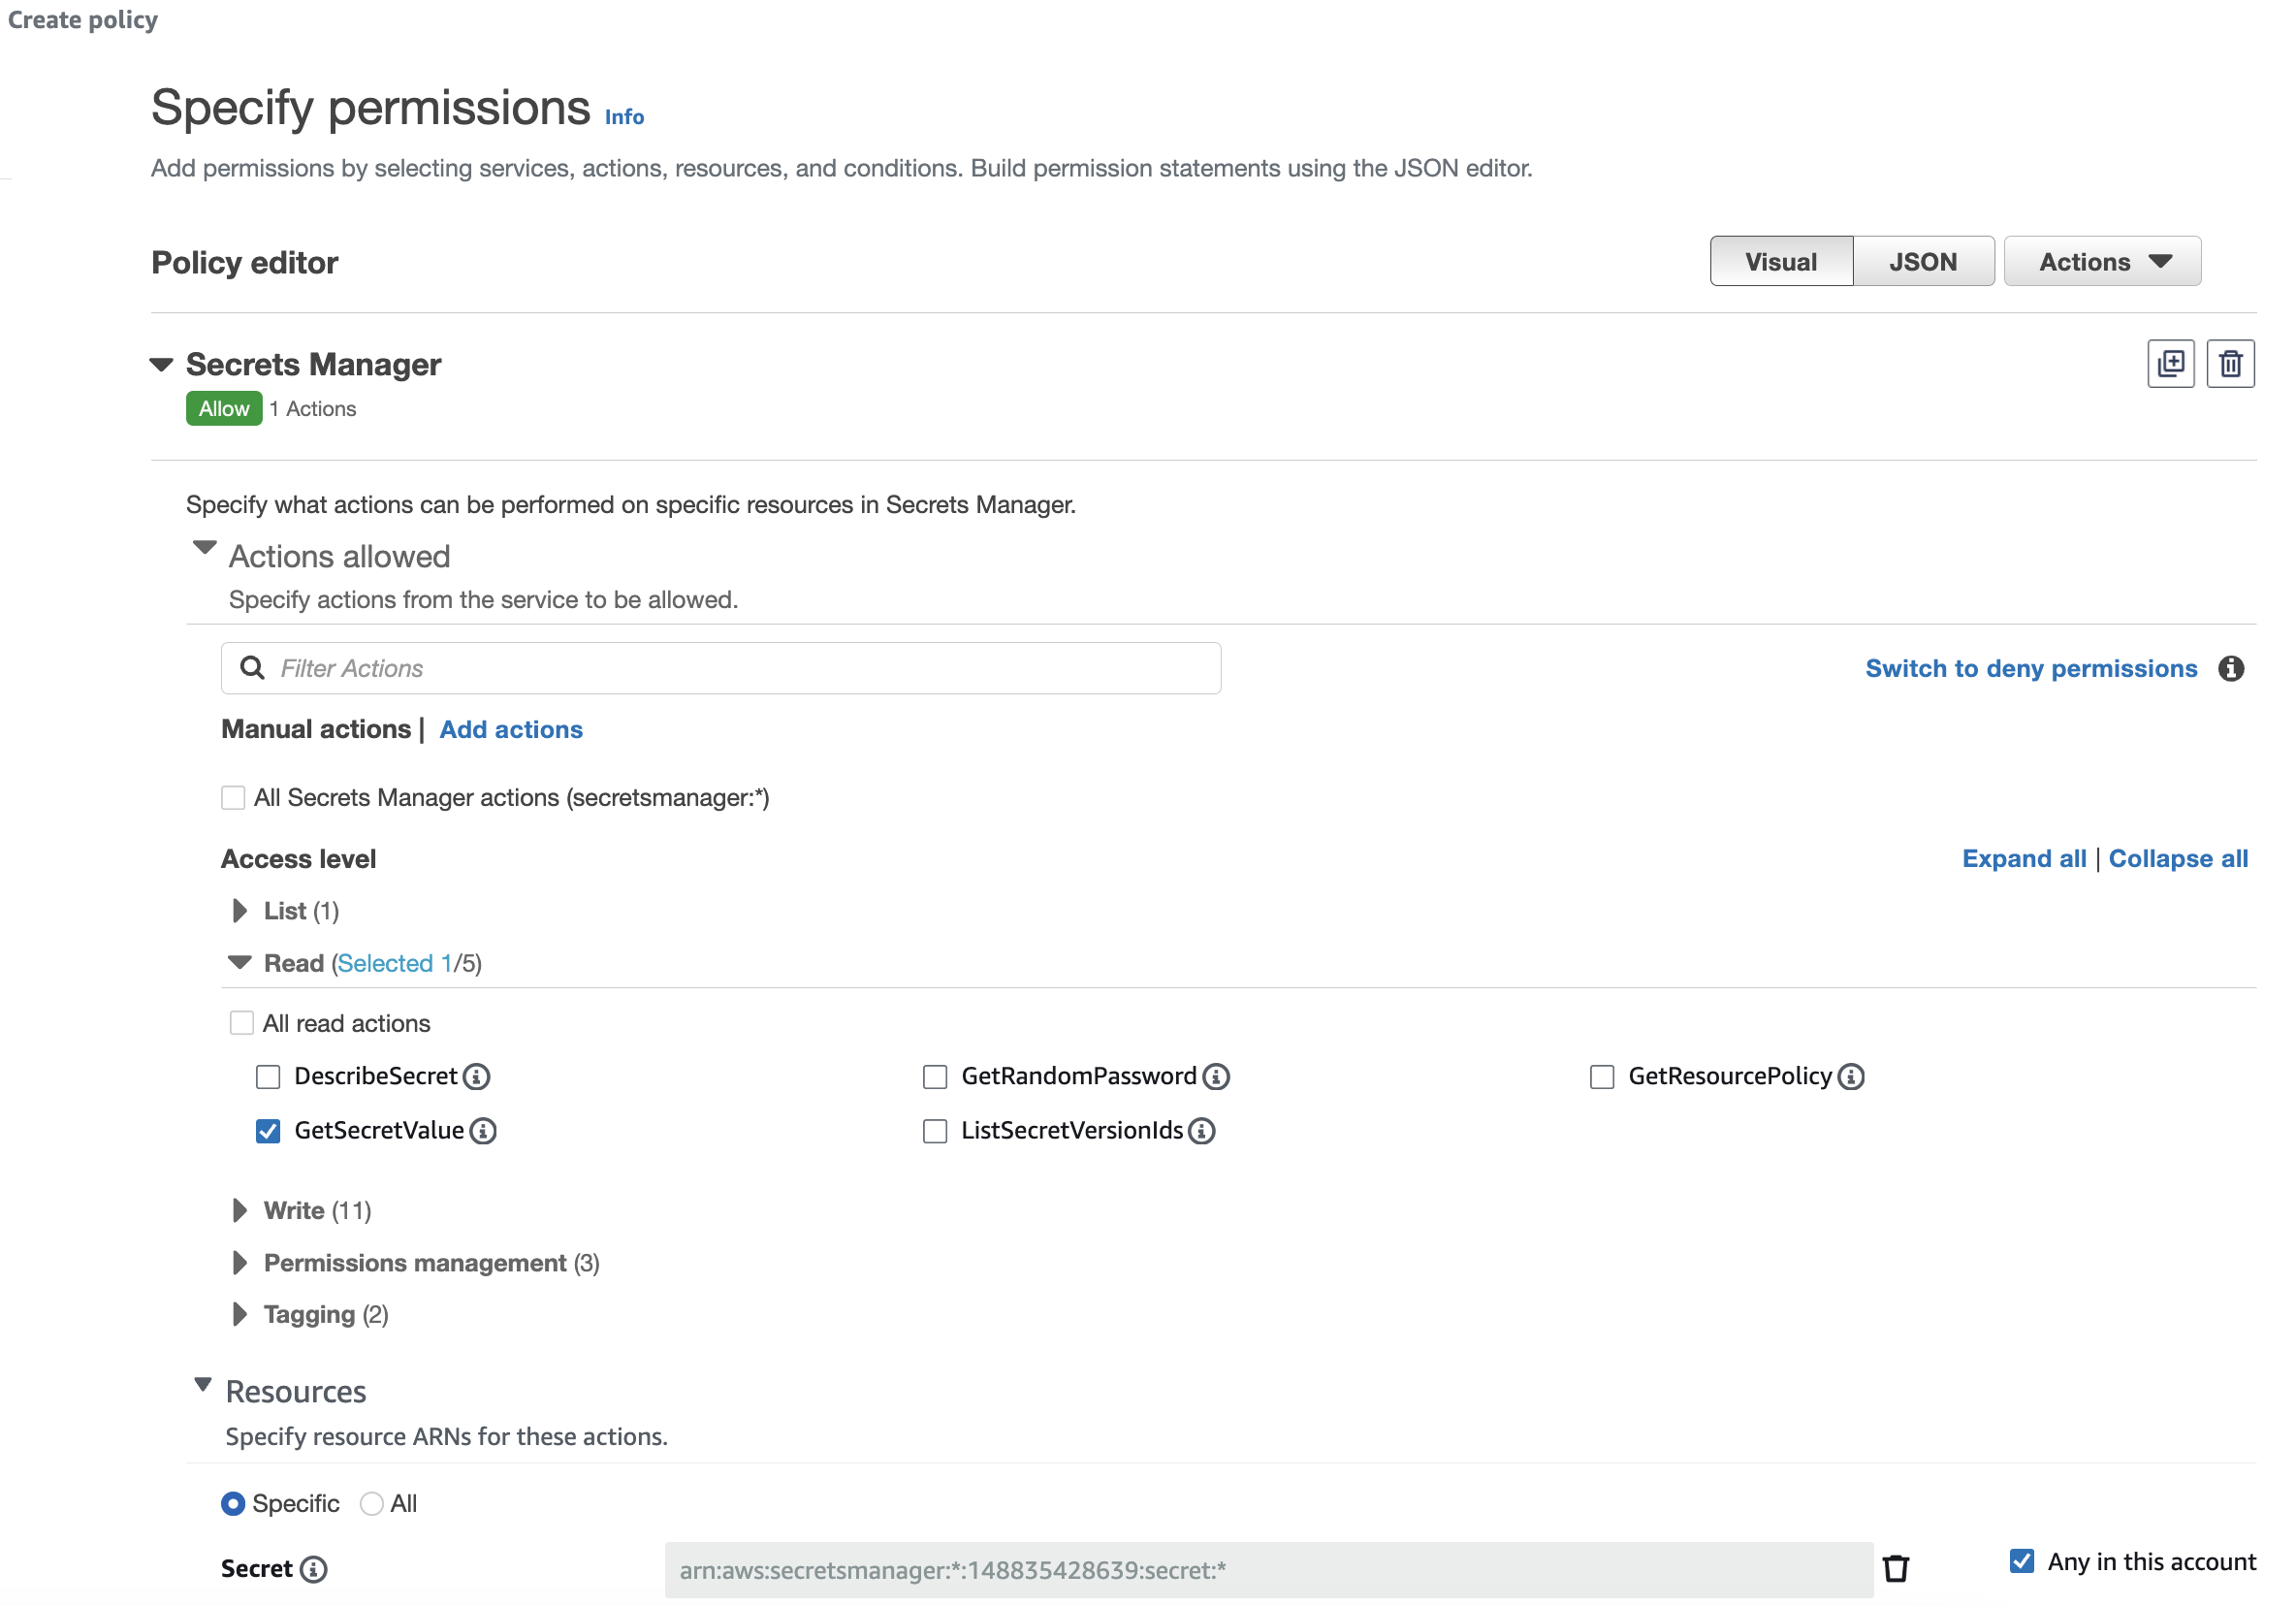
 * Edit the role and add the Secrets Manager -> Read -> GetSecretValue permission.
 Finally, to get access from the command line to your AWS account you need to configure the AWS environment.
```
$ aws sts get-session-token
{
"Credentials": {
"AccessKeyId": "XXXYYY",
"SecretAccessKey": "abcdef",
"SessionToken": "... lots of chars ...",
"Expiration": "2023-10-03T17:28:34+00:00"
}
}
```
Set the `AWS_ACCESS_KEY_ID`, `AWS_SECRET_ACCESS_KEY` and `AWS_SESSION_TOKEN` environment variables to the values from the above JSON result. Note that the session has a maximum timespan of 1 hour, so you need to refresh this regularly.
At this point you should be ready to deploy your function.
```
$ npx hedy \
--build --verbose --directory ~/proj/hedy/temp \
--entryFile ~/proj/hedy/myproj/src/index.js --deploy \
--target aws --aws-region eu-west-1 \
--aws-role 'arn:aws:iam::148835428639:role/HedyInvocationRole' \
--aws-api 99q7f1czdf -l minor --name "myfunc@1"
```
if all goes well, the the output will end with something like this:
```
{
"aws": {
"name": "amazonwebservices;host=https://99q7f1czdf.execute-api.eu-west-1.amazonaws.com",
"url": "https://99q7f1czdf.execute-api.eu-west-1.amazonaws.com/default/myfunc/0.0.0"
}
}
```
Now you can invoke your function as follows (note the URL is as reported by the `hedy` command with a slight change to the version number):
```
$ curl https://99q7f1czdf.execute-api.eu-west-1.amazonaws.com/default/myfunc/v0.0
{"result": "it works!"}
```
Finally, to get access from the command line to your AWS account you need to configure the AWS environment.
```
$ aws sts get-session-token
{
"Credentials": {
"AccessKeyId": "XXXYYY",
"SecretAccessKey": "abcdef",
"SessionToken": "... lots of chars ...",
"Expiration": "2023-10-03T17:28:34+00:00"
}
}
```
Set the `AWS_ACCESS_KEY_ID`, `AWS_SECRET_ACCESS_KEY` and `AWS_SESSION_TOKEN` environment variables to the values from the above JSON result. Note that the session has a maximum timespan of 1 hour, so you need to refresh this regularly.
At this point you should be ready to deploy your function.
```
$ npx hedy \
--build --verbose --directory ~/proj/hedy/temp \
--entryFile ~/proj/hedy/myproj/src/index.js --deploy \
--target aws --aws-region eu-west-1 \
--aws-role 'arn:aws:iam::148835428639:role/HedyInvocationRole' \
--aws-api 99q7f1czdf -l minor --name "myfunc@1"
```
if all goes well, the the output will end with something like this:
```
{
"aws": {
"name": "amazonwebservices;host=https://99q7f1czdf.execute-api.eu-west-1.amazonaws.com",
"url": "https://99q7f1czdf.execute-api.eu-west-1.amazonaws.com/default/myfunc/0.0.0"
}
}
```
Now you can invoke your function as follows (note the URL is as reported by the `hedy` command with a slight change to the version number):
```
$ curl https://99q7f1czdf.execute-api.eu-west-1.amazonaws.com/default/myfunc/v0.0
{"result": "it works!"}
```