In this section we will use cocreate-api to create a customer and send dynamic data from the frontEnt to the Websocket.
npm i @cocreate/apiOr you can use cdn link:
<script>https://cdn.cocreate.app/stripe/latest/CoCreate-api.min.js</script>According to the usage of the official documentation of stripe create_customer, we note that we can send the [description, email] fields among others, but for the purposes of this example we will only use those already named
Name-file : index-connect.html

<form realtime="true" id="customer-form" array="modules">
        <input type="text" stripe="description" value="My First Test Customer (created for API docs)" >
        <input type="text" stripe="email" value="customer@cocreate.com" >
	<button class='createCustomerBtn'>Click Balance Transaction</button>
</form>
The code, used for the front-end custom classAs can be seen, we only edit the parameter of the class where the css selector for the trigger buttons is registered classBtns
Name-file = Cocreate-stripe.js

var CocreateStripeAPi = function() {
...........
    this.classBtns = ['.createCustomerBtn']
...........
}
Only, we will show the interesting parts of the code, since in the index we show the general configuration of the websocket endpoint
Name-file = Cocreate-stripeWebSocket.js

........
switch (type) {
	case '.createCustomerBtn':
	    const customer = await stripe.customers.create(data);
	    utils.send_response(that.wsManager,socket,{"test":"from_server","response":customer},send_response)
	break;
}
........
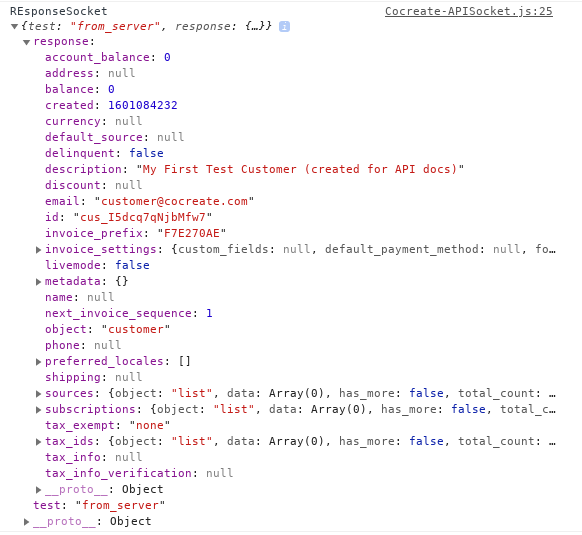
If you have done everything right you will have an answer similar to this
For the following example, we will use method override, and use a special class called CocreateRender