Open-source CSV and XLS/XLSX file importer for React and JavaScript
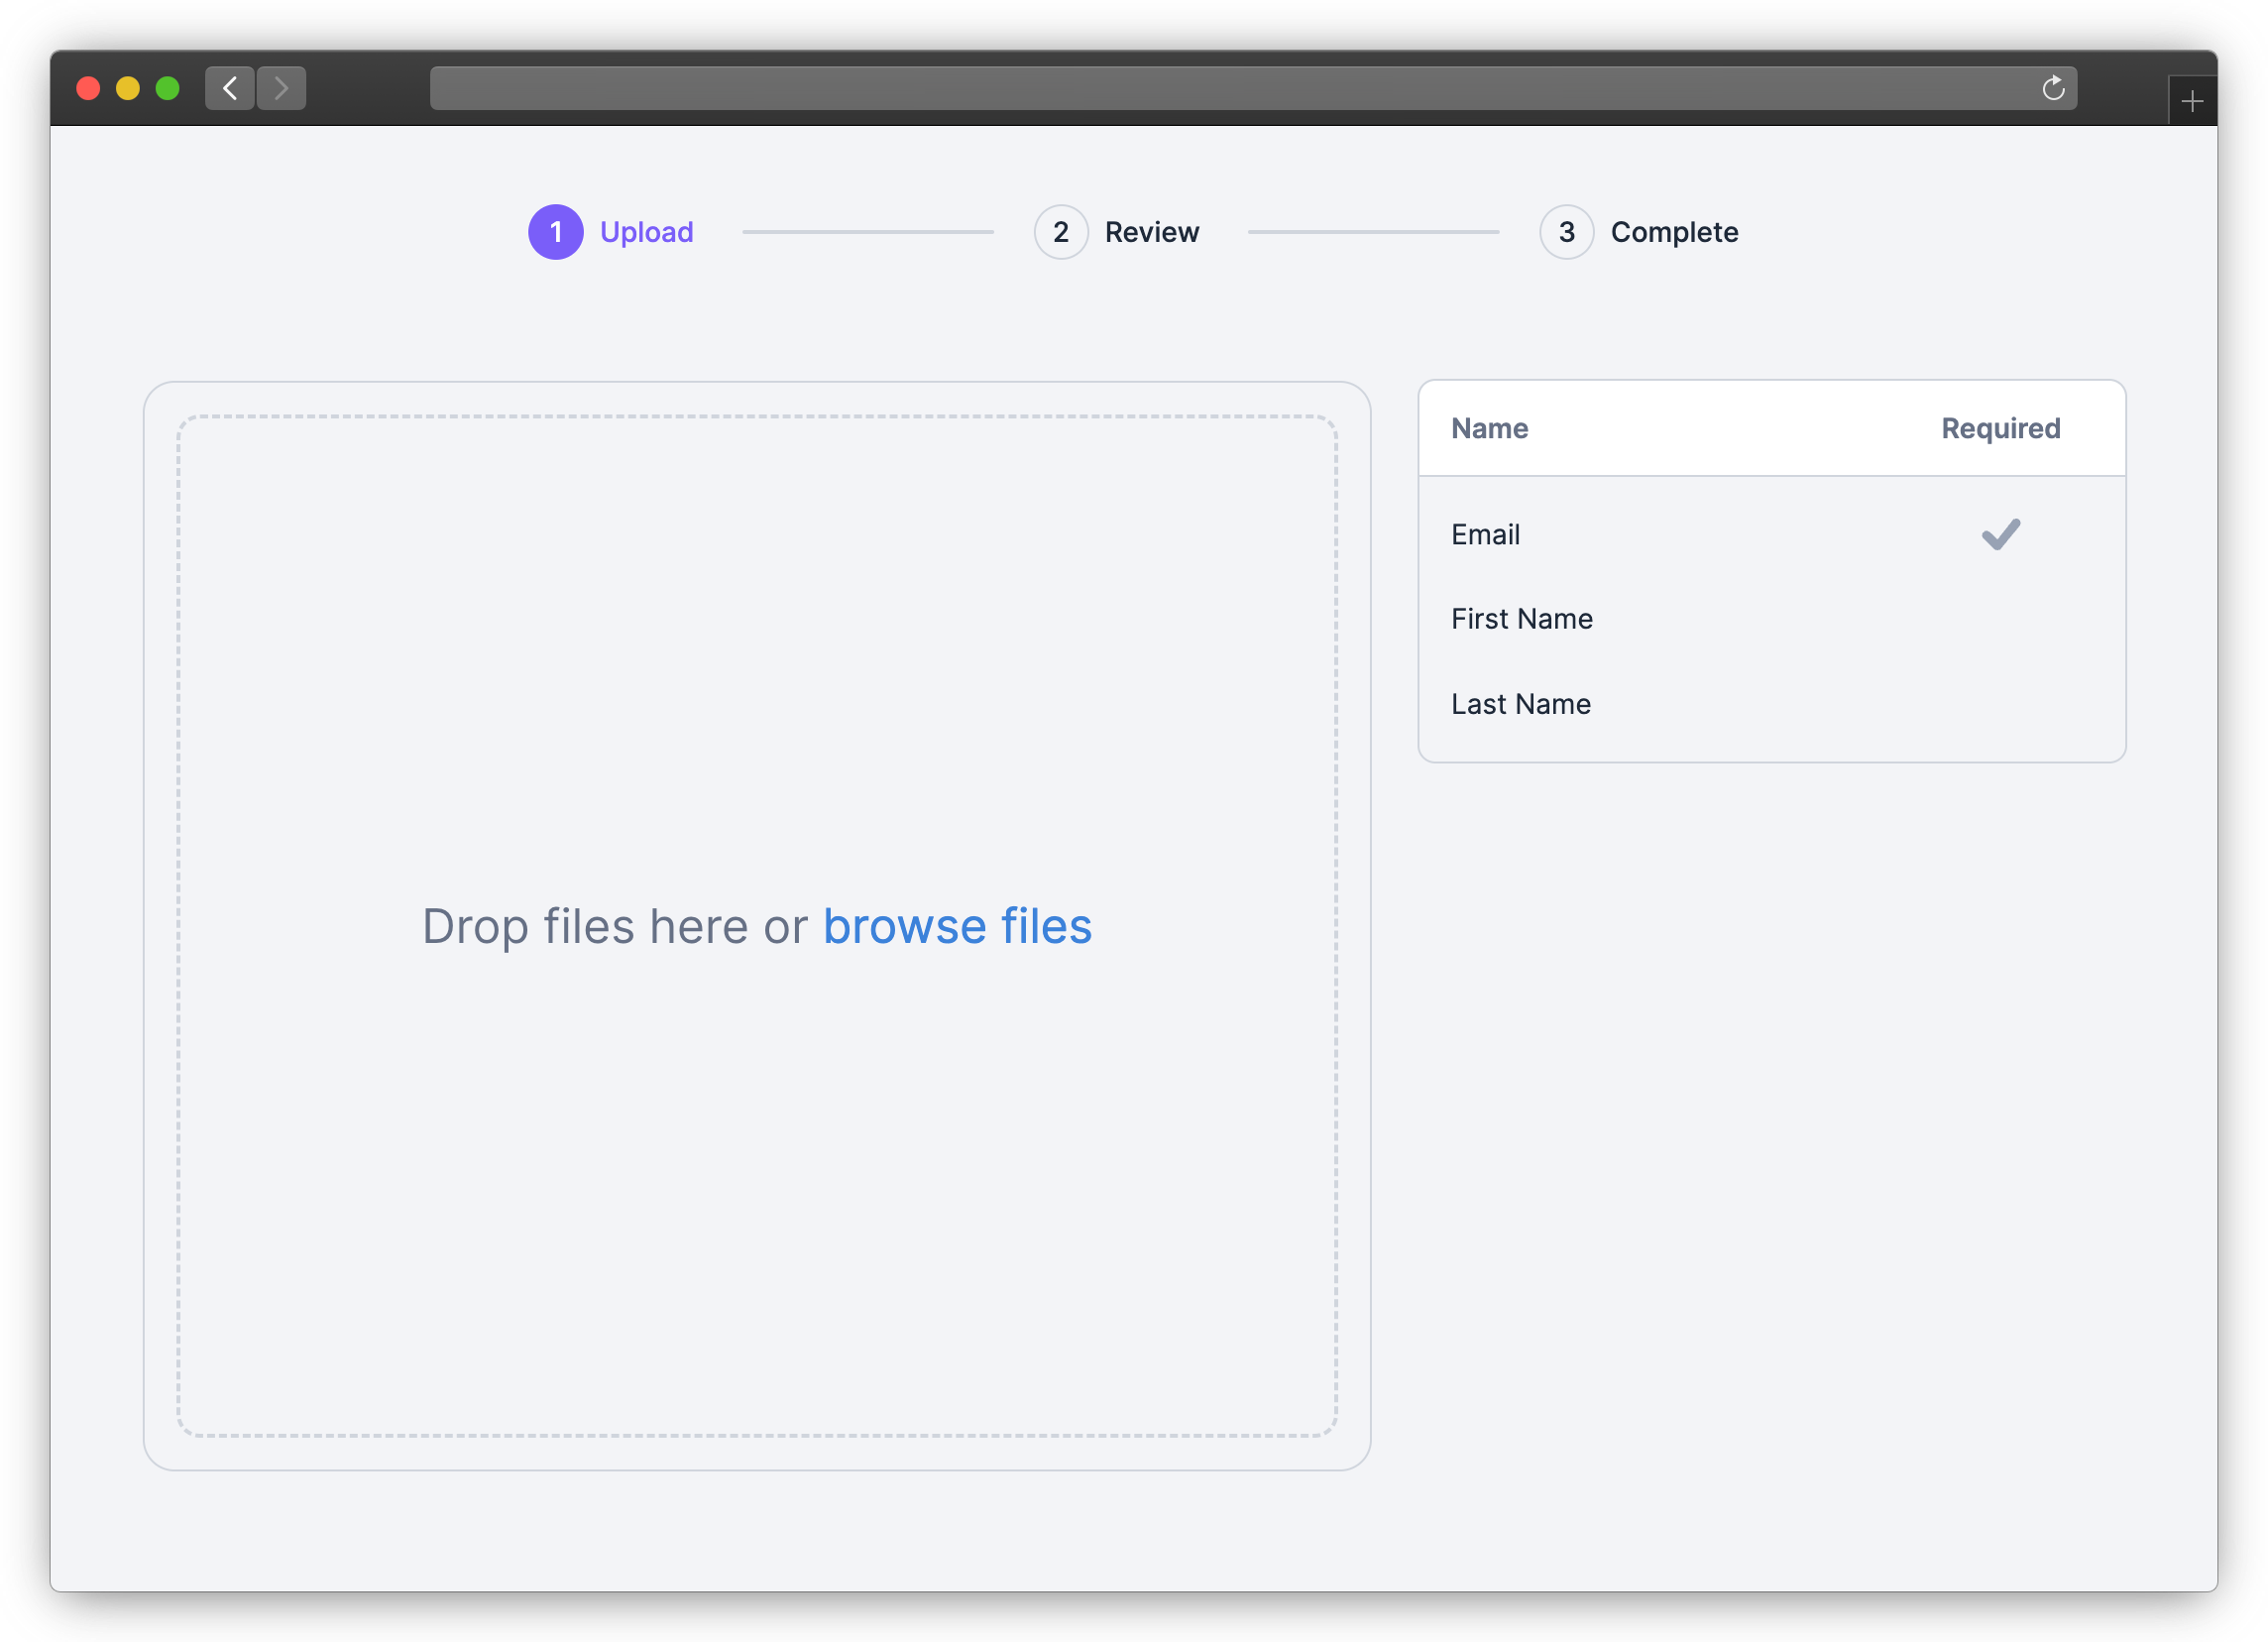
## How It Works
1. Embed the CSV Importer in your app with the [React](https://www.npmjs.com/package/csv-import-react)
or [JavaScript](https://www.npmjs.com/package/csv-import-js) SDK
2. Define the columns your users can import (via the `template` parameter)
3. Your users import their files in your app
4. Retrieve the imported data from the `onComplete` event
## Get Started
### 1. Install SDK
Use NPM or Yarn to install the SDK for [React](https://www.npmjs.com/package/csv-import-react)
or [JavaScript](https://www.npmjs.com/package/csv-import-js).
**NPM**
```bash
npm install csv-import-react
# or
npm install csv-import-js
```
**Yarn**
```bash
yarn add csv-import-react
# or
yarn add csv-import-js
```
### 2. Add the importer to your application
#### Using React
```javascript
import { CSVImporter } from "csv-import-react";
import { useState } from "react";
function MyComponent() {
const [isOpen, setIsOpen] = useState(false);
return (
<>
setIsOpen(false)}
darkMode={true}
onComplete={(data) => console.log(data)}
template={{
columns: [
{
name: "First Name",
key: "first_name",
required: true,
description: "The first name of the user",
suggested_mappings: ["First", "Name"],
},
{
name: "Age",
data_type: "number",
},
],
}}
/>
);
}
```
#### Using JavaScript
```html
```
## SDK Reference
### isModal (_boolean_, default: `true`)
When set to `true` (default value), the importer will behave as a modal with its open state controlled by `modalIsOpen`. When set to `false`, the importer will be embedded directly in your page.
### modalIsOpen (_boolean_, default: `false`)
Only used when `isModal` is `true`: Controls the importer modal being open or closed.
\
**React SDK Only**: For the JavaScript SDK, use `.showModal()` and `.closeModal()` to operate the modal.
### modalOnCloseTriggered (_function_)
Only used when `isModal` is `true`: A function called when the user clicks the close button or clicks outside of (when used with `modalCloseOnOutsideClick`) the importer. `useState` can be used to control the importer modal opening and closing.
```javascript
const [isOpen, setIsOpen] = useState(false);
```
```jsx
setIsOpen(false)}
...
/>
```
### modalCloseOnOutsideClick (_boolean_, default: `false`)
Only used when `isModal` is `true`: Clicking outside the modal will call the `modalOnCloseTriggered` function.
### template (_object_)
Configure the columns used for the import.
```jsx
template={{
columns: [
{
name: "First Name",
key: "first_name",
required: true,
description: "The first name of the user",
suggested_mappings: ["First", "Name"],
},
{
name: "Age",
data_type: "number",
},
],
}}
```
### onComplete (_function_)
Callback function that fires when a user completes an import. It returns `data`, an object that contains the row data, column definitions, and other information about the import.
```jsx
onComplete={(data) => console.log(data)}
```
Example `data`:
```json
{
"num_rows": 2,
"num_columns": 3,
"columns": [
{
"key": "age",
"name": "Age"
},
{
"key": "email",
"name": "Email"
},
{
"key": "first_name",
"name": "First Name"
}
],
"rows": [
{
"index": 0,
"values": {
"age": 23,
"email": "maria@example.com",
"first_name": "Maria"
}
},
{
"index": 1,
"values": {
"age": 32,
"email": "robert@example.com",
"first_name": "Robert"
}
}
]
}
```
### darkMode (_boolean_, default: `false`)
Toggle between dark mode (`true`) and light mode (`false`).
### primaryColor (_string_)
Specifies the primary color for the importer in hex format. Use `customStyles` to customize the UI in more detail.
```jsx
primaryColor="#7A5EF8"
```
### customStyles (_object_)
Apply custom styles to the importer with an object containing CSS properties and values. Note that custom style properties will override `primaryColor` and any default styles from `darkMode`.
Available options:
```jsx
customStyles={{
"font-family": "cursive",
"font-size": "15px",
"base-spacing": "2rem",
"border-radius": "8px",
"color-primary": "salmon",
"color-primary-hover": "crimson",
"color-secondary": "indianRed",
"color-secondary-hover": "crimson",
"color-tertiary": "indianRed",
"color-tertiary-hover": "crimson",
"color-border": "lightCoral",
"color-text": "brown",
"color-text-soft": "rgba(165, 42, 42, .5)",
"color-text-on-primary": "#fff",
"color-text-on-secondary": "#ffffff",
"color-background": "bisque",
"color-background-modal": "blanchedAlmond",
"color-input-background": "blanchedAlmond",
"color-input-background-soft": "white",
"color-background-menu-hover": "bisque",
"color-importer-link": "indigo",
"color-progress-bar": "darkGreen"
}}
```
## Internationalization
### Predefined languages
- Out-of-the-box support for various languages.
- Common languages are available through the language prop (i.e., `language="fr"` for French).
- Available predefined languages:
- en
- es
- fr
### Customizable language
- Language keys can be exported and overridden.
- Labels and messages can be customized to any text.
- Translations key examples can be found in `src/i18n/es.ts`
```javascript
// Set up custom translations
const customTranslations = {
jp: {
Upload: "アップロード",
"Browse files": "ファイルを参照",
},
pt: {
Upload: "Carregar",
"Browse files": "Procurar arquivos",
},
};
return (
)
```
### showDownloadTemplateButton (_boolean_, default: `true`)
When set to `false`, hide the Download Template button on the first screen of the importer.
### skipHeaderRowSelection (_boolean_, default: `false`)
When set to `true`, the importer will not display and skip the Header Row Selection step and always choose the first row in the file as the header.
## Contributing
### Setting Up the Project
To set up the project locally, follow these steps:
1. **Clone the repository**
```bash
git clone https://github.com/tableflowhq/csv-import.git
cd csv-import
```
2. **Install dependencies**
```bash
yarn install
```
3. **Build the project**
```bash
yarn build
```
### Running Storybook
To run Storybook locally, follow these steps:
1. **Start Storybook**
```bash
yarn storybook
```
2. **Open Storybook in your browser:**
Storybook should automatically open in your default browser. If it doesn't, navigate to [http://localhost:6006](http://localhost:6006).
### Modifying the project and testing with the demo app
The project includes a demo app that you can use to test your changes. The demo app has its own `README.md` file with detailed instructions on how to set it up and run it.
1. Make your changes in the codebase.
2. Follow the instructions in the demo app's `README.md` to set up and run the demo app. This will help you verify that your changes work as expected in a real application.
3. Commit your changes and push them to your forked repository.
4. Create a pull request to the main repository.
## Get In Touch
Let us know your feedback or feature requests! Submit a GitHub
issue [here](https://github.com/tableflowhq/csv-import/issues/new).
 Open-source CSV and XLS/XLSX file importer for React and JavaScript