[](https://www.webcomponents.org/element/htmlelements/smart-tabs)
# <smart-tabs>
[Live Demo ↗](https://htmlelements.com/demos/tabs/)
|
[Documentation ↗](https://www.htmlelements.com/docs/)
|
[Installation ↗](https://www.npmjs.com/package/@smarthtmlelements/smarthtmlelements-core)
[<smart-tabs>](https://htmlelements.com/demos/tabs/) is a Tabs Custom HTML Element that make it easy to explore and switch between different views, part of the [Smart HTML Elements](https://htmlelements.com/).
```html
// Content goes here.
// Content goes here.
// Content goes here.
```
[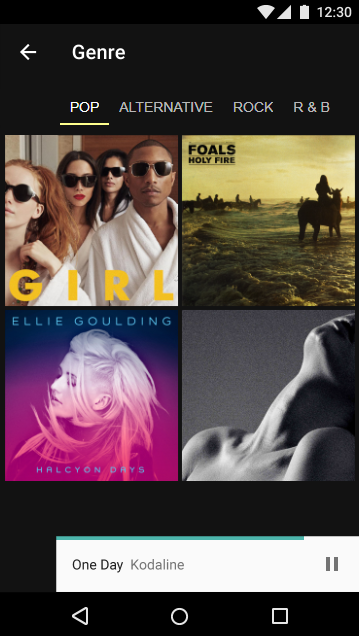 ](https://htmlelements.com/demos/tabs)
## Getting Started
Smart HTML Elements components documentation includes getting started, customization and api documentation topics.
[Getting Started Documentation](https://www.htmlelements.com/docs/tabs/)
|
[CSS Documentation](https://www.htmlelements.com/docs/tabs-css/)
|
[API Documentation](https://www.htmlelements.com/docs/tabs-api/)
## The file structure for Smart HTML Elements
- `source-minified/`
Javascript files.
- `source-minified/styles/`
Component CSS Files.
- `demos/`
Demo files
## Running demos in browser
1. Fork the `Smart-HTML-Elements-Core` repository and clone it locally.
1. Make sure you have [npm](https://www.npmjs.com/) installed.
1. When in the `Smart-HTML-Elements-Core` directory, run `npm install` and then `bower install` to install dependencies.
1. Run a localhost or upload the demo on a web server. Then run:
- /demos/smart-button/smart-button-overview.htm
## Following the coding style
We are using [ESLint](http://eslint.org/) for linting JavaScript code.
## Creating a pull request
- Make sure your code is compliant with ESLint
- [Submit a pull request](https://www.digitalocean.com/community/tutorials/how-to-create-a-pull-request-on-github) with detailed title and description
- Wait for response from one of our team members
## License
Apache License 2.0
](https://htmlelements.com/demos/tabs)
## Getting Started
Smart HTML Elements components documentation includes getting started, customization and api documentation topics.
[Getting Started Documentation](https://www.htmlelements.com/docs/tabs/)
|
[CSS Documentation](https://www.htmlelements.com/docs/tabs-css/)
|
[API Documentation](https://www.htmlelements.com/docs/tabs-api/)
## The file structure for Smart HTML Elements
- `source-minified/`
Javascript files.
- `source-minified/styles/`
Component CSS Files.
- `demos/`
Demo files
## Running demos in browser
1. Fork the `Smart-HTML-Elements-Core` repository and clone it locally.
1. Make sure you have [npm](https://www.npmjs.com/) installed.
1. When in the `Smart-HTML-Elements-Core` directory, run `npm install` and then `bower install` to install dependencies.
1. Run a localhost or upload the demo on a web server. Then run:
- /demos/smart-button/smart-button-overview.htm
## Following the coding style
We are using [ESLint](http://eslint.org/) for linting JavaScript code.
## Creating a pull request
- Make sure your code is compliant with ESLint
- [Submit a pull request](https://www.digitalocean.com/community/tutorials/how-to-create-a-pull-request-on-github) with detailed title and description
- Wait for response from one of our team members
## License
Apache License 2.0