| 参数 |
类型 |
是否必填 |
说明 |
| title |
String |
Yes |
button 标题 |
| icon |
String |
No |
button 图标 url |
| isPreset |
Number |
Yes |
- 1 - 客服组件内置功能
- 0 - 非内置功能 |
| presetId |
String |
No |
当 isPreset 为 1 时,可选值如下:
- humanService - 人工服务
- serviceRating - 服务评价
- endHumanService - 结束对话 |
| isEnabled |
Number |
Yes |
- 1 - 渲染
- 0 - 不渲染 |
| content |
String |
No |
当 isPreset 为 0 时,填入文本内容或者 url |
| type |
Number |
Yes |
- 1 - 点击 button 后客服组件发送 content 对应的文本
- 2 - 点击 button 后客服组件打开 content 对应的 url(小程序打开 url 可能会受限,请提前参考相关文档解决)。 |
``` javascript
Page({
data: {
},
getSupport() {
// SDKAppID/userID/userSig 的获取请参考步骤4
const SDKAppID = 0;
const userID = '';
const userSig = '';
const toolbarButtonList = [
{"title":"人工服务","icon":"https://tccc-im-agent-avatar-1258344699.cos.ap-nanjing.myqcloud.com/toolbar_button_1.png","type":1,"content":"","isPreset":1,"presetId":"humanService","isEnabled":1},
{"title":"服务评价","icon":"https://tccc-im-agent-avatar-sg-1258344699.cos.ap-singapore.myqcloud.com/toolbar_button_2.png","type":1,"content":"","isPreset":1,"presetId":"serviceRating","isEnabled":1},
{"title":"结束对话","icon":"https://tccc-im-agent-avatar-sg-1258344699.cos.ap-singapore.myqcloud.com/toolbar_button_3.png","type":1,"content":"","isPreset":1,"presetId":"endHumanService","isEnabled":1},
{"title":"智能客服","type":1,"content":"智能客服高","isPreset":0,"isEnabled":1}
];
wx.navigateTo({
url: `/ai-desk-customer-wechat/pages/index/index?SDKAppID=${SDKAppID}&userID=${userID}&userSig=${userSig}`
+ `&toolbarButtonList=${JSON.stringify(toolbarButtonList)}`
});
},
})
```
### 底部快捷订单
> **说明:**
>
> 请升级 [ai-desk-customer-wechat](https://www.npmjs.com/package/@tencentcloud/ai-desk-customer-wechat) 到 v1.5.2 或更高版本。
>
如果您想实现打开客服会话时在聊天区域底部展示快捷订单,可以配置 `bottomQuickOrder`,效果如下所示:
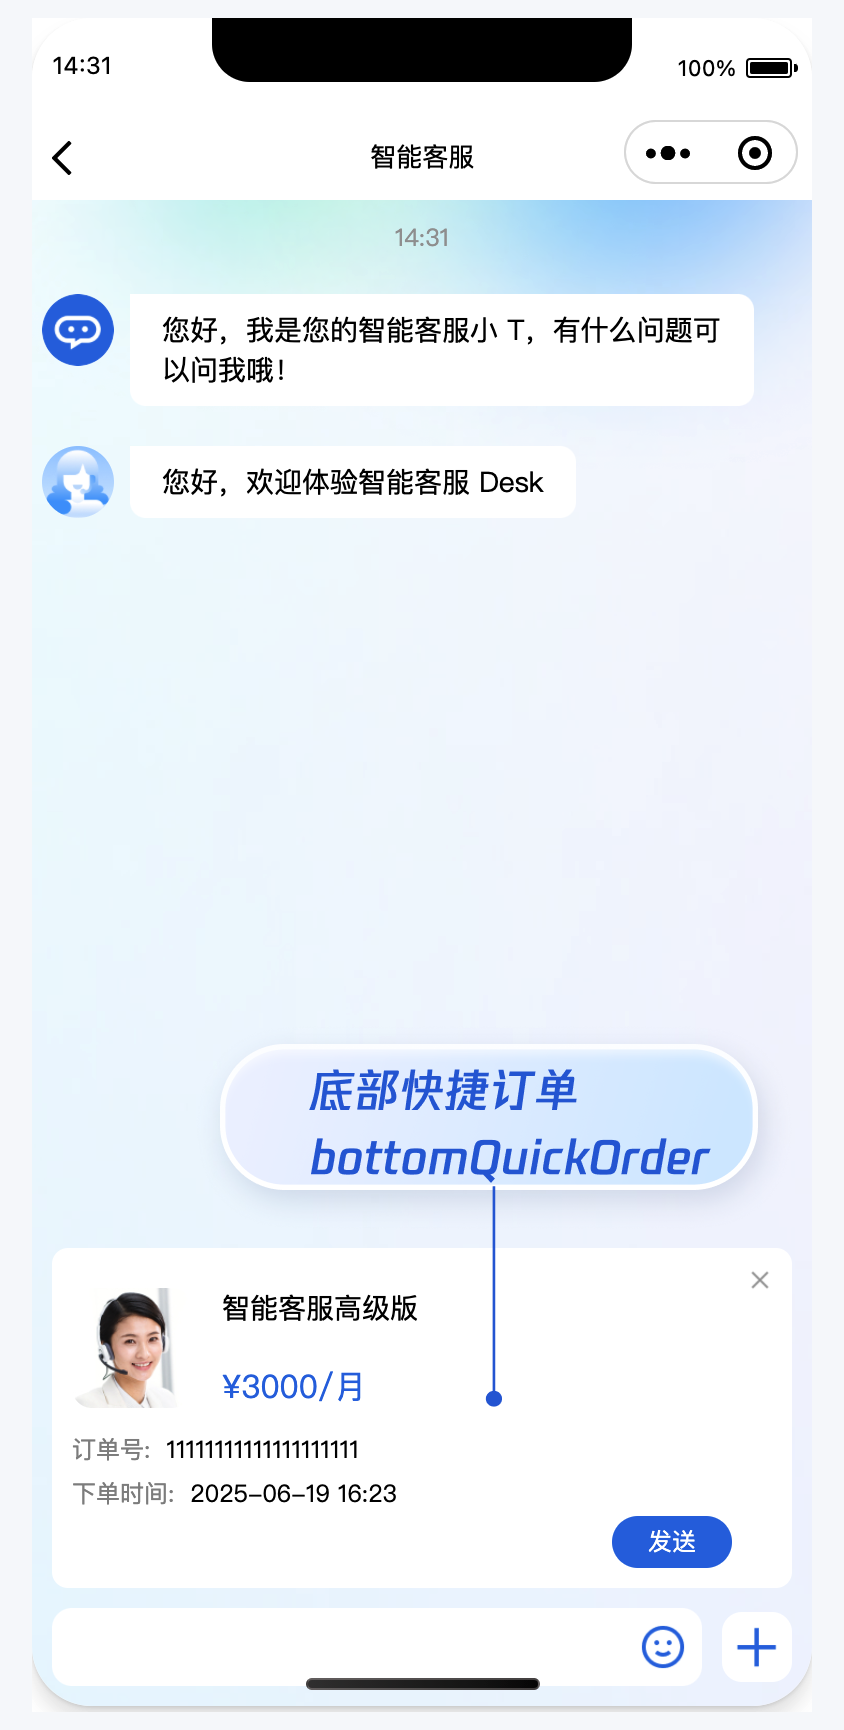
修改主包 `pages/index/index.js`,设置 `bottomQuickOrder` 并将其转成 json 字符串后传递给客服组件。
`bottomQuickOrder` 的参数描述如下: