adaptor:ex server
==============
 Server application for the adaptor:ex storytelling engine that connects your digital and physical interfaces.
adaptor:ex is digital duckt tape for multi linear stage plays, theatre games, messenger adventures or escape rooms. The versatile tool is especially suitable to build storytelling games in the Telegram Instant Messenger.
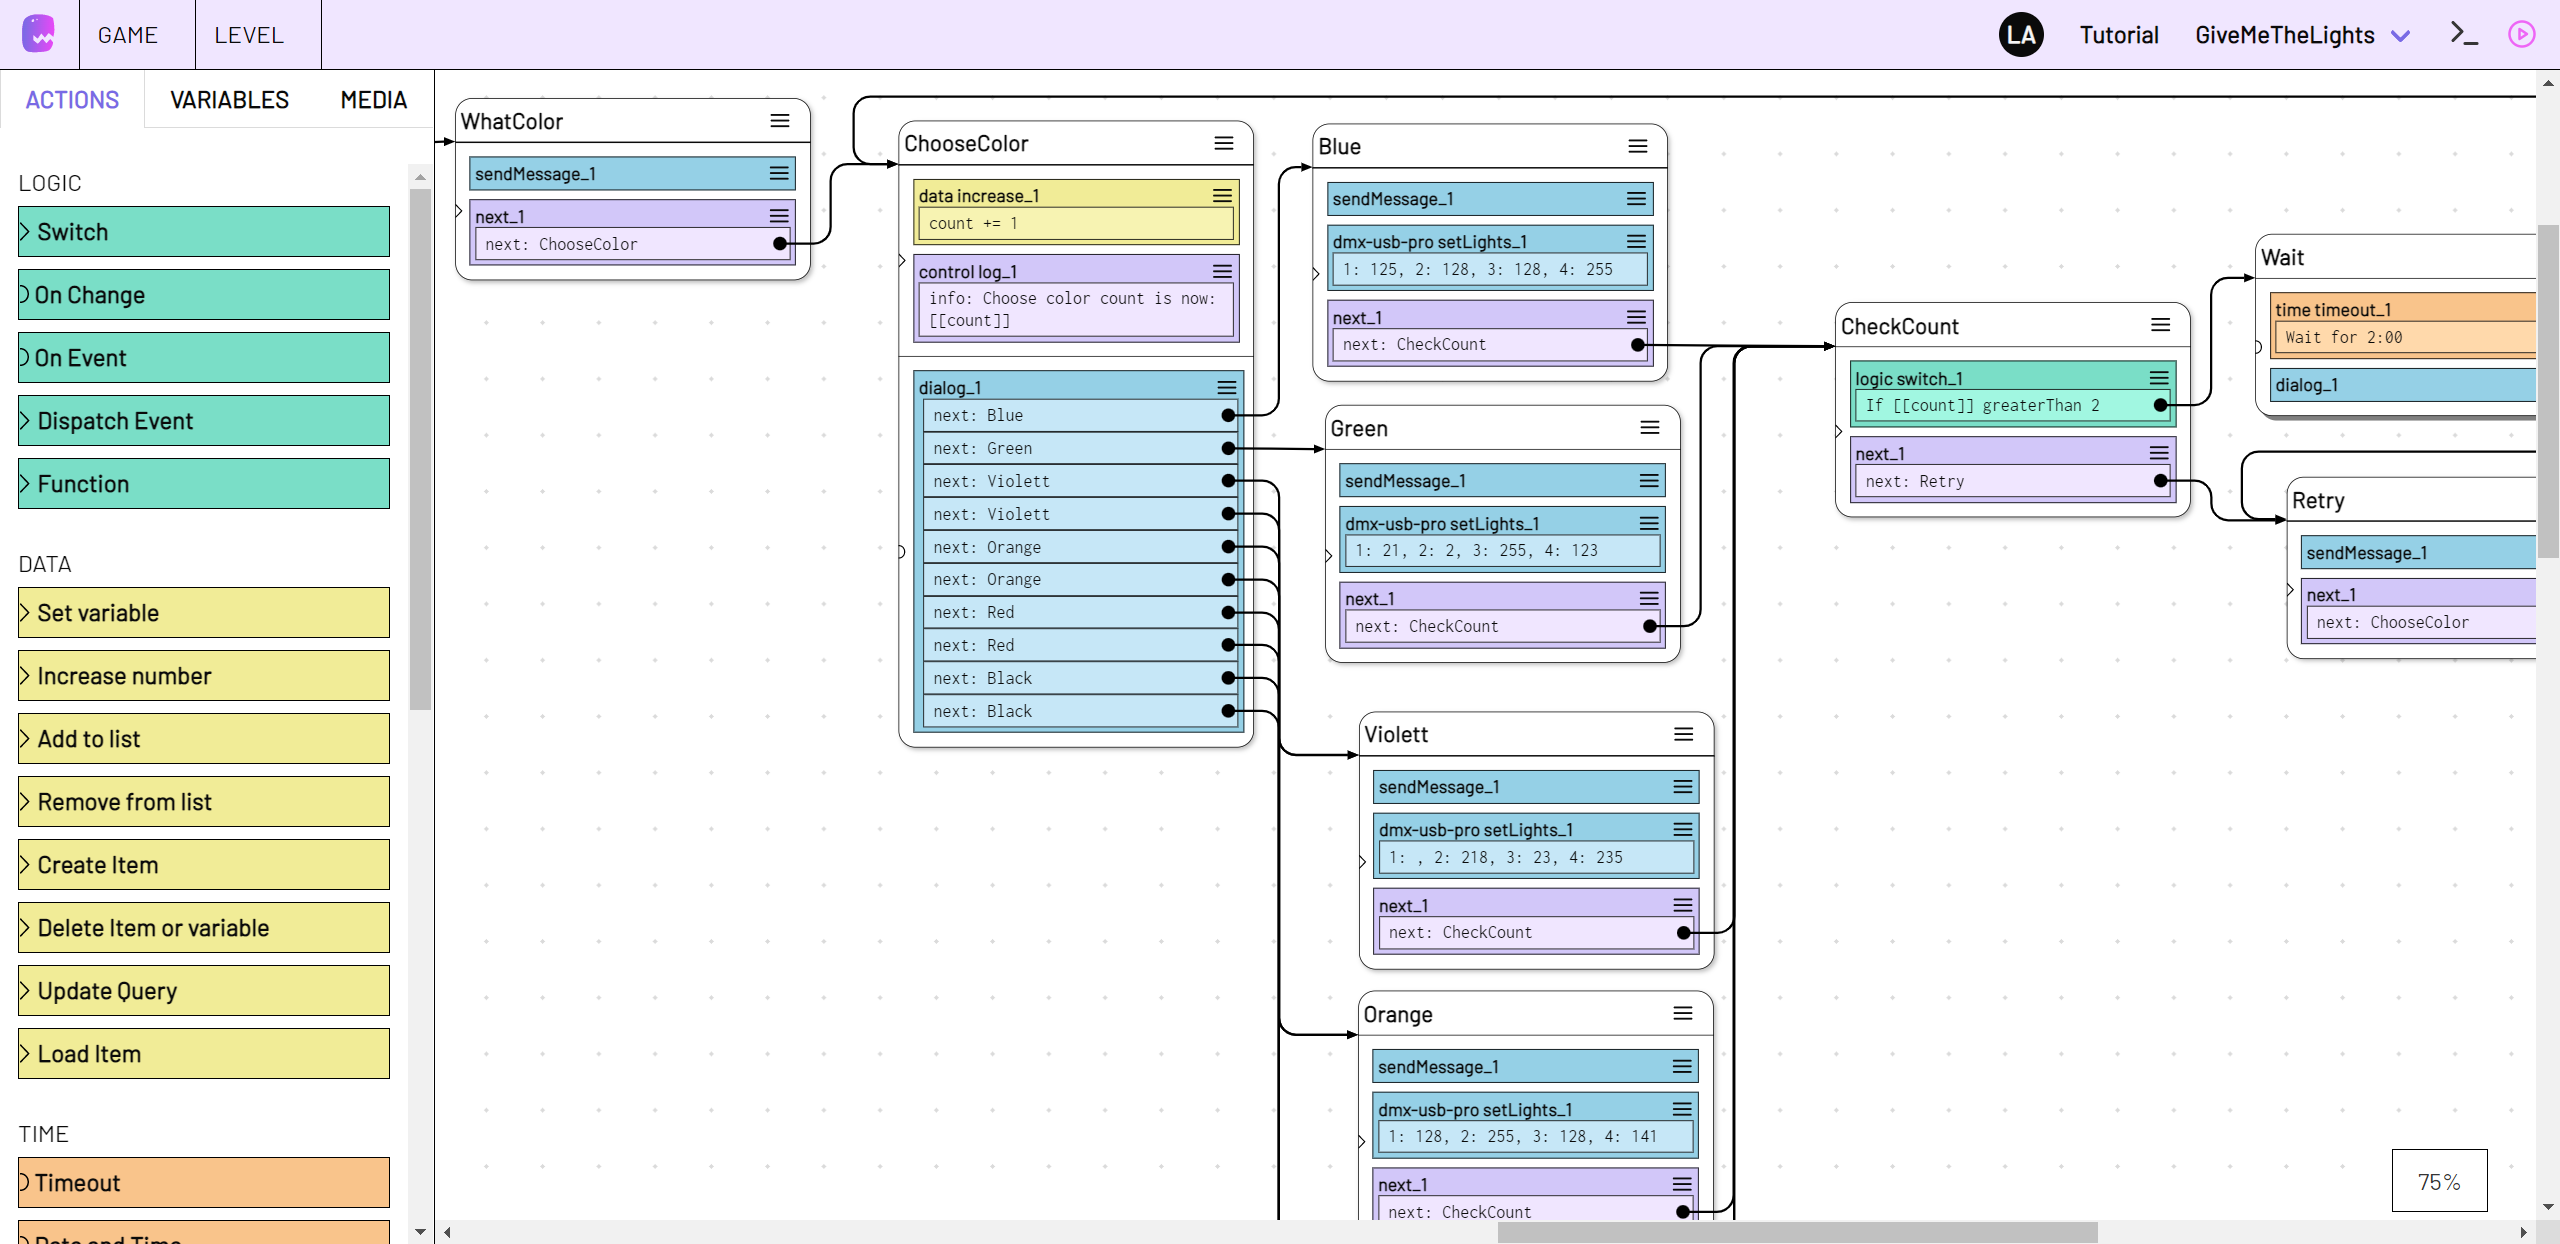
The following pages provide details and customization information about the server setup. If you are just getting startet or need more general information about adaptor:ex, checkout our [Documentation Homepage](https://docs.adaptorex.org).
**Content**
1. [Install](#install)
2. [Getting started](#getting-started)
3. [Configuration](#configuration)
4. [Commands](#commands)
5. [Docker Guide](#docker-guide)
6. [MongoDB](#mongodb)
7. [License](#license)
8. [Authors and Acknowledgment](#authors-and-acknowledgment)
Install
-------
If you haven't already, install the latest version of [nodejs](https://nodejs.org) for your operation system which includes the nodejs package manager npm.
Install npm package as global Command Line Interface
`$ sudo npm install -g adaptorex --unsafe-perm`
### Install from source or with docker
Besides using NPM you can also install adaptor:ex from source or inside docker containers. For detailed information see the [install](https://docs.adaptorex.org/install.html) page and our [server-setup](https://docs.adaptorex.org/tutorials/server-setup/index.html) guide on [adaptorex.org](https://docs.adaptorex.org).
Getting started
---------------
Run
`$ adaptorex`
this will start adaptor:ex server with default settings.
> Checkout the [Docs](https://docs.adaptorex.org/install.html#installing-from-source-with-npm) if you installed from source.
By default the adaptor:ex web interface will be accessible on http://localhost:8081. Open this URL in an up to date Web browser like Chrome or Firefox.
Learn how to use adaptor:ex in one of our [Tutorials](https://docs.adaptorex.org/tutorials/arduino-serial/index.html) at [adaptorex.org](https://docs.adaptorex.org).
By default adaptor:ex will create a data folder called `adaptorex` in the current directory. Take a look at [Configuration](#configuration) if you want to store data in a different place.
Instead of the embedded database [NeDB](https://www.npmjs.com/package/nedb) you can use adaptor:ex with [mongodb](#mongodb) too.
Configuration
-------------
To change basic settings you can start adaptor:ex with additional options.
For example, to run adaptor:ex with a detailed debug log, call `adaptorex` and append the level option:
`$ adaptorex --level debug`
All options you provide are stored to a config file. So adaptor:ex server will start based on previously appended options.
By default adaptor:ex creates a `config.json` file in the ./adaptorex directory. Use the `config` option to use or create a different config file:
`$ adaptorex --config /path/to/my/config.json`
More options are listed below.
| opt | long option | param |default | description
|-----|----------------|------------|-----------------|--------------
|-c |--config |[filename] |./adaptorex/config.json |config file you want to use instead of the default config.json
|-f |--files |[dir path] |./adaptorex |Directory to store and load variable data files.
|-p |--port |[portno] |8081 |port number for access to adaptor:ex API
|-h |--host |[webaddress]|http://localhost |address that enables webplugins to reach your adaptor:ex webserver remotely
| |--headless | | |do not serve the included client build website
|-l |--level |[loglevel] |info |level of console output can be set to "trace", "debug","info","warn", "error" or "silent"
|-d |--database |[db type] |nedb |Change database to mongodb (external) or NeDB (embedded)
|-m |--mongodburl |[db url] |mongodb://localhost:27017?replicaSet=adaptor-repl |url to connect to mongodb. Use with `-d mongodb`
|-a |--auth |[auth type] |disabled |secure the web ui with a login. Set to "disabled" to disable auth or use "basic" to enable basic auth
| |--python |[py path] |python/python3 |Set the path to, or executable name of your python3 installation. Default is `python3` except for Windows OS it's `python`. Note: As of today there is no plugin known that requires a python install
### Client
See the [adaptor:ex client](https://gitlab.com/machina_ex/adaptor_ex/adaptor_ex_client) readme for customization options to the client web app.
### Games
Besides these configuration options, the config file stores what games to load on startup.
Whenever you load or remove a game, config is adjusted accordingly.
If you use a fresh config file adaptor:ex server will not load any games you might have created.
Use the `load` command to restore game data that has previously been created
### Secure with user Authentication
Enable Basic Auth authentication for the web editor interface like this
`$ adaptorex --auth basic`
If you enable authentication you need to add user logins to the config.json file to gain access to the editor.
Add the `users` field with a list of user logins to your config.json file:
```json
"users": [
{
"login": "ada",
"password": "secure!?&"
},
{
"login": "grace",
"password": "secure123"
}
]
```
Your config file will look similar to this:
```json
{
"host": "http://localhost",
"port": 8081,
"data": "./adaptorex",
"database": {
"type": "nedb"
},
"level": "info",
"authentication": "basic",
"users": [
{
"login": "ada",
"password": "secure!?&"
},
{
"login": "grace",
"password": "secure123"
}
]
}
```
then start or restart `adaptorex`. If you open the webinterface you should get a prompt to enter username and password.
Commands
---------
Basic functionalities of adaptor:ex can be controlled by command line.
If there are more than one games loaded, you have to address the game you want to interact with by name. Do
`> testgame sessions`
to get a list of all sessions in testgame. If there is only one game active, you address it automatically when not using main commands.
To forward commands to plugins or sessions, address them by name, prepended by the game name, separated by a blank. Sessions can also be addressed by their index. Get all sessions to see their index using:
`> sessions`
Be aware that indexes of active sessions change when other sessions are canceled.
If the game has only one session running, you don't have to address the session by name. Simply do
`> listeners`
or, if there is more than one game:
`> testgame listeners`
to get a list of all active listeners in testsession.
To address elements that contain space characters, wrap them in quotes (" or ')
Use the following commands to control adaptor:ex server from command line.
### main
|cmd |args |description
|-----------|-----------------|--------------
|quit |- |close running adaptor:ex server. same as `ctrl+c`
|games |- |list currently loaded games
|load |[game][template] |load from DB or create new game. Optionally choose template for quick setup.
|unload |[game] |remove game from adaptor:ex server. Keep it in Database
|del/delete |[game] |delete game, including database (!)
|level |[log level] |change log level to "trace" (everything), "debug", "info", "warn", "error" or "silent" (off)
|plugins |- |list all plugins that can be added to games
|urls |- |print a list of all known urls adaptor server can be accessed with
|api |- |print a list of all known API urls adaptor API can be accessed with
|whitelist |add [url] |add a url to be allowed as cross origin url
|whitelist |remove [url] |remove a url from whitelist for cross origin access
|whitelist |any |allow access from any url (remove whitelist)
|whitelist |none |block access for all urls except localhost (clear whitelist)
### game
If you have more then one game loaded, prepend commands with game name.
|cmd |args |description
|-----------|---------------------|--------------
|sessions | |list currently running sessions
|launch |[level] [name] |start session with [name] based on [level]
|cancel |[session] |delete session and all its listeners
|cancel |all |delete all sessions and all their listeners in this game
|plugin |list |list active plugins
|plugin |add [plugin] |activate plugin
|plugin |remove [plugin] |deactivate plugin and delete all items
|collection |list |list custom collections
|collection |create [collection] |create new custom collection
|collection |delete [collection] |delete existing custom collection
### session
If you have more then one session running, prepend commands with session name or index.
|cmd |args |description
|----------|------------------------------------------|--------------
|next |[name] |dispatch a state with [name] in this session
|listeners | |list currently active listeners
|listener |cancel [name/index] |cancel listener by [name] or [index]
|reference |list |show all references assigned to this session
|reference |assign [collection] [document name] [name]|create new reference [name], linking to document with [document name] in [collection]
|player | |list refrences in player collection that are assigned to this session
|remove |[reference] / [collections] [key] [value] |remove existing reference using [reference] name or specifiing a query ([key] [value]) in [collection]
### plugin
send commands to plugins you added to your game.
Prepend commands with plugin name.
plugin collection items can also be addressed by name property.
use collections command to show available collections for plugin.
|cmd |args |description
|-----------|--------------------|--------------
|collections| |list available collections
If plugin has multiple collections prepend collection to address items.
To look into item properties like `settings` use
|cmd |args |description
|-----------|--------------------|--------------
|[property] | |show property
#### time
|cmd |args |description
|----------|--------------------|--------------
|list | |list all running timer
#### devices
General commands
|cmd |args |description
|----------|--------------------|--------------
|list | |list all devices
|ports | |get list of midi and serial ports
|midi |on/off |enable (on) or disable (off) midi
Commands adressing specific device. Prepend device name
|cmd |args |description
|----------|--------------------|--------------
|send |[json message] |Send message to device. E.g.: `{message:"content"}`
|settings | |show device settings
|reconnect | |reconnect device with current settings
> For example to send a message to your TCP Device 'lightbulb' telling it to go off do:
> `> devices lightbulb send '{switch:"off"}'`
#### twilio
Commands adressing specific twilio phone. Prepend phone name
|cmd |args |description
|----------|--------------------|--------------
|routing |sms/answer/status |show current call and/or sms routing.
|cancel |sms/answer [number] |cancel routing for incoming sms or call for Telnumber [number]
|pending | |Show incoming call or sms events from unregistered telnumbers that were not yet forwarded to a session
|lock | |Disable requests to twilio for this phone (E.g. to save costs when testing)
|unlock |cancel [name/index] |Enable requests to twilio for this phone
#### telegram
Commands addressing accounts. Use like this:
`> telegram accounts `
|cmd |args |description
|-----------|-------------------------|--------------
|routing |-/message |show current message routing.
|cancel |message [id] [index] |cancel message routing at [index] for messages from user [id]
|pending | |Show incoming messages from unregistered peers that were not yet forwarded to a session
|user |[entity] |get user info through telegram API. Use '+' format number to get user by phone number. See also [telethon get_entity](https://docs.telethon.dev/en/latest/modules/client.html?highlight=get_entity#telethon.client.users.UserMethods.get_entity)
|add_contact|[phone/id] [first name]/-|add user to accounts contacts. Use [phone] and [first_name] or get user by [id].
#### ableton
|cmd |args |description
|----------|--------------------|--------------
|livesets | |List livesets
#### d-pro (in development)
|cmd |args |description
|----------|--------------------|--------------
|shows | |List D-Pro Shows
#### tradfri (in development)
|cmd |args |description
|----------|--------------------|--------------
|discover | |Discover Tradfri Gateway and show devices
Docker Guide
------------
To access adaptor:ex server command line inside the docker container use
`$ docker attach your_docker-adaptor-server_1`
where `your_docker-adaptor-server_1` is the name of your adaptor:ex server docker container.
If you used the docker-compose.yml in this repository, the name is composed of the directory in which you installed adaptor:ex and `adaptor-server` and a number counting up from `1` for each installed docker-compose instance.
Deatach with keys [ctrl] + [P] and then [ctrl] + [Q]
To take a look at the server logs use
`$ docker logs your_docker-adaptor-server_1`
Restart docker container with
`$ docker restart your_docker-adaptor-server_1`
MongoDB
-------
By default adaptor:ex server uses the embedded [NeDB](https://www.npmjs.com/package/nedb) Database. For larger projects with many sessions it is recommended to use [mongodb](https://www.mongodb.com/) instead. It's a scalable NoSQL database that is used in many Web Applications.
NeDB was actually built to replace mongodb for smaller, local projects. It has a similar query language, but it is not as advanced as mongodb itself. When you connect adaptor:ex with mongodb you can use it's extensive query language when developing Game Installations.
> If you are not using local hardware interfaces we recommend using the [docker compose install](#install-with-docker) option which includes mongodb. Otherwise follow beneath instructions.
### Install and Setup
Start by following the instructions on how to [install mongodb community edition](https://docs.mongodb.com/manual/administration/install-community/) for your operation system.
Adaptor:ex comes with a shell file `mongo.sh` to setup a database with a so called 'replica set' that is needed for use with adaptor:ex. Unfortunately it can only be used with MacOS or Linux.
Enter the adaptor:ex source directory.
> If you did not install adaptor:ex from source, download the [mongo.sh file](https://gitlab.com/machina_ex/adaptor_ex/adaptor_ex_server/-/raw/main/mongo.sh) and [mongod.conf](https://gitlab.com/machina_ex/adaptor_ex/adaptor_ex_server/-/raw/main/mongod.conf) config template file beforehand:
>
> `$ wget https://gitlab.com/machina_ex/adaptor_ex/adaptor_ex_server/-/raw/main/mongod.conf; wget https://gitlab.com/machina_ex/adaptor_ex/adaptor_ex_server/-/raw/main/mongo.sh`
Use the shell file to run a setup like this:
`$ sh mongo.sh setup`
and follow the instructions.
To create a default mongodb setup that works well on your local machine press enter for the default value on all input prompts.
This creates required database folders, config files and initiates mongo replica sets which are necessary for adaptor:ex change listeners.
Once it is set up, you can always do
`$ sh mongo.sh start`
to start mongodb before you run the node script and
`$ sh mongo.sh stop`
to stop the mongodb process.
On the last line `mongo.sh setup` will tell you with what options to start adaptor:ex to connect it to the mongodb server.
It should look something like this, depending on your individual options:
`$ adaptorex --database mongodb --mongourl 'mongodb://localhost:27017?replicaSet=adaptor-repl'`
> Replika setup is based on [this tutorial](https://medium.com/@thakkaryash94/mongodb-3-6-change-streams-example-with-node-js-2b9a85652c50)
### Access from a remote location
To access the adaptor:ex game databases from a remote location, it is recommended to enable authentication.
You can use `mongo.sh setup` to create a root user and enable authentication for mongodb.
> When hosting adaptor:ex with remote access you should also secure the webview. See [Configuration](#configuration) on how to secure the web editor with login and password.
Once `mongo.sh setup` asks you to create a user, type a username and press enter.
`mongo.sh setup` will now ask you to choose a password for this user and if you want to allow remote access to your database.
If you confirm, the mongodb will be bound to ip 0.0.0.0 instead of 127.0.0.1 which allows to access the database on the given port using your server ip or domain.
To allow the adaptor:ex node script to access the secured database, run `adaptorex` with the following options. Replace `` and `` with your mongodb user and password and `` with your primary replica set port (default would be 27017):
`$ adaptorex --database mongodb --mongourl mongodb://:@localhost:/admin?replicaSet=adaptor-repl`
> For a quick answer on how `mongo.sh setup` creates authentification for mongodb replica sets see [this helpful post](https://stackoverflow.com/questions/38524150/mongodb-replica-set-with-simple-password-authentication)
By reusing `mongo.sh setup` you can always disable authentication or create a new root user for mongodb. Though it is not possible to change the password for an existing user. When creating the same user with a new password your changes to the user will be ignored. See [the mongodb user management manual](https://docs.mongodb.com/manual/tutorial/manage-users-and-roles/) on how to use the mongo shell to change user settings.
Config files for all replica sets are found in the data mongodb folder. If you make changes to the files be aware that using `mongo.sh setup`, will overwrite these changes.
### Remote connection into docker container
If you use adaptor:ex server inside of docker, you might need to access the database via an ssh tunnel. For that you can get the IP address of the running database like this:
```console
sudo docker inspect -f '{{range.NetworkSettings.Networks}}{{.IPAddress}}{{end}}' yourdocker-adaptor_server-1
```
where `yourdocker-adaptor_server-1` is the name of your docker instance (depending on your setup)
### Backups
#### Create
When using mongodb the easiest way to create full backups of your games is using [mongodump](https://docs.mongodb.com/manual/reference/program/mongodump/).
Make a command like this, to export a games full database:
`$ mongodump --db --username --password --authenticationDatabase admin -o /path/to/backupfolder`
#### Schedule
Creating a bash script when you automate the backup process helps keeping your backups in order. Make a new file called something like `run_backup.sh` with the following content:
``` bash
#!/bin/sh
DIR=`date +%Y-%m-%d_%H:%M:%S`
DEST=./patrol/backup/$DIR
mkdir $DEST
mongodump --db --username --password --authenticationDatabase admin -o $DEST
```
To create backups regularly you can make a cron job (Linux/MacOs) that executes the above file in specific time intervals.
Open crontab editor to add a new cronjob:
`$ crontab -u myuser -e`
add the following line at the bottom of the crontab editor to make a backup once per hour from 9-22 h:
`0 9-22 * * * ./path/to/file/run_backup.sh`
#### Restore
Restore a game using [mongorestore](https://docs.mongodb.com/manual/reference/program/mongorestore/).
To restore all games you dumped into a folder do:
`$ mongorestore /path/to/backup/`
To restore a specific game do:
`$ mongorestore --db /path/to/backup/mygame`
If authentification is enabled, add authentification credentials:
`$ mongorestore --db --username --password --authenticationDatabase admin /path/to/backup`
You can use the adaptor:ex web ui to restore the game by adding a new game with the same name. Or you can use command line, start the adaptor server and load your game from the database:
`> load mygame`
License
-------
Source code licensed MIT
Authors and Acknowledgment
--------------------------
This is a [machina commons](https://commons.machinaex.org) project by
[](https://machinaex.de)
sponsored by
Server application for the adaptor:ex storytelling engine that connects your digital and physical interfaces.
adaptor:ex is digital duckt tape for multi linear stage plays, theatre games, messenger adventures or escape rooms. The versatile tool is especially suitable to build storytelling games in the Telegram Instant Messenger.

The following pages provide details and customization information about the server setup. If you are just getting startet or need more general information about adaptor:ex, checkout our [Documentation Homepage](https://docs.adaptorex.org).
**Content**
1. [Install](#install)
2. [Getting started](#getting-started)
3. [Configuration](#configuration)
4. [Commands](#commands)
5. [Docker Guide](#docker-guide)
6. [MongoDB](#mongodb)
7. [License](#license)
8. [Authors and Acknowledgment](#authors-and-acknowledgment)
Install
-------
If you haven't already, install the latest version of [nodejs](https://nodejs.org) for your operation system which includes the nodejs package manager npm.
Install npm package as global Command Line Interface
`$ sudo npm install -g adaptorex --unsafe-perm`
### Install from source or with docker
Besides using NPM you can also install adaptor:ex from source or inside docker containers. For detailed information see the [install](https://docs.adaptorex.org/install.html) page and our [server-setup](https://docs.adaptorex.org/tutorials/server-setup/index.html) guide on [adaptorex.org](https://docs.adaptorex.org).
Getting started
---------------
Run
`$ adaptorex`
this will start adaptor:ex server with default settings.
> Checkout the [Docs](https://docs.adaptorex.org/install.html#installing-from-source-with-npm) if you installed from source.
By default the adaptor:ex web interface will be accessible on http://localhost:8081. Open this URL in an up to date Web browser like Chrome or Firefox.
Learn how to use adaptor:ex in one of our [Tutorials](https://docs.adaptorex.org/tutorials/arduino-serial/index.html) at [adaptorex.org](https://docs.adaptorex.org).
By default adaptor:ex will create a data folder called `adaptorex` in the current directory. Take a look at [Configuration](#configuration) if you want to store data in a different place.
Instead of the embedded database [NeDB](https://www.npmjs.com/package/nedb) you can use adaptor:ex with [mongodb](#mongodb) too.
Configuration
-------------
To change basic settings you can start adaptor:ex with additional options.
For example, to run adaptor:ex with a detailed debug log, call `adaptorex` and append the level option:
`$ adaptorex --level debug`
All options you provide are stored to a config file. So adaptor:ex server will start based on previously appended options.
By default adaptor:ex creates a `config.json` file in the ./adaptorex directory. Use the `config` option to use or create a different config file:
`$ adaptorex --config /path/to/my/config.json`
More options are listed below.
| opt | long option | param |default | description
|-----|----------------|------------|-----------------|--------------
|-c |--config |[filename] |./adaptorex/config.json |config file you want to use instead of the default config.json
|-f |--files |[dir path] |./adaptorex |Directory to store and load variable data files.
|-p |--port |[portno] |8081 |port number for access to adaptor:ex API
|-h |--host |[webaddress]|http://localhost |address that enables webplugins to reach your adaptor:ex webserver remotely
| |--headless | | |do not serve the included client build website
|-l |--level |[loglevel] |info |level of console output can be set to "trace", "debug","info","warn", "error" or "silent"
|-d |--database |[db type] |nedb |Change database to mongodb (external) or NeDB (embedded)
|-m |--mongodburl |[db url] |mongodb://localhost:27017?replicaSet=adaptor-repl |url to connect to mongodb. Use with `-d mongodb`
|-a |--auth |[auth type] |disabled |secure the web ui with a login. Set to "disabled" to disable auth or use "basic" to enable basic auth
| |--python |[py path] |python/python3 |Set the path to, or executable name of your python3 installation. Default is `python3` except for Windows OS it's `python`. Note: As of today there is no plugin known that requires a python install
### Client
See the [adaptor:ex client](https://gitlab.com/machina_ex/adaptor_ex/adaptor_ex_client) readme for customization options to the client web app.
### Games
Besides these configuration options, the config file stores what games to load on startup.
Whenever you load or remove a game, config is adjusted accordingly.
If you use a fresh config file adaptor:ex server will not load any games you might have created.
Use the `load` command to restore game data that has previously been created
### Secure with user Authentication
Enable Basic Auth authentication for the web editor interface like this
`$ adaptorex --auth basic`
If you enable authentication you need to add user logins to the config.json file to gain access to the editor.
Add the `users` field with a list of user logins to your config.json file:
```json
"users": [
{
"login": "ada",
"password": "secure!?&"
},
{
"login": "grace",
"password": "secure123"
}
]
```
Your config file will look similar to this:
```json
{
"host": "http://localhost",
"port": 8081,
"data": "./adaptorex",
"database": {
"type": "nedb"
},
"level": "info",
"authentication": "basic",
"users": [
{
"login": "ada",
"password": "secure!?&"
},
{
"login": "grace",
"password": "secure123"
}
]
}
```
then start or restart `adaptorex`. If you open the webinterface you should get a prompt to enter username and password.
Commands
---------
Basic functionalities of adaptor:ex can be controlled by command line.
If there are more than one games loaded, you have to address the game you want to interact with by name. Do
`> testgame sessions`
to get a list of all sessions in testgame. If there is only one game active, you address it automatically when not using main commands.
To forward commands to plugins or sessions, address them by name, prepended by the game name, separated by a blank. Sessions can also be addressed by their index. Get all sessions to see their index using:
`> sessions`
Be aware that indexes of active sessions change when other sessions are canceled.
If the game has only one session running, you don't have to address the session by name. Simply do
`> listeners`
or, if there is more than one game:
`> testgame listeners`
to get a list of all active listeners in testsession.
To address elements that contain space characters, wrap them in quotes (" or ')
Use the following commands to control adaptor:ex server from command line.
### main
|cmd |args |description
|-----------|-----------------|--------------
|quit |- |close running adaptor:ex server. same as `ctrl+c`
|games |- |list currently loaded games
|load |[game][template] |load from DB or create new game. Optionally choose template for quick setup.
|unload |[game] |remove game from adaptor:ex server. Keep it in Database
|del/delete |[game] |delete game, including database (!)
|level |[log level] |change log level to "trace" (everything), "debug", "info", "warn", "error" or "silent" (off)
|plugins |- |list all plugins that can be added to games
|urls |- |print a list of all known urls adaptor server can be accessed with
|api |- |print a list of all known API urls adaptor API can be accessed with
|whitelist |add [url] |add a url to be allowed as cross origin url
|whitelist |remove [url] |remove a url from whitelist for cross origin access
|whitelist |any |allow access from any url (remove whitelist)
|whitelist |none |block access for all urls except localhost (clear whitelist)
### game
If you have more then one game loaded, prepend commands with game name.
|cmd |args |description
|-----------|---------------------|--------------
|sessions | |list currently running sessions
|launch |[level] [name] |start session with [name] based on [level]
|cancel |[session] |delete session and all its listeners
|cancel |all |delete all sessions and all their listeners in this game
|plugin |list |list active plugins
|plugin |add [plugin] |activate plugin
|plugin |remove [plugin] |deactivate plugin and delete all items
|collection |list |list custom collections
|collection |create [collection] |create new custom collection
|collection |delete [collection] |delete existing custom collection
### session
If you have more then one session running, prepend commands with session name or index.
|cmd |args |description
|----------|------------------------------------------|--------------
|next |[name] |dispatch a state with [name] in this session
|listeners | |list currently active listeners
|listener |cancel [name/index] |cancel listener by [name] or [index]
|reference |list |show all references assigned to this session
|reference |assign [collection] [document name] [name]|create new reference [name], linking to document with [document name] in [collection]
|player | |list refrences in player collection that are assigned to this session
|remove |[reference] / [collections] [key] [value] |remove existing reference using [reference] name or specifiing a query ([key] [value]) in [collection]
### plugin
send commands to plugins you added to your game.
Prepend commands with plugin name.
plugin collection items can also be addressed by name property.
use collections command to show available collections for plugin.
|cmd |args |description
|-----------|--------------------|--------------
|collections| |list available collections
If plugin has multiple collections prepend collection to address items.
To look into item properties like `settings` use
|cmd |args |description
|-----------|--------------------|--------------
|[property] | |show property
#### time
|cmd |args |description
|----------|--------------------|--------------
|list | |list all running timer
#### devices
General commands
|cmd |args |description
|----------|--------------------|--------------
|list | |list all devices
|ports | |get list of midi and serial ports
|midi |on/off |enable (on) or disable (off) midi
Commands adressing specific device. Prepend device name
|cmd |args |description
|----------|--------------------|--------------
|send |[json message] |Send message to device. E.g.: `{message:"content"}`
|settings | |show device settings
|reconnect | |reconnect device with current settings
> For example to send a message to your TCP Device 'lightbulb' telling it to go off do:
> `> devices lightbulb send '{switch:"off"}'`
#### twilio
Commands adressing specific twilio phone. Prepend phone name
|cmd |args |description
|----------|--------------------|--------------
|routing |sms/answer/status |show current call and/or sms routing.
|cancel |sms/answer [number] |cancel routing for incoming sms or call for Telnumber [number]
|pending | |Show incoming call or sms events from unregistered telnumbers that were not yet forwarded to a session
|lock | |Disable requests to twilio for this phone (E.g. to save costs when testing)
|unlock |cancel [name/index] |Enable requests to twilio for this phone
#### telegram
Commands addressing accounts. Use like this:
`> telegram accounts `
|cmd |args |description
|-----------|-------------------------|--------------
|routing |-/message |show current message routing.
|cancel |message [id] [index] |cancel message routing at [index] for messages from user [id]
|pending | |Show incoming messages from unregistered peers that were not yet forwarded to a session
|user |[entity] |get user info through telegram API. Use '+' format number to get user by phone number. See also [telethon get_entity](https://docs.telethon.dev/en/latest/modules/client.html?highlight=get_entity#telethon.client.users.UserMethods.get_entity)
|add_contact|[phone/id] [first name]/-|add user to accounts contacts. Use [phone] and [first_name] or get user by [id].
#### ableton
|cmd |args |description
|----------|--------------------|--------------
|livesets | |List livesets
#### d-pro (in development)
|cmd |args |description
|----------|--------------------|--------------
|shows | |List D-Pro Shows
#### tradfri (in development)
|cmd |args |description
|----------|--------------------|--------------
|discover | |Discover Tradfri Gateway and show devices
Docker Guide
------------
To access adaptor:ex server command line inside the docker container use
`$ docker attach your_docker-adaptor-server_1`
where `your_docker-adaptor-server_1` is the name of your adaptor:ex server docker container.
If you used the docker-compose.yml in this repository, the name is composed of the directory in which you installed adaptor:ex and `adaptor-server` and a number counting up from `1` for each installed docker-compose instance.
Deatach with keys [ctrl] + [P] and then [ctrl] + [Q]
To take a look at the server logs use
`$ docker logs your_docker-adaptor-server_1`
Restart docker container with
`$ docker restart your_docker-adaptor-server_1`
MongoDB
-------
By default adaptor:ex server uses the embedded [NeDB](https://www.npmjs.com/package/nedb) Database. For larger projects with many sessions it is recommended to use [mongodb](https://www.mongodb.com/) instead. It's a scalable NoSQL database that is used in many Web Applications.
NeDB was actually built to replace mongodb for smaller, local projects. It has a similar query language, but it is not as advanced as mongodb itself. When you connect adaptor:ex with mongodb you can use it's extensive query language when developing Game Installations.
> If you are not using local hardware interfaces we recommend using the [docker compose install](#install-with-docker) option which includes mongodb. Otherwise follow beneath instructions.
### Install and Setup
Start by following the instructions on how to [install mongodb community edition](https://docs.mongodb.com/manual/administration/install-community/) for your operation system.
Adaptor:ex comes with a shell file `mongo.sh` to setup a database with a so called 'replica set' that is needed for use with adaptor:ex. Unfortunately it can only be used with MacOS or Linux.
Enter the adaptor:ex source directory.
> If you did not install adaptor:ex from source, download the [mongo.sh file](https://gitlab.com/machina_ex/adaptor_ex/adaptor_ex_server/-/raw/main/mongo.sh) and [mongod.conf](https://gitlab.com/machina_ex/adaptor_ex/adaptor_ex_server/-/raw/main/mongod.conf) config template file beforehand:
>
> `$ wget https://gitlab.com/machina_ex/adaptor_ex/adaptor_ex_server/-/raw/main/mongod.conf; wget https://gitlab.com/machina_ex/adaptor_ex/adaptor_ex_server/-/raw/main/mongo.sh`
Use the shell file to run a setup like this:
`$ sh mongo.sh setup`
and follow the instructions.
To create a default mongodb setup that works well on your local machine press enter for the default value on all input prompts.
This creates required database folders, config files and initiates mongo replica sets which are necessary for adaptor:ex change listeners.
Once it is set up, you can always do
`$ sh mongo.sh start`
to start mongodb before you run the node script and
`$ sh mongo.sh stop`
to stop the mongodb process.
On the last line `mongo.sh setup` will tell you with what options to start adaptor:ex to connect it to the mongodb server.
It should look something like this, depending on your individual options:
`$ adaptorex --database mongodb --mongourl 'mongodb://localhost:27017?replicaSet=adaptor-repl'`
> Replika setup is based on [this tutorial](https://medium.com/@thakkaryash94/mongodb-3-6-change-streams-example-with-node-js-2b9a85652c50)
### Access from a remote location
To access the adaptor:ex game databases from a remote location, it is recommended to enable authentication.
You can use `mongo.sh setup` to create a root user and enable authentication for mongodb.
> When hosting adaptor:ex with remote access you should also secure the webview. See [Configuration](#configuration) on how to secure the web editor with login and password.
Once `mongo.sh setup` asks you to create a user, type a username and press enter.
`mongo.sh setup` will now ask you to choose a password for this user and if you want to allow remote access to your database.
If you confirm, the mongodb will be bound to ip 0.0.0.0 instead of 127.0.0.1 which allows to access the database on the given port using your server ip or domain.
To allow the adaptor:ex node script to access the secured database, run `adaptorex` with the following options. Replace `` and `` with your mongodb user and password and `` with your primary replica set port (default would be 27017):
`$ adaptorex --database mongodb --mongourl mongodb://:@localhost:/admin?replicaSet=adaptor-repl`
> For a quick answer on how `mongo.sh setup` creates authentification for mongodb replica sets see [this helpful post](https://stackoverflow.com/questions/38524150/mongodb-replica-set-with-simple-password-authentication)
By reusing `mongo.sh setup` you can always disable authentication or create a new root user for mongodb. Though it is not possible to change the password for an existing user. When creating the same user with a new password your changes to the user will be ignored. See [the mongodb user management manual](https://docs.mongodb.com/manual/tutorial/manage-users-and-roles/) on how to use the mongo shell to change user settings.
Config files for all replica sets are found in the data mongodb folder. If you make changes to the files be aware that using `mongo.sh setup`, will overwrite these changes.
### Remote connection into docker container
If you use adaptor:ex server inside of docker, you might need to access the database via an ssh tunnel. For that you can get the IP address of the running database like this:
```console
sudo docker inspect -f '{{range.NetworkSettings.Networks}}{{.IPAddress}}{{end}}' yourdocker-adaptor_server-1
```
where `yourdocker-adaptor_server-1` is the name of your docker instance (depending on your setup)
### Backups
#### Create
When using mongodb the easiest way to create full backups of your games is using [mongodump](https://docs.mongodb.com/manual/reference/program/mongodump/).
Make a command like this, to export a games full database:
`$ mongodump --db --username --password --authenticationDatabase admin -o /path/to/backupfolder`
#### Schedule
Creating a bash script when you automate the backup process helps keeping your backups in order. Make a new file called something like `run_backup.sh` with the following content:
``` bash
#!/bin/sh
DIR=`date +%Y-%m-%d_%H:%M:%S`
DEST=./patrol/backup/$DIR
mkdir $DEST
mongodump --db --username --password --authenticationDatabase admin -o $DEST
```
To create backups regularly you can make a cron job (Linux/MacOs) that executes the above file in specific time intervals.
Open crontab editor to add a new cronjob:
`$ crontab -u myuser -e`
add the following line at the bottom of the crontab editor to make a backup once per hour from 9-22 h:
`0 9-22 * * * ./path/to/file/run_backup.sh`
#### Restore
Restore a game using [mongorestore](https://docs.mongodb.com/manual/reference/program/mongorestore/).
To restore all games you dumped into a folder do:
`$ mongorestore /path/to/backup/`
To restore a specific game do:
`$ mongorestore --db /path/to/backup/mygame`
If authentification is enabled, add authentification credentials:
`$ mongorestore --db --username --password --authenticationDatabase admin /path/to/backup`
You can use the adaptor:ex web ui to restore the game by adding a new game with the same name. Or you can use command line, start the adaptor server and load your game from the database:
`> load mygame`
License
-------
Source code licensed MIT
Authors and Acknowledgment
--------------------------
This is a [machina commons](https://commons.machinaex.org) project by
[](https://machinaex.de)
sponsored by