Chapter 13. Importing a file from Atlas 1
If you’re using the original, O’Reilly-only version of Atlas, here’s what you’ll need to do to import your projects. To do this, you’ll need to use git on the command line. If you need help with this, email atlas@oreilly.com and we can help you.
Before you start...
There are two things you need to do before you can migrate a repo over to Atlas 2. First, you must have an account. Email atlas@oreilly.com for details on getting a registration code.
Second, you must add your SSH key. You can learn more about SSH on this GitHub article "Generating SSH Keys.” To do this:
- Click on your profile page, which you access by clicking on your username at the upper right corner.
- Add a title (this is just something to help you remember what key you used) and the key itself.
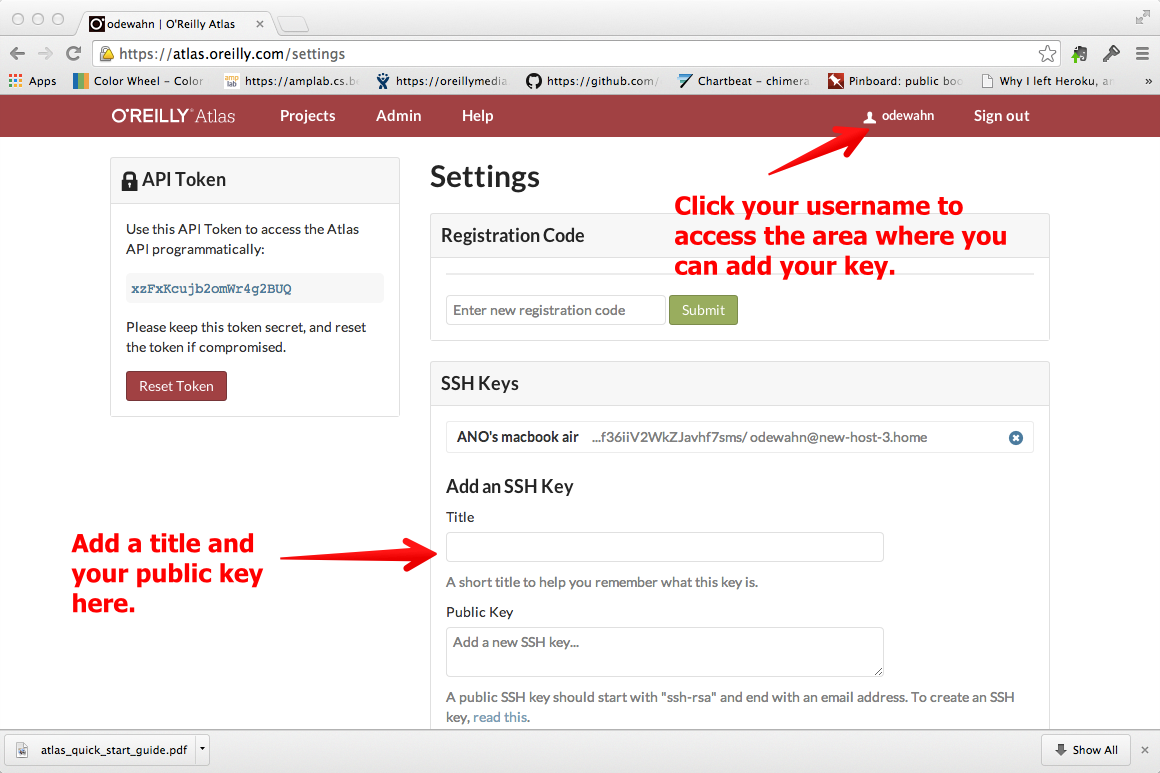
Figure 13-1. You add your SSH key on your profile page.
Get the git URL for the repo you want to move.
The first step is to pull your project out of the old system. First, find the remote URL on the “Admin” tab for your project in Atlas 1:
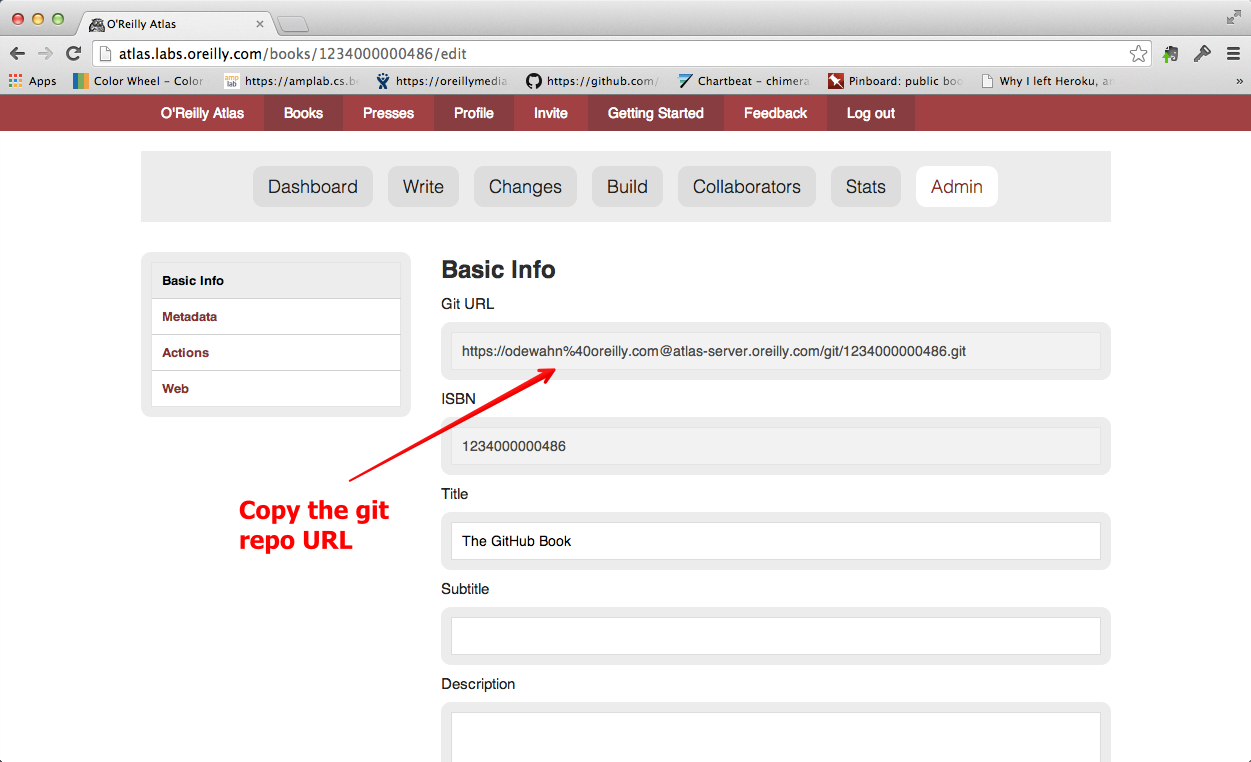
Figure 13-2. You’ll find the url for your repository on the “Admin” tab.
Clone your original repo.
Once you’ve got the url, you’ll need to clone it to your machine using git on the command line. For example:
$ git clone https://odewahn%40oreilly.com@atlas-server.oreilly.com/git/1234000000486.git
Cloning into '1234000000486'...
Password for 'https://odewahn@oreilly.com@atlas-server.oreilly.com':
remote: Counting objects: 2831, done.
remote: Compressing objects: 100% (2535/2535), done.
remote: Total 2831 (delta 1388), reused 736 (delta 182)
Receiving objects: 100% (2831/2831), 20.34 MiB | 977 KiB/s, done.
Resolving deltas: 100% (1388/1388), done.
Note that your password is the same as your password when you log into Atlas.
Create a “bare” repo in Atlas 2 to receive your project.
Since you have an existing project, you’ll need to create what’s called a “bare” repo to recive your content and history. To do this:
- click the “New Project” button
- Give your project a title and a description
- Select “Bare” in the “Template” section
- Click “Create!”
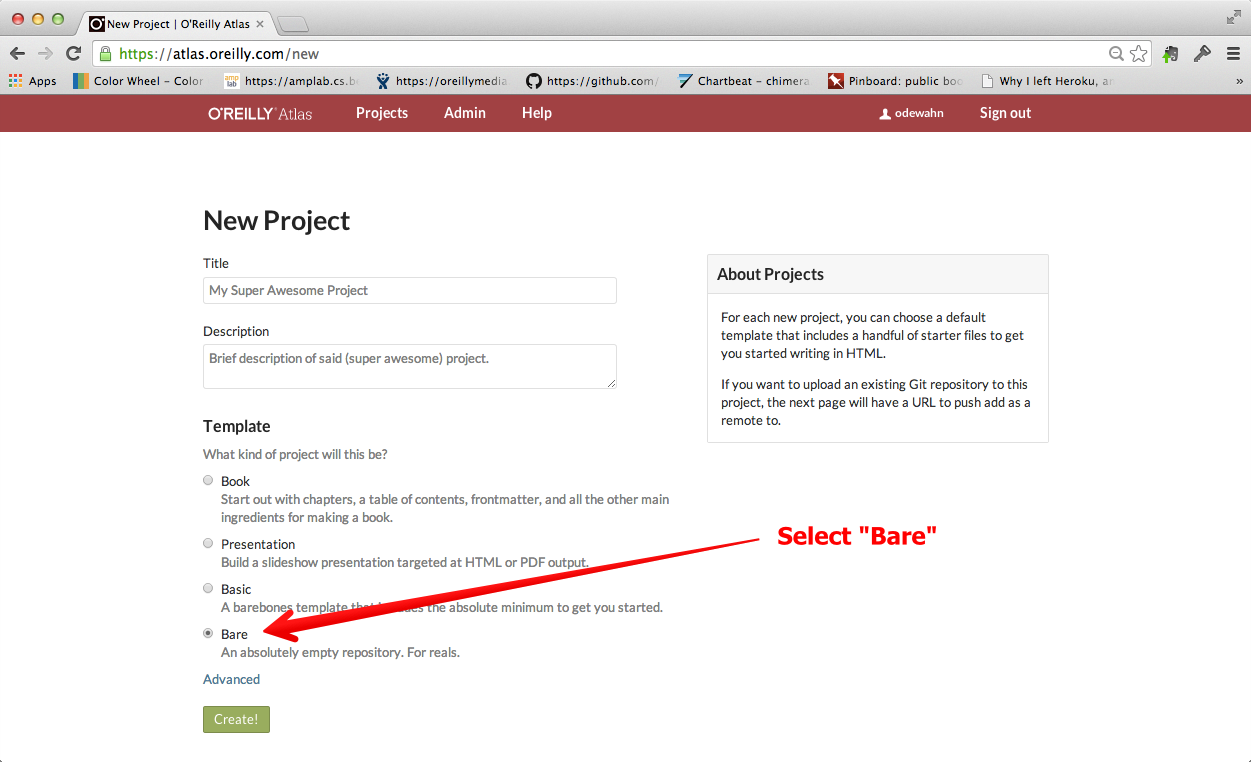
Figure 13-3. Create a bare repo to accept your project
Get the URL for your new repo from the “Settings” tab.
Once you’ve created the new repo, go to the “Settings” tab and copy its Git URL.
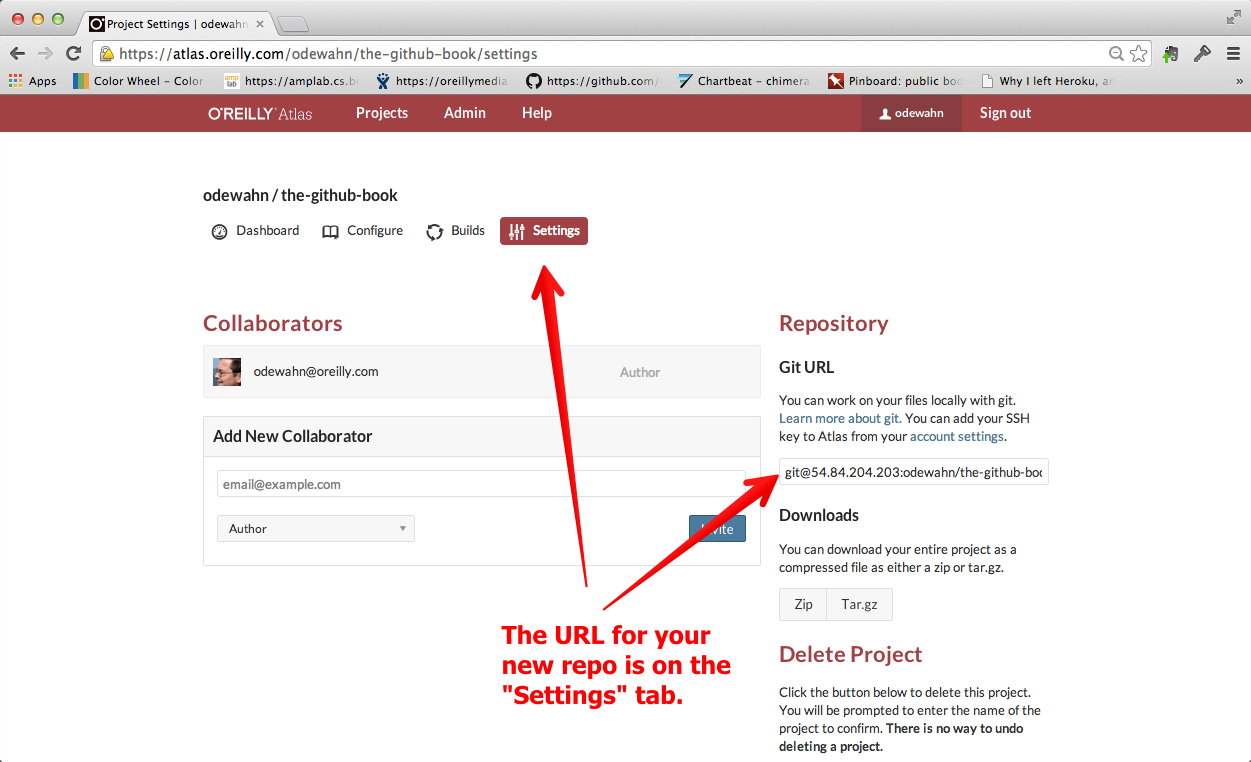
Figure 13-4. This is an image caption
Add a remote from your old repo to your new one and push.
Once you have the new repos git url, return to the command line client and add a remote to the repo you want to move. Then, push it.
Verifying the Atlas 2 Git Server’s identity
Note that you may be prompted to verify the identity of the Atlas 2 git server the first time you push. If so, just type “yes” at the prompt.Your session should look something like this.
$ git remote add atlas2 git@54.84.204.203:odewahn/the-github-book.git
admins-air-5:1234000000486 odewahn$ git push atlas2 master
The authenticity of host '54.84.204.203 (54.84.204.203)' can't be established.
RSA key fingerprint is 35:4b:68:ee:42:aa:2a:b3:0e:0a:6f:87:0e:5e:b3:87.
Are you sure you want to continue connecting (yes/no)? yes
Warning: Permanently added '54.84.204.203' (RSA) to the list of known hosts.
Counting objects: 2831, done.
Delta compression using up to 4 threads.
Compressing objects: 100% (1329/1329), done.
Writing objects: 100% (2831/2831), 20.34 MiB | 1.30 MiB/s, done.
Total 2831 (delta 1388), reused 2831 (delta 1388)
To git@54.84.204.203:odewahn/the-github-book.git
 * [new branch]      master -> master