Homebridge Nature Remo TV Remote
Nature Remoに登録したテレビリモコンをhomebridgeに追加します

## 📲 インストール
[config-ui-x](https://github.com/oznu/homebridge-config-ui-x)の「プラグイン」タブから`homebridge-nature-remo-tv-remote`で検索、もしくは下記のコマンドでインストールしてください。
```sh
npm i -g homebridge-nature-remo-tv-remote
```
## ✅ デバイスの設定
### 1. Nature RemoのOAuth2アクセストークンを取得
[こちら](https://home.nature.global/)からアクセストークンを取得します。
### 2. 登録するテレビのAppliance IDを取得
ターミナルを開き、下記のコマンドを実行してください。`${access-token}`には、1.で取得したトークンを入れてください。
```sh
curl -X GET "https://api.nature.global/1/appliances" -H "Authorization: Bearer ${access-token}" > appliance_id.json
```
保存された`appliance_id.json`を開いて、Appliance IDを確認してください。
```json
{
{
"id": "xxxxxxxx-xxxx-xxxx-xxxx-xxxxxxxxxx", // <- **Appliance ID**
"device": {...},
"model": null,
"type": "TV",
"nickname": "テレビ", // <- NatureRemoに登録されている名前
"image": "ico_tv",
"settings": null,
"aircon": null,
"signals": [...],
"tv": { ... }
},
...
}
```
### 3. homebridgeに登録する
[config-ui-x](https://github.com/oznu/homebridge-config-ui-x)を使用すると、簡単に設定を追加できます。
「プラグイン」タブから「homebridge-nature-remo-tv-remote」の設定を開き、1.,2.で取得したアクセストークンとAppliance IDを入力します。
「保存」を押した後、homebridgeを再起動してください。
 ## 🏠 Homeアプリへ追加
既にhomebridgeをブリッジとして追加している場合でも、新しく追加する必要があります。
Home.appを開き、「アクセサリを追加」→「コードがないか、スキャンできません」→(追加したテレビを選択)→「このまま追加」を押してください。
HomeKit設定コードは、[config-ui-x](https://github.com/oznu/homebridge-config-ui-x)から確認できます。
## 🏠 Homeアプリへ追加
既にhomebridgeをブリッジとして追加している場合でも、新しく追加する必要があります。
Home.appを開き、「アクセサリを追加」→「コードがないか、スキャンできません」→(追加したテレビを選択)→「このまま追加」を押してください。
HomeKit設定コードは、[config-ui-x](https://github.com/oznu/homebridge-config-ui-x)から確認できます。

 ## 🔖 Advance setting
Example button name
| button name | detail |
|----|----|
| `power` | TV Power |
| `input-terrestrial` | Select Terrestrial |
| `input-bs` | Select BS |
| `input-cs` | Select CS |
| `ch-1` | Select 1 channel |
| `ch-2` | Select 2 channel |
| `ch-3` | Select 3 channel |
| `ch-4` | Select 4 channel |
| `ch-5` | Select 5 channel |
| `ch-6` | Select 6 channel |
| `ch-7` | Select 7 channel |
| `ch-8` | Select 8 channel |
| `ch-9` | Select 9 channel |
| `ch-10` | Select 10 channel |
| `ch-11` | Select 11 channel |
| `ch-12` | Select 12 channel |
| `ch-up` | Next channnel |
| `ch-down` | Previous channel |
| `back` | Back button |
| `ok` | OK/Select button |
| `vol-up` | Volume up |
| `vol-down` | Volume down |
In addition, there are various other buttons.
You can check the list of buttons from the `appliance_id.json` that you got when checking the appliance ID.
```json
{
{
"id": "xxxxxxxx-xxxx-xxxx-xxxx-xxxxxxxxxx",
"device": {...},
"model": null,
"type": "TV",
"nickname": "テレビ", // <- NatureRemoに登録されている名前
"image": "ico_tv",
"settings": null,
"aircon": null,
"signals": [...],
"tv": {
"button": [
{
"name": "power", // <- **button name**
"image": "ico_io",
"label": "TV_power"
},
{
"name": "select-input-src", // <- **button name**
"image": "ico_input",
"label": "TV_source"
},
...
]
}
},
...
}
```
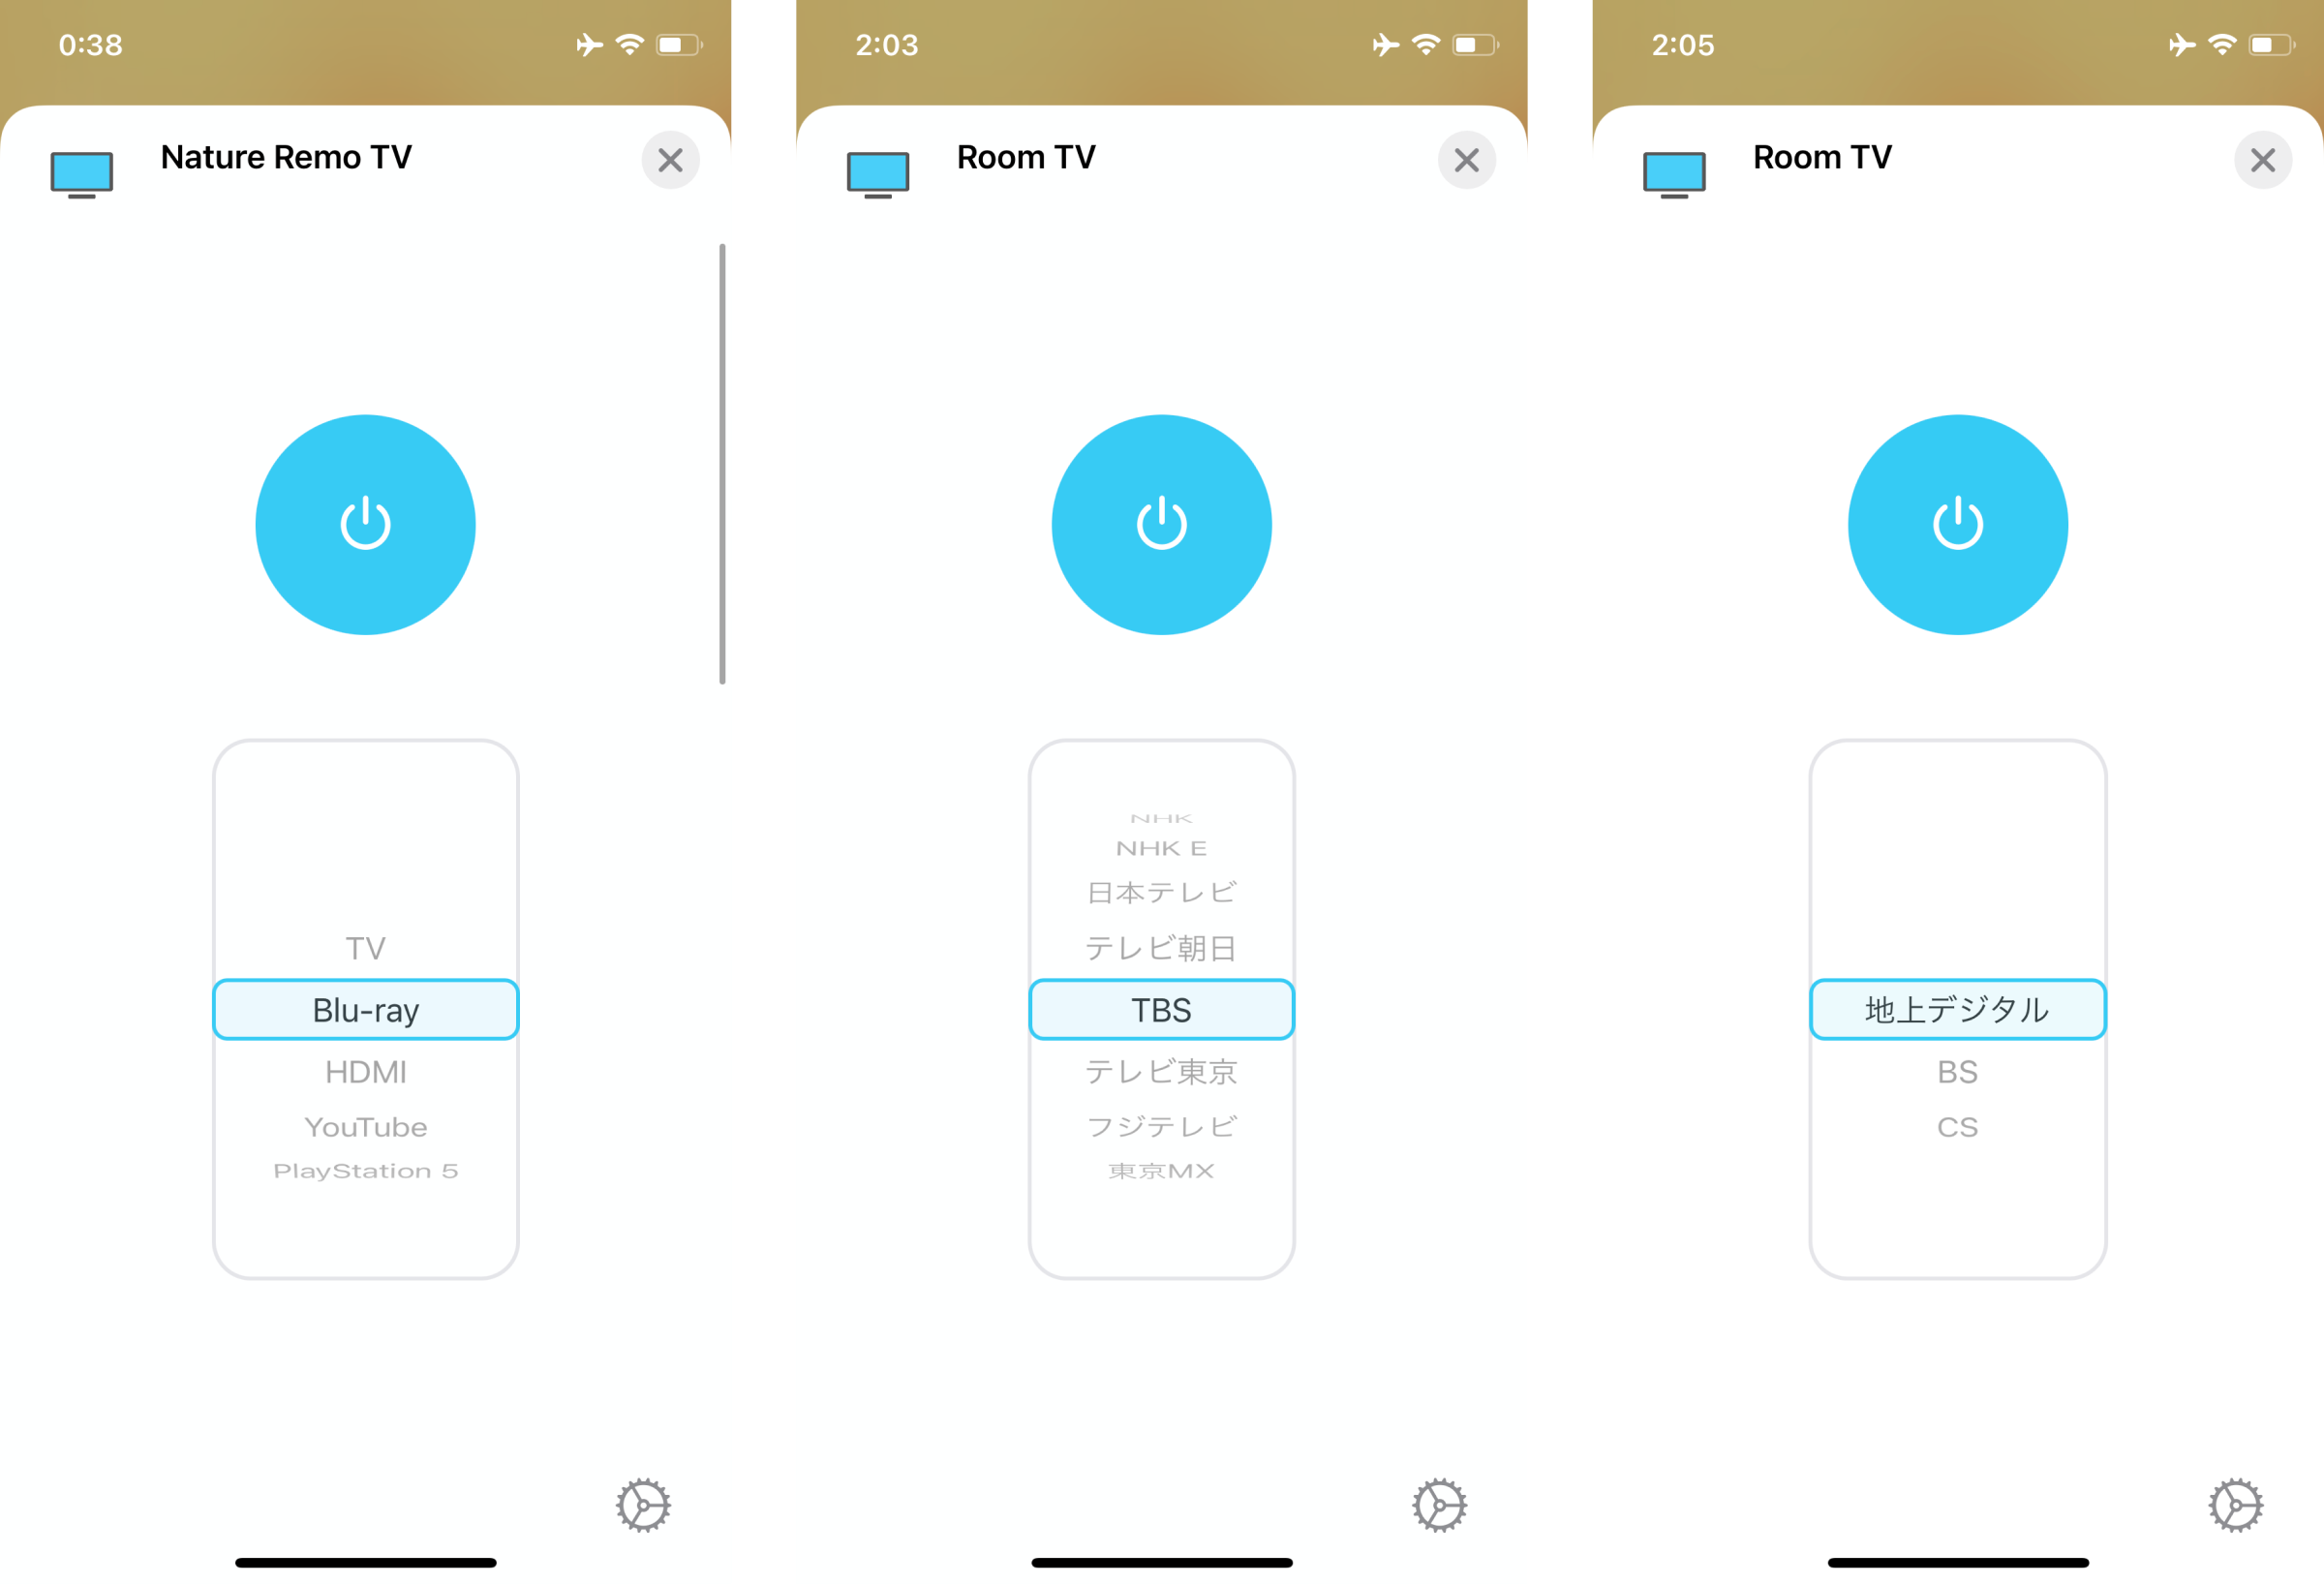
Set Input Sources
Allows you to set the input source for the TV.
By setting it, you can select the input source from the Home app.
 Open the plugin tab of config-ui-x and go to Settings and open Sources.
In **Label**, enter the label of the input source.
And **Button Name**, enter the name of the button you got from Nature Remo.
Open the plugin tab of config-ui-x and go to Settings and open Sources.
In **Label**, enter the label of the input source.
And **Button Name**, enter the name of the button you got from Nature Remo.
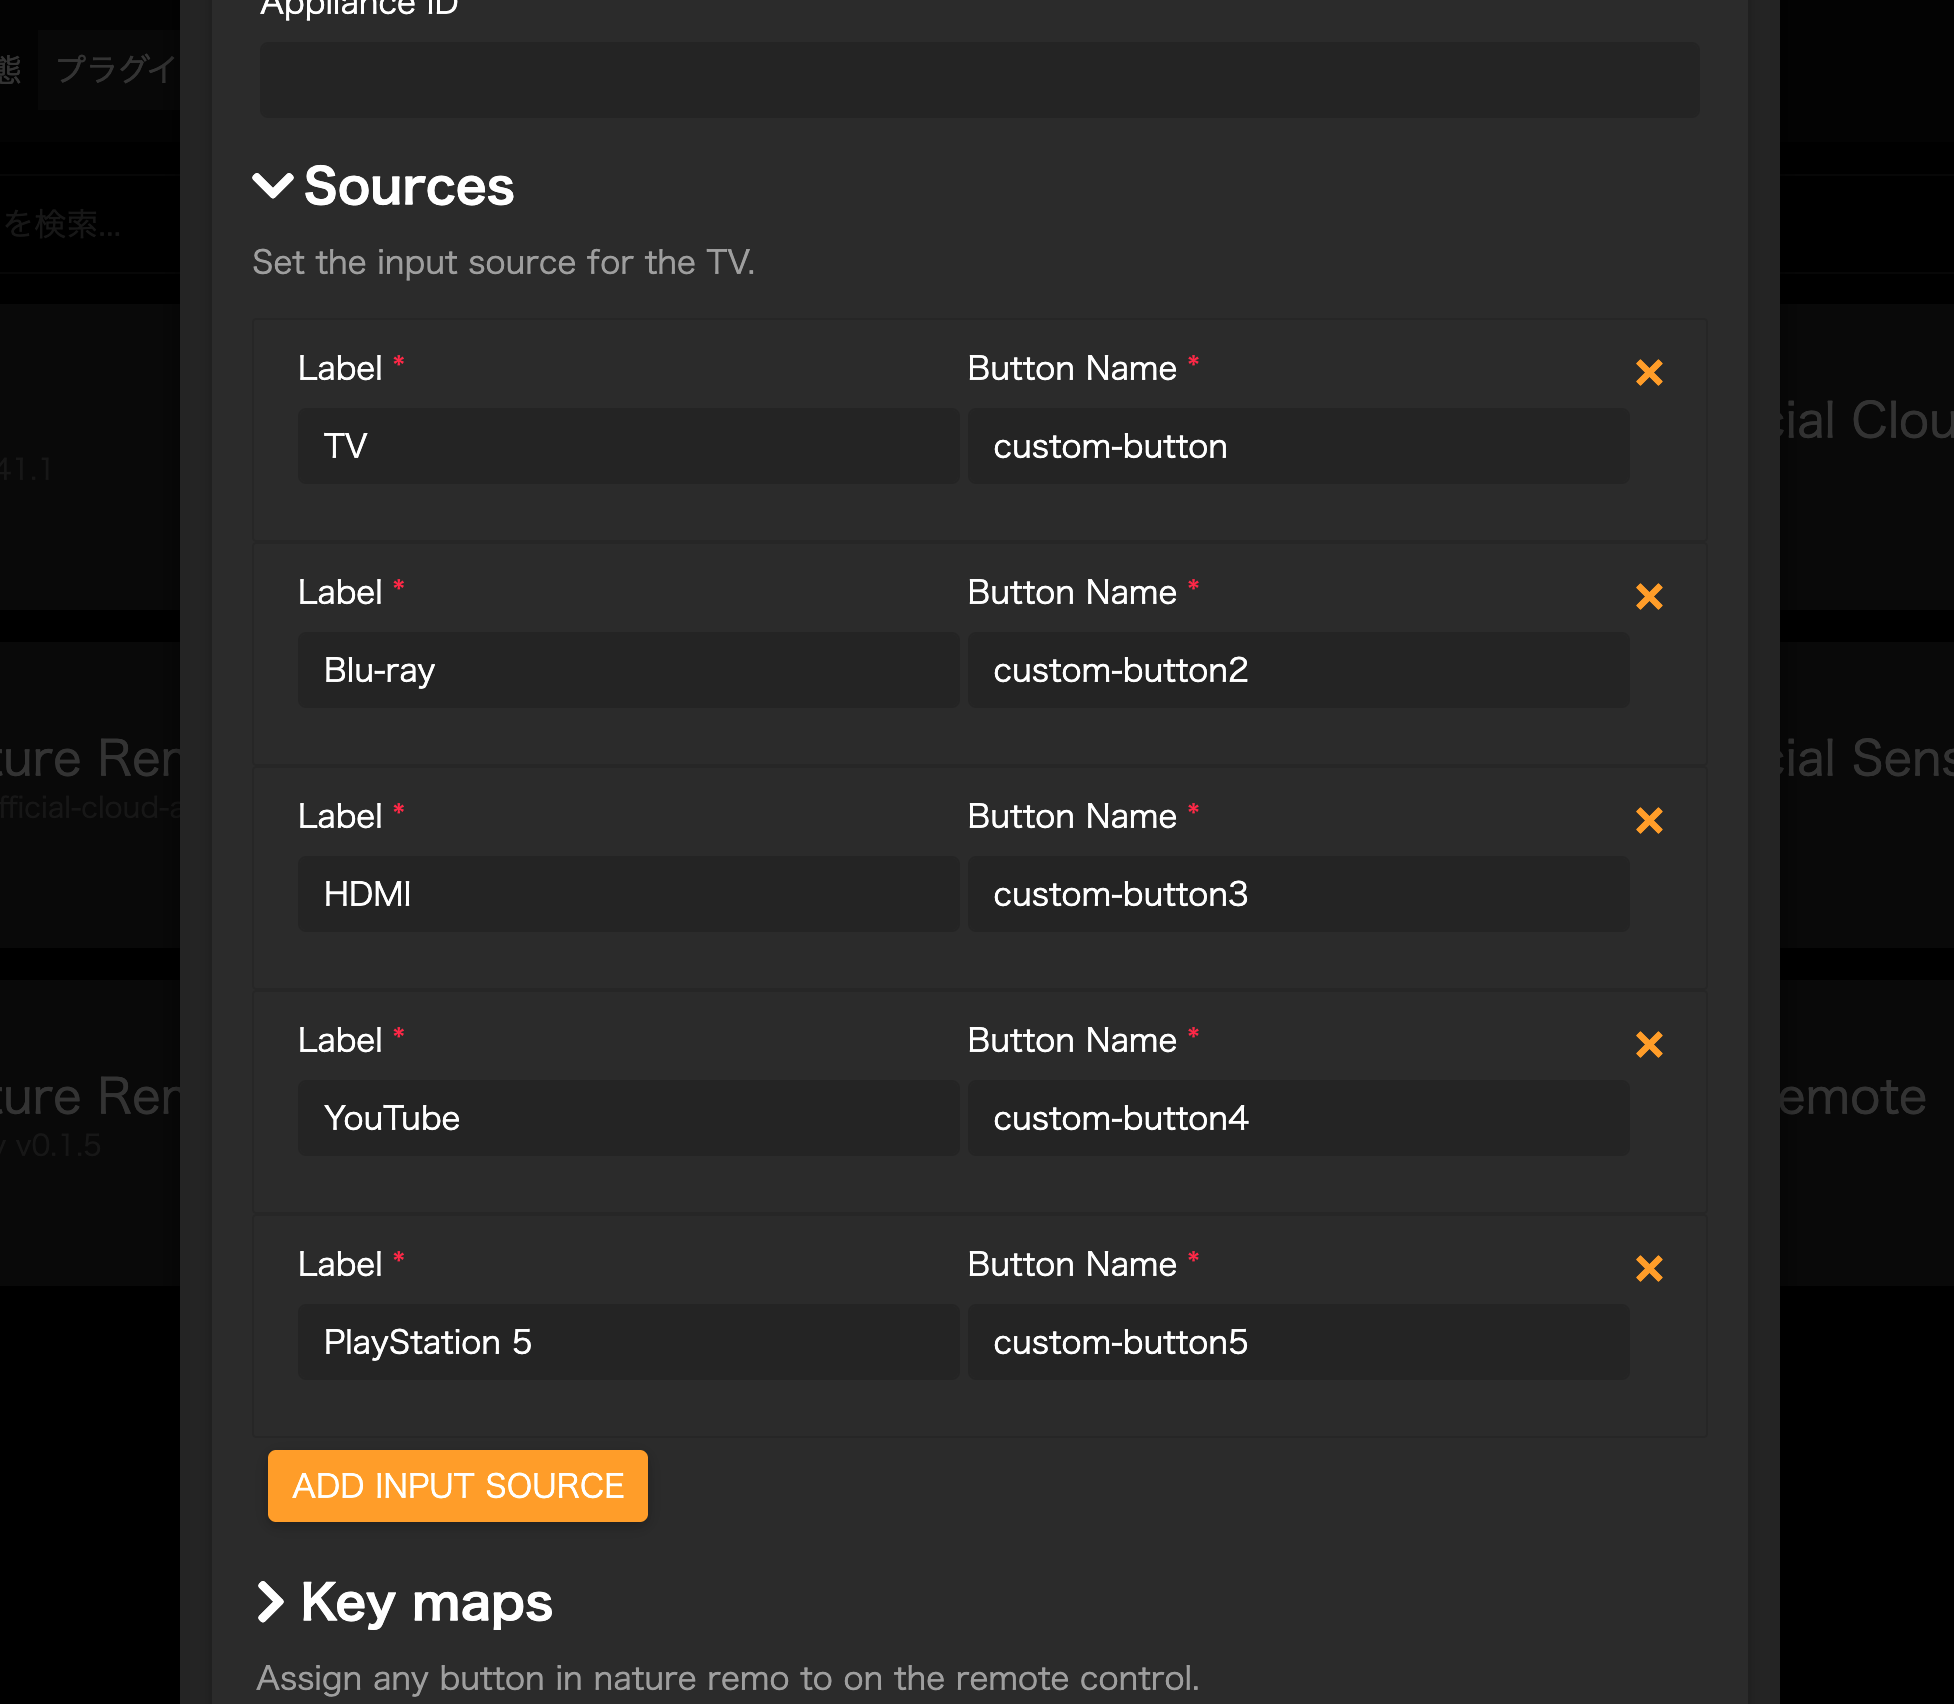 If you have changed the input sources, **you will need to restart homebridge and re-register in home.app.**
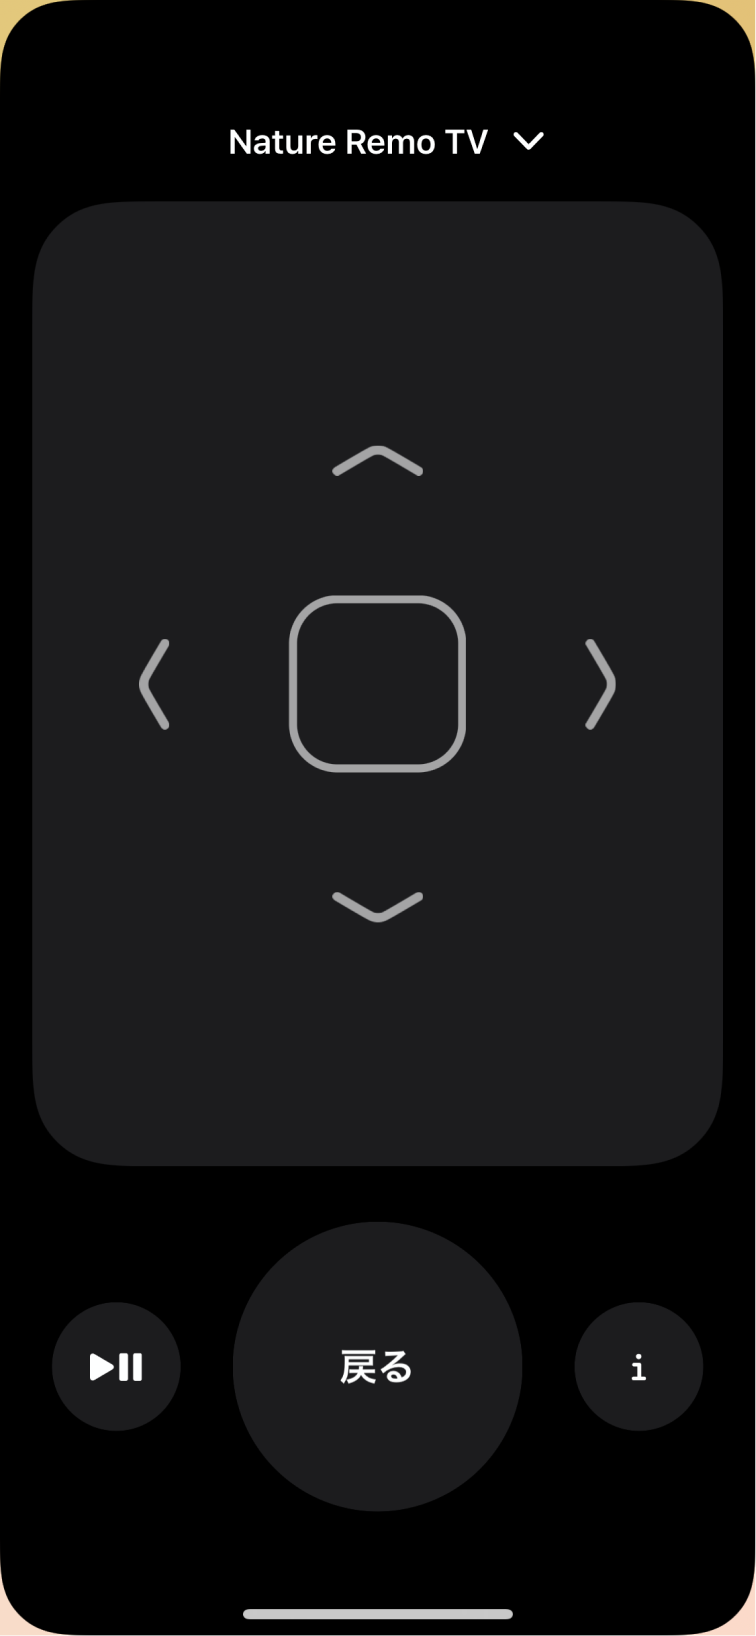
Relocate the keymap
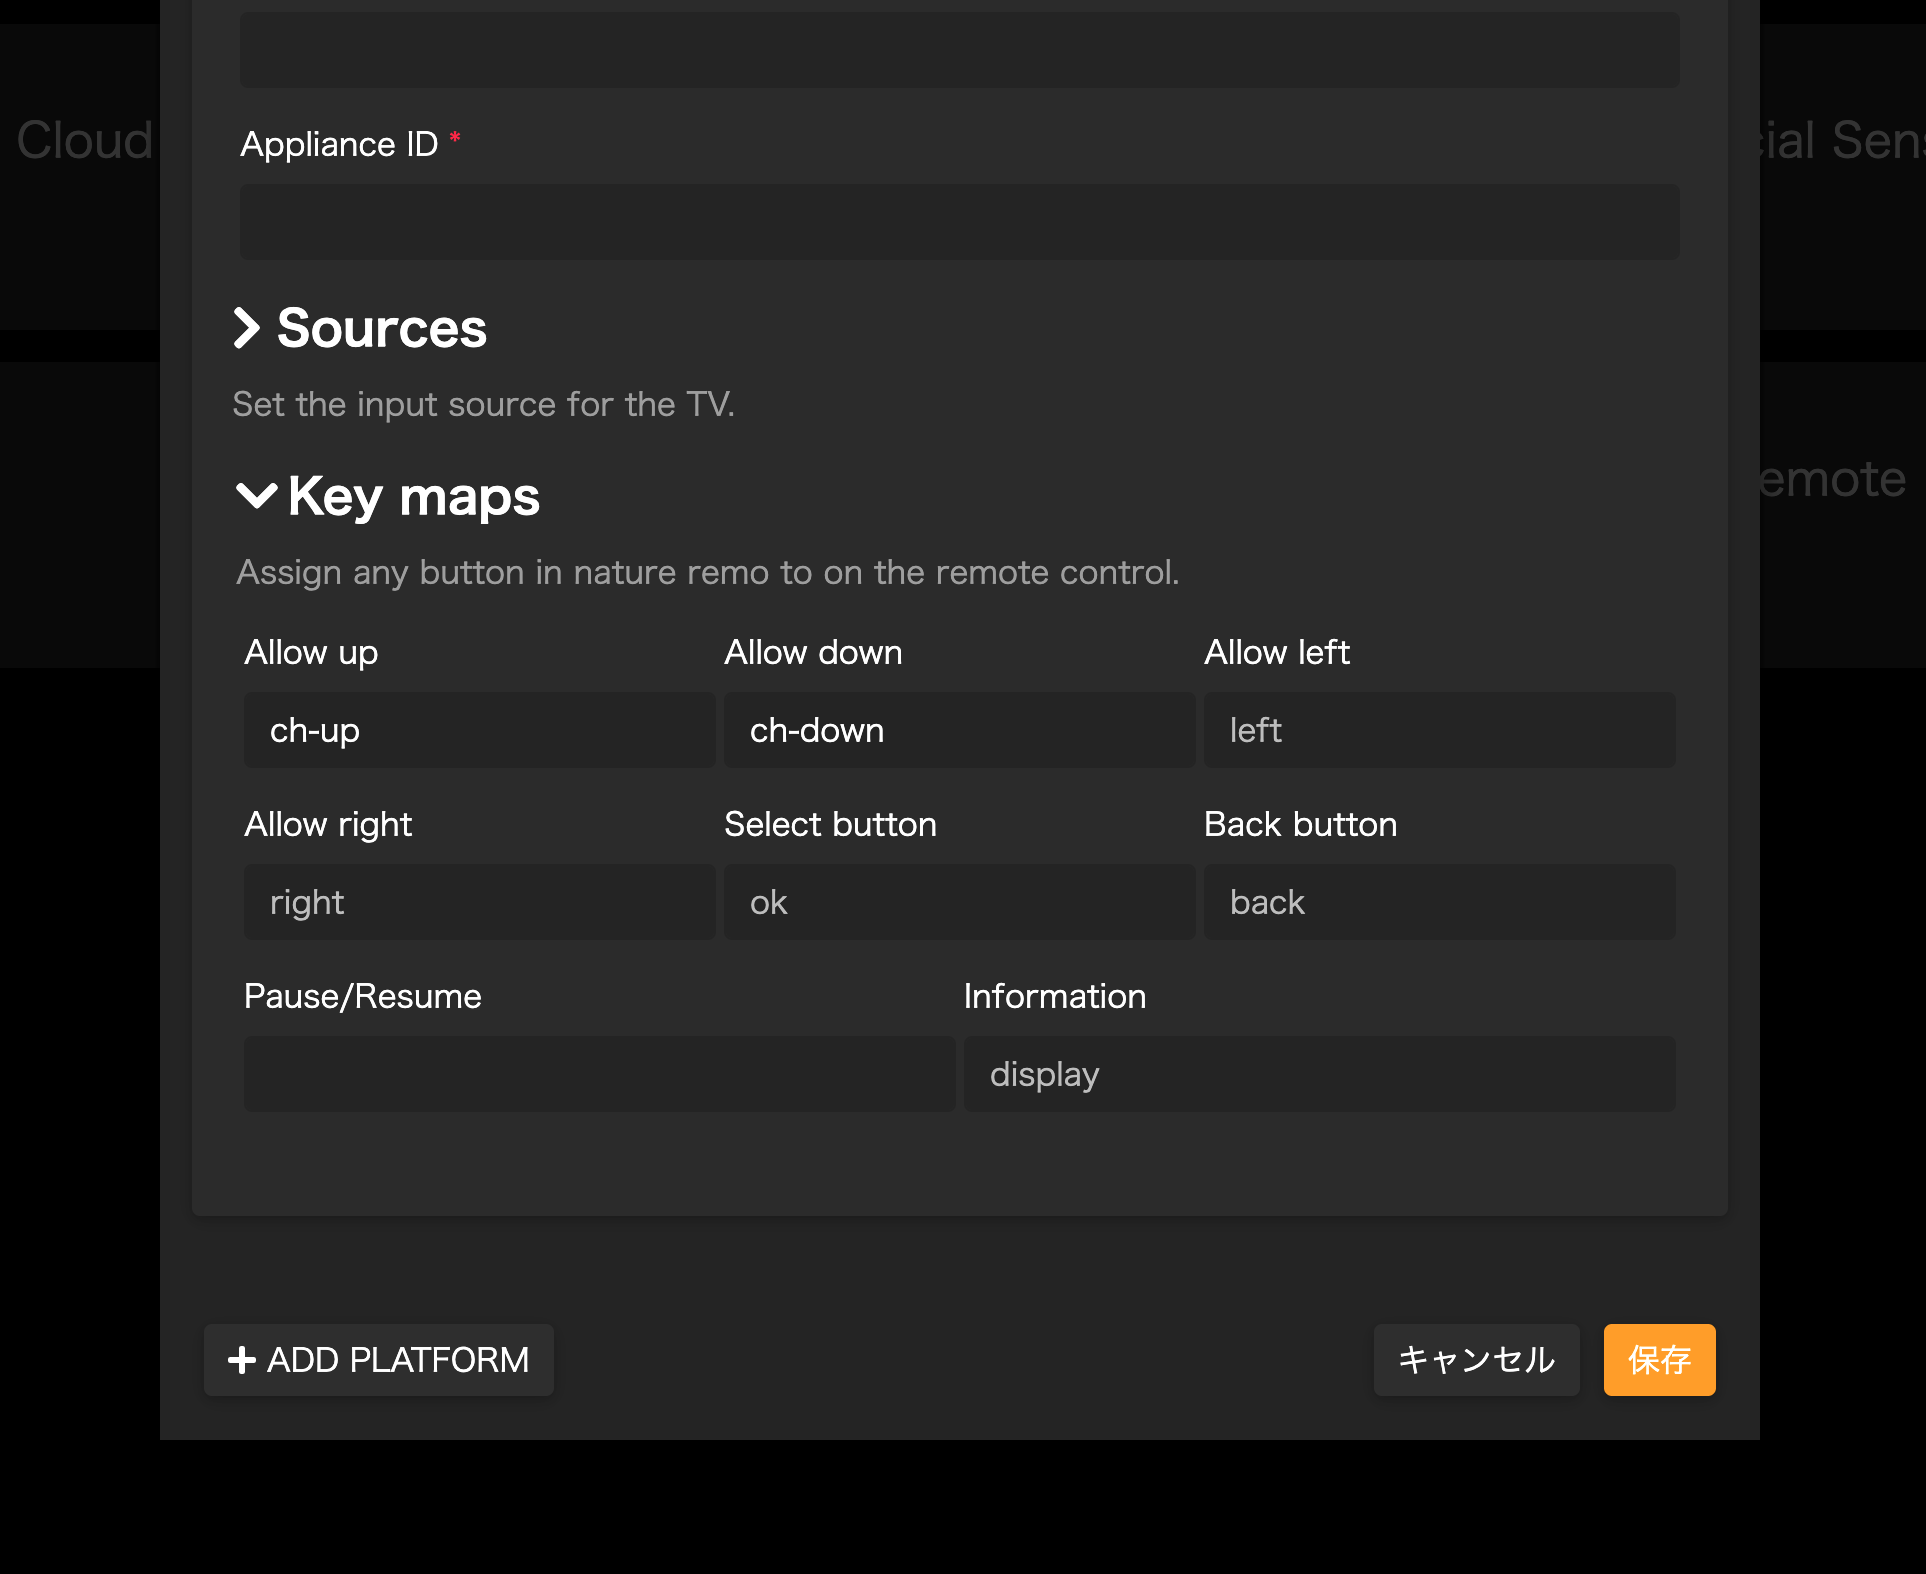
Assign any button on TV remote in the Control Center to any button.
 Open the plugin tab of config-ui-x and go to Settings and open Key maps.
## 🤝 Contributing
1. Fork it (https://github.com/sskmy1024y/homebridge-nature-remo-tv-remote/fork)
2. Create your feature branch (git checkout -b my-new-feature)
3. Commit your changes (git commit -am 'Add some feature')
4. Push to the branch (git push origin my-new-feature)
5. Create a new Pull Request
## 🎫 Licence
The MIT License (MIT)
* Copyright (c) 2021 Sho YAMASHITA
## 🖋 Author
* [sskmy1024y](https://github.com/sskmy1024y)