
ignite boilerplate andross typescript
[](http://standardjs.com/)
* This Boiler Plate is just my Customized version of ignite Andross
* Installed And Configed With TypeScript
* Updated React Native To The Lastest Version (0.57.2)
* Added Rtl Support
* Added Switchable ColorScheme Support
* Add Better Multi language Support And Add Language To App Settings Redux
* Keep Settings Even When The App Closed
* TODO // Internal Set Of Material Components
* HighLighted Dependencies that installed :
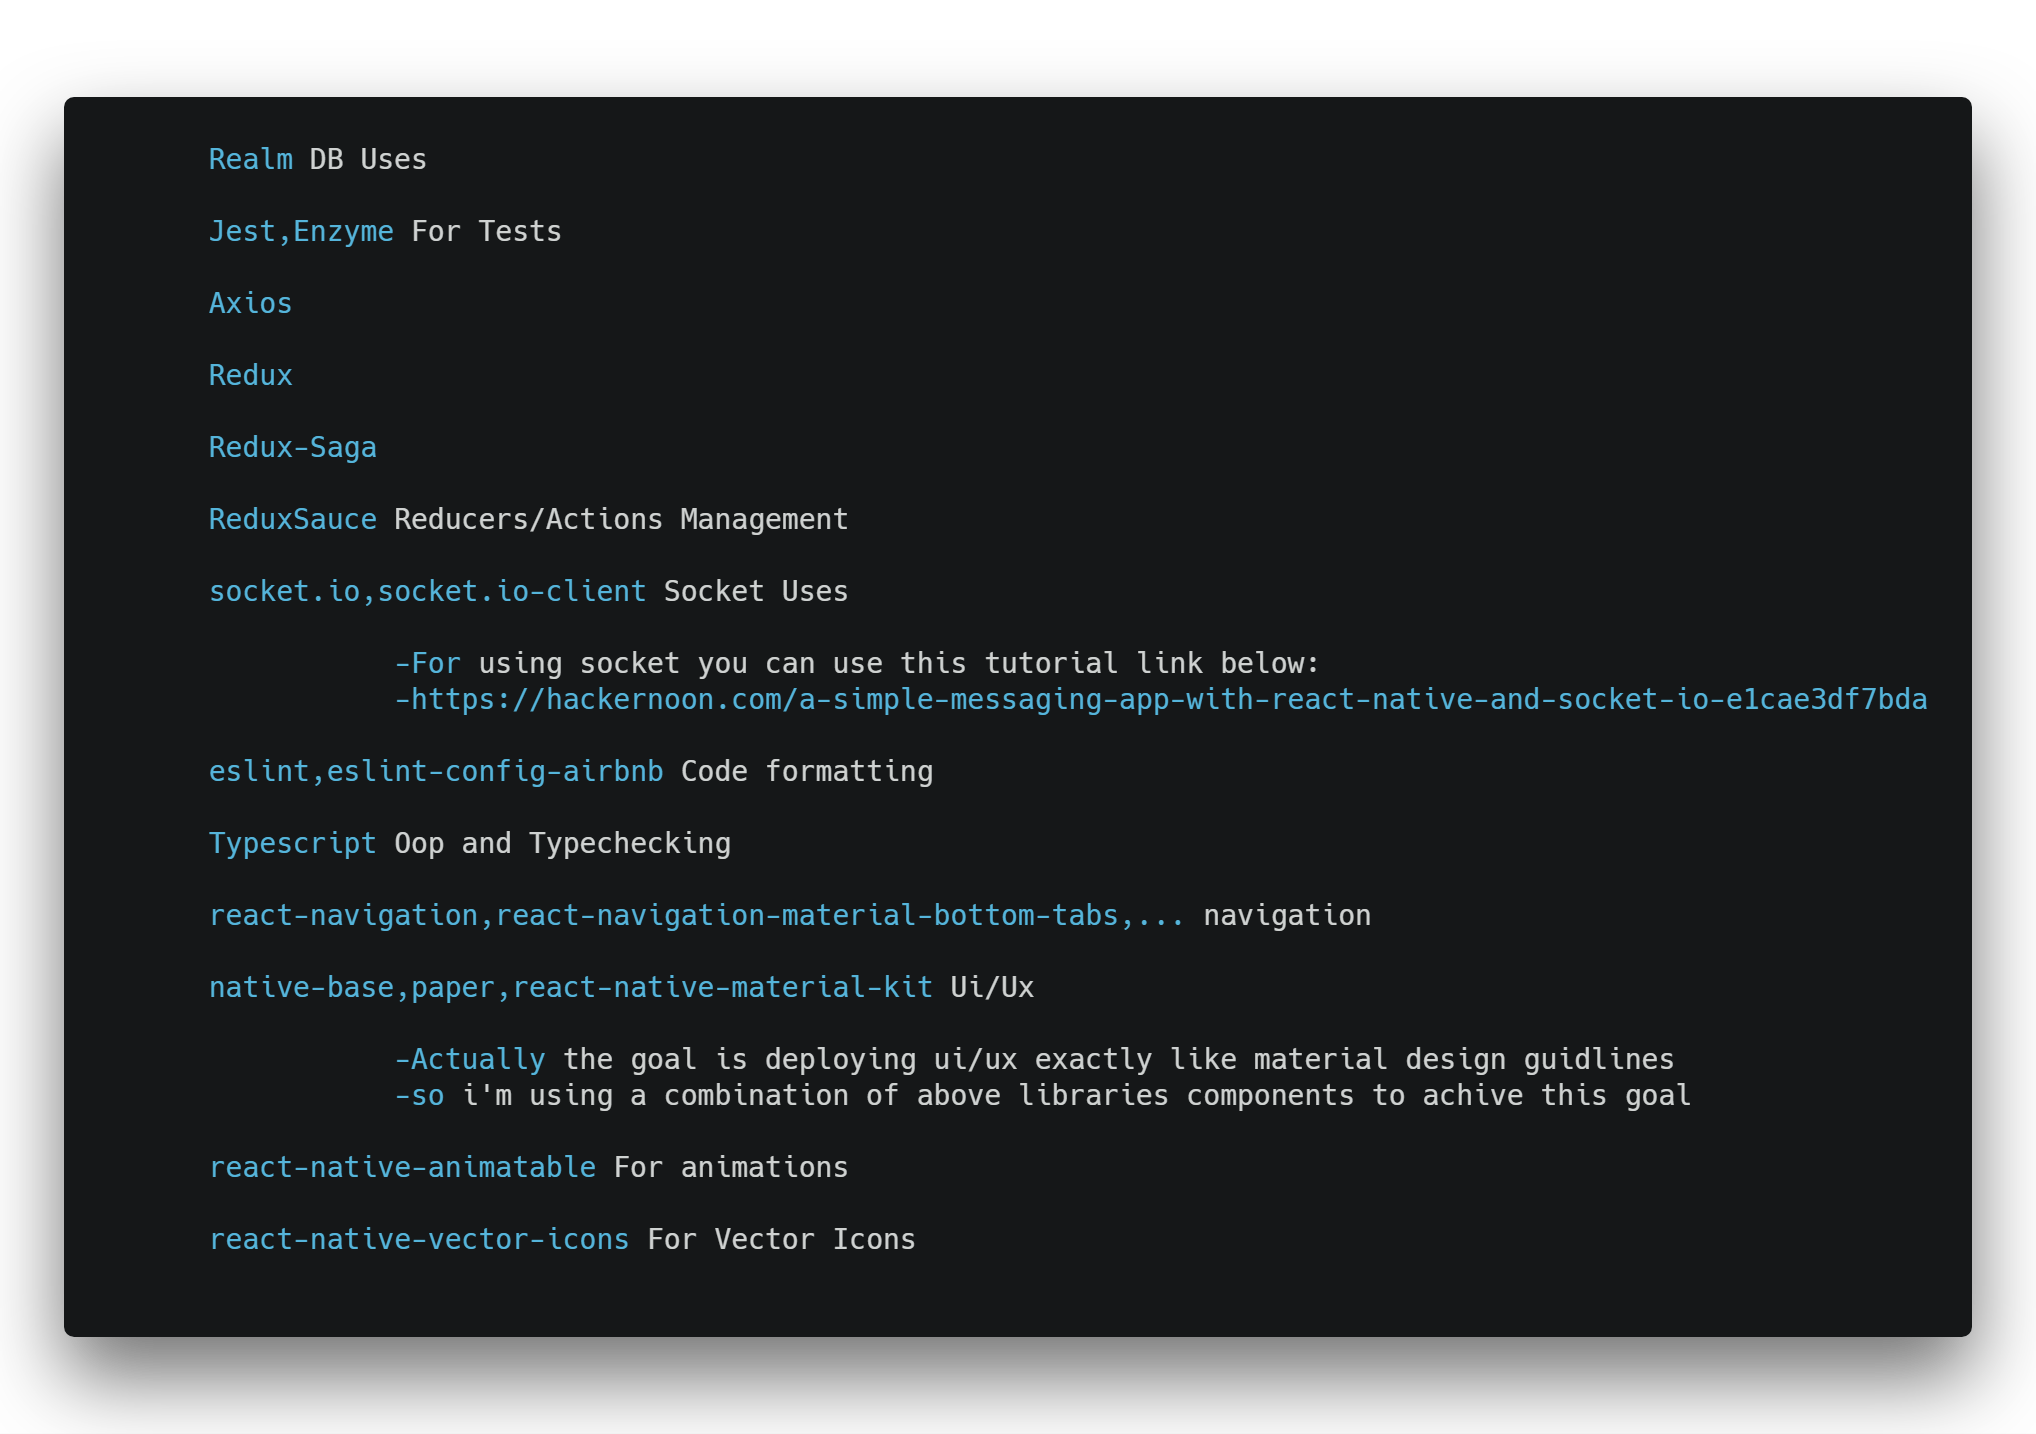 You can see more on package .json
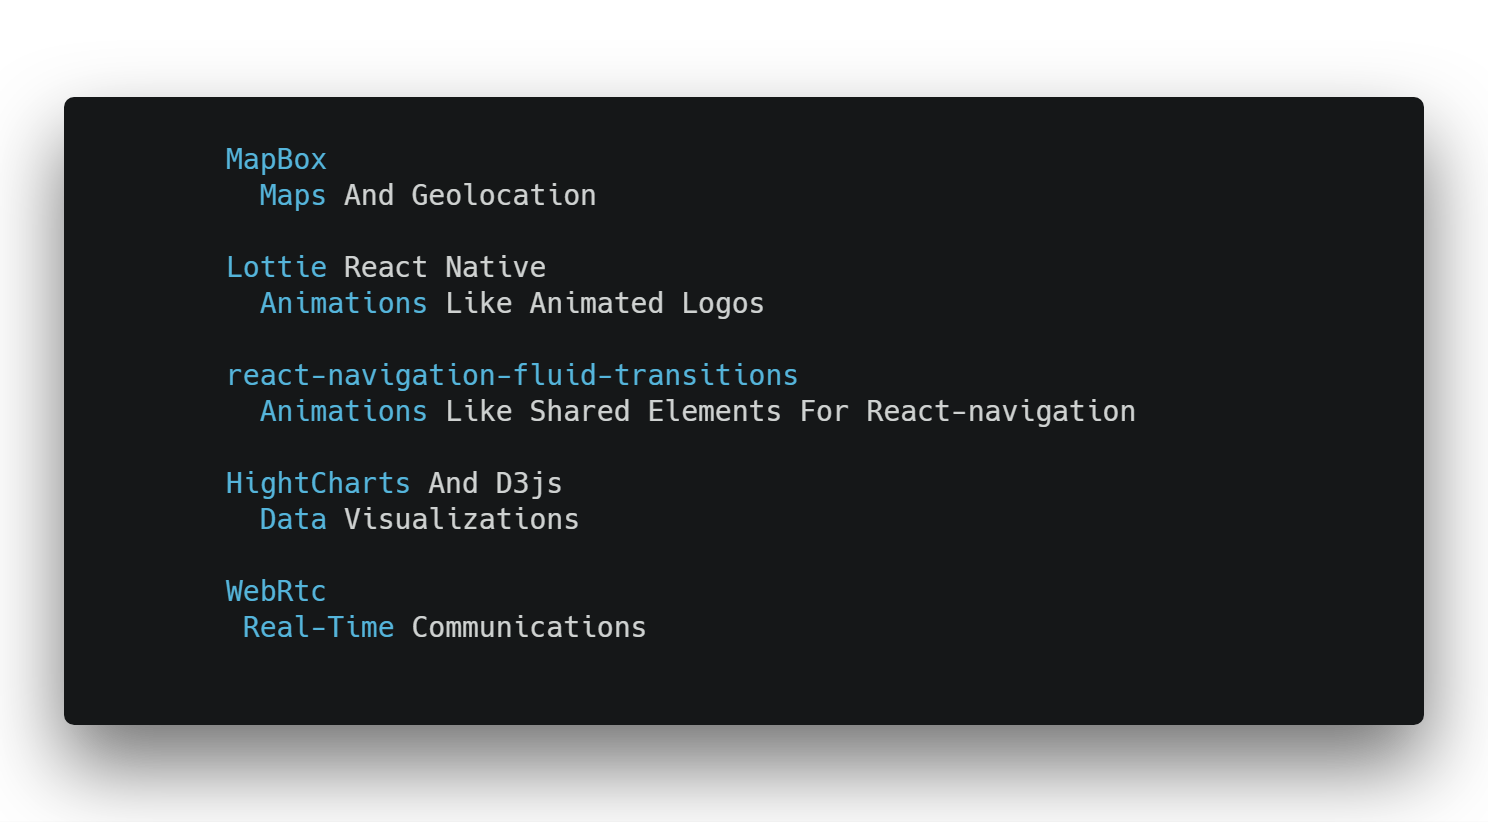
* Recommended Dependencies :
You can see more on package .json
* Recommended Dependencies :
 ## :fire: Ignite Cli
First you must install ignite cli as gobal with this command
```
npm install -g ignite-cli
```
For More Cli Instructions Please refer to below sections and ignite boilerplate page :
https://github.com/infinitered/ignite
## :snowflake: Usage
You can create your app using this boilerplate with this commands
```
ignite new YourAppName -b ignite-boilerplate-andross-typescript
```
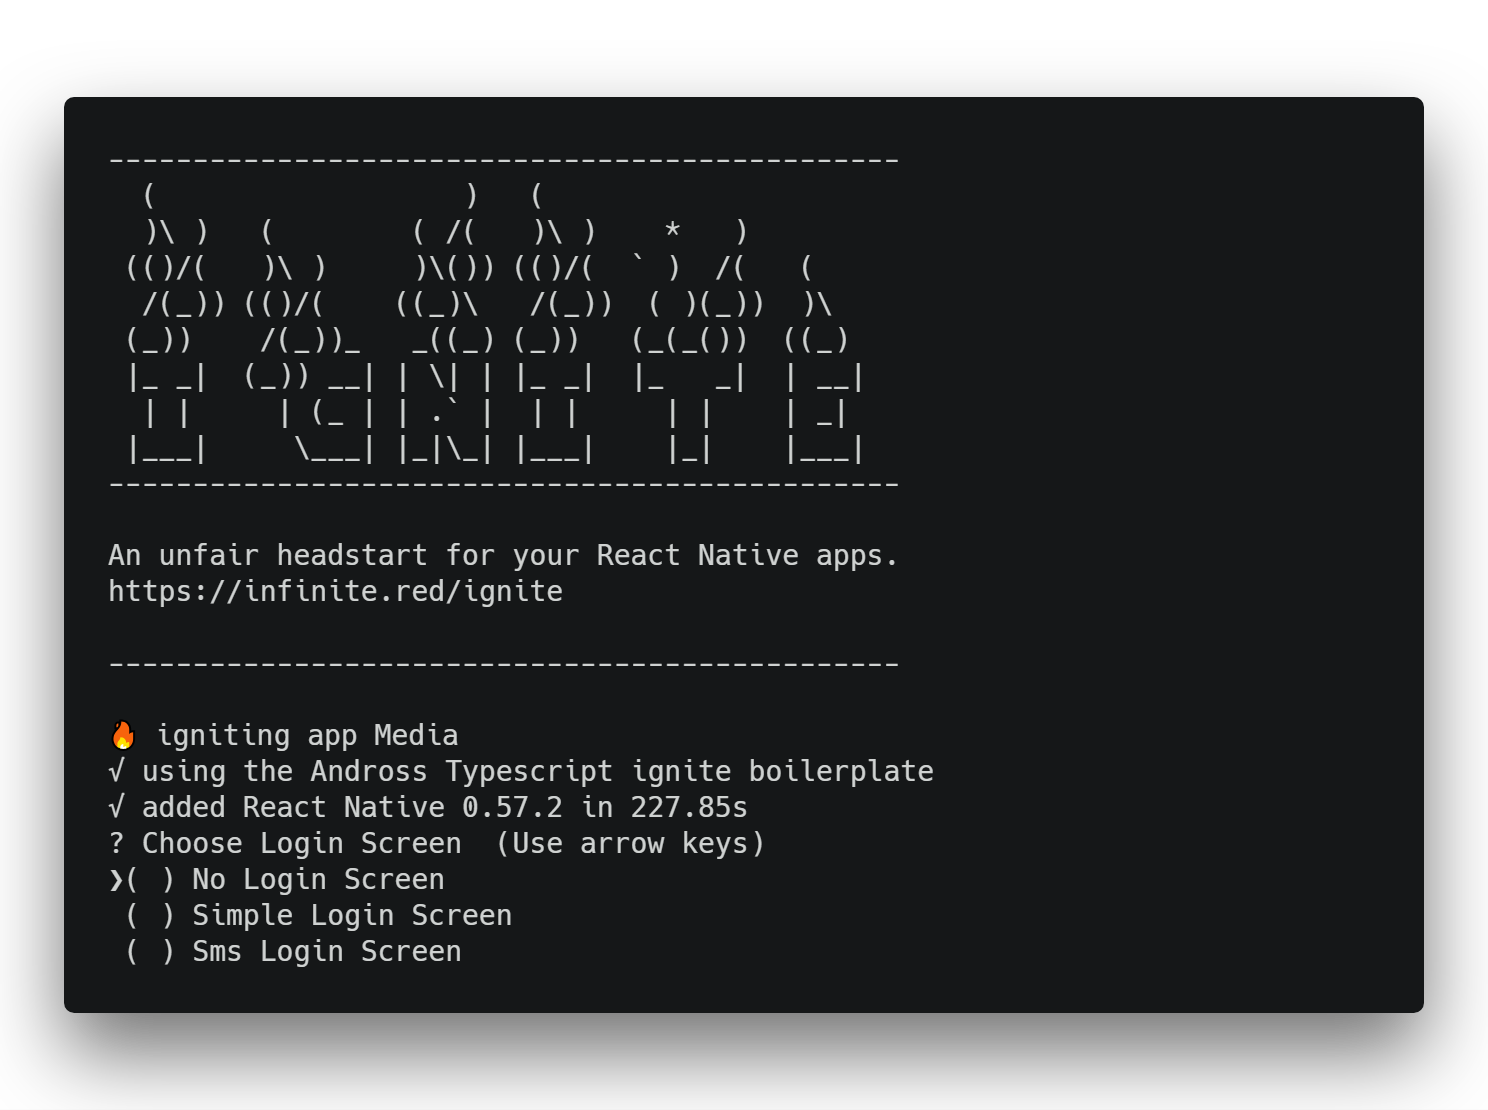
During the installation,
You can choose your login screen style or no login screen:
## :fire: Ignite Cli
First you must install ignite cli as gobal with this command
```
npm install -g ignite-cli
```
For More Cli Instructions Please refer to below sections and ignite boilerplate page :
https://github.com/infinitered/ignite
## :snowflake: Usage
You can create your app using this boilerplate with this commands
```
ignite new YourAppName -b ignite-boilerplate-andross-typescript
```
During the installation,
You can choose your login screen style or no login screen:
 if you choose a login screen, redux,components,login screen will be generated then you can change them.
You can see what will be these login screens look like in
Here
if you choose a login screen, redux,components,login screen will be generated then you can change them.
You can see what will be these login screens look like in
Here
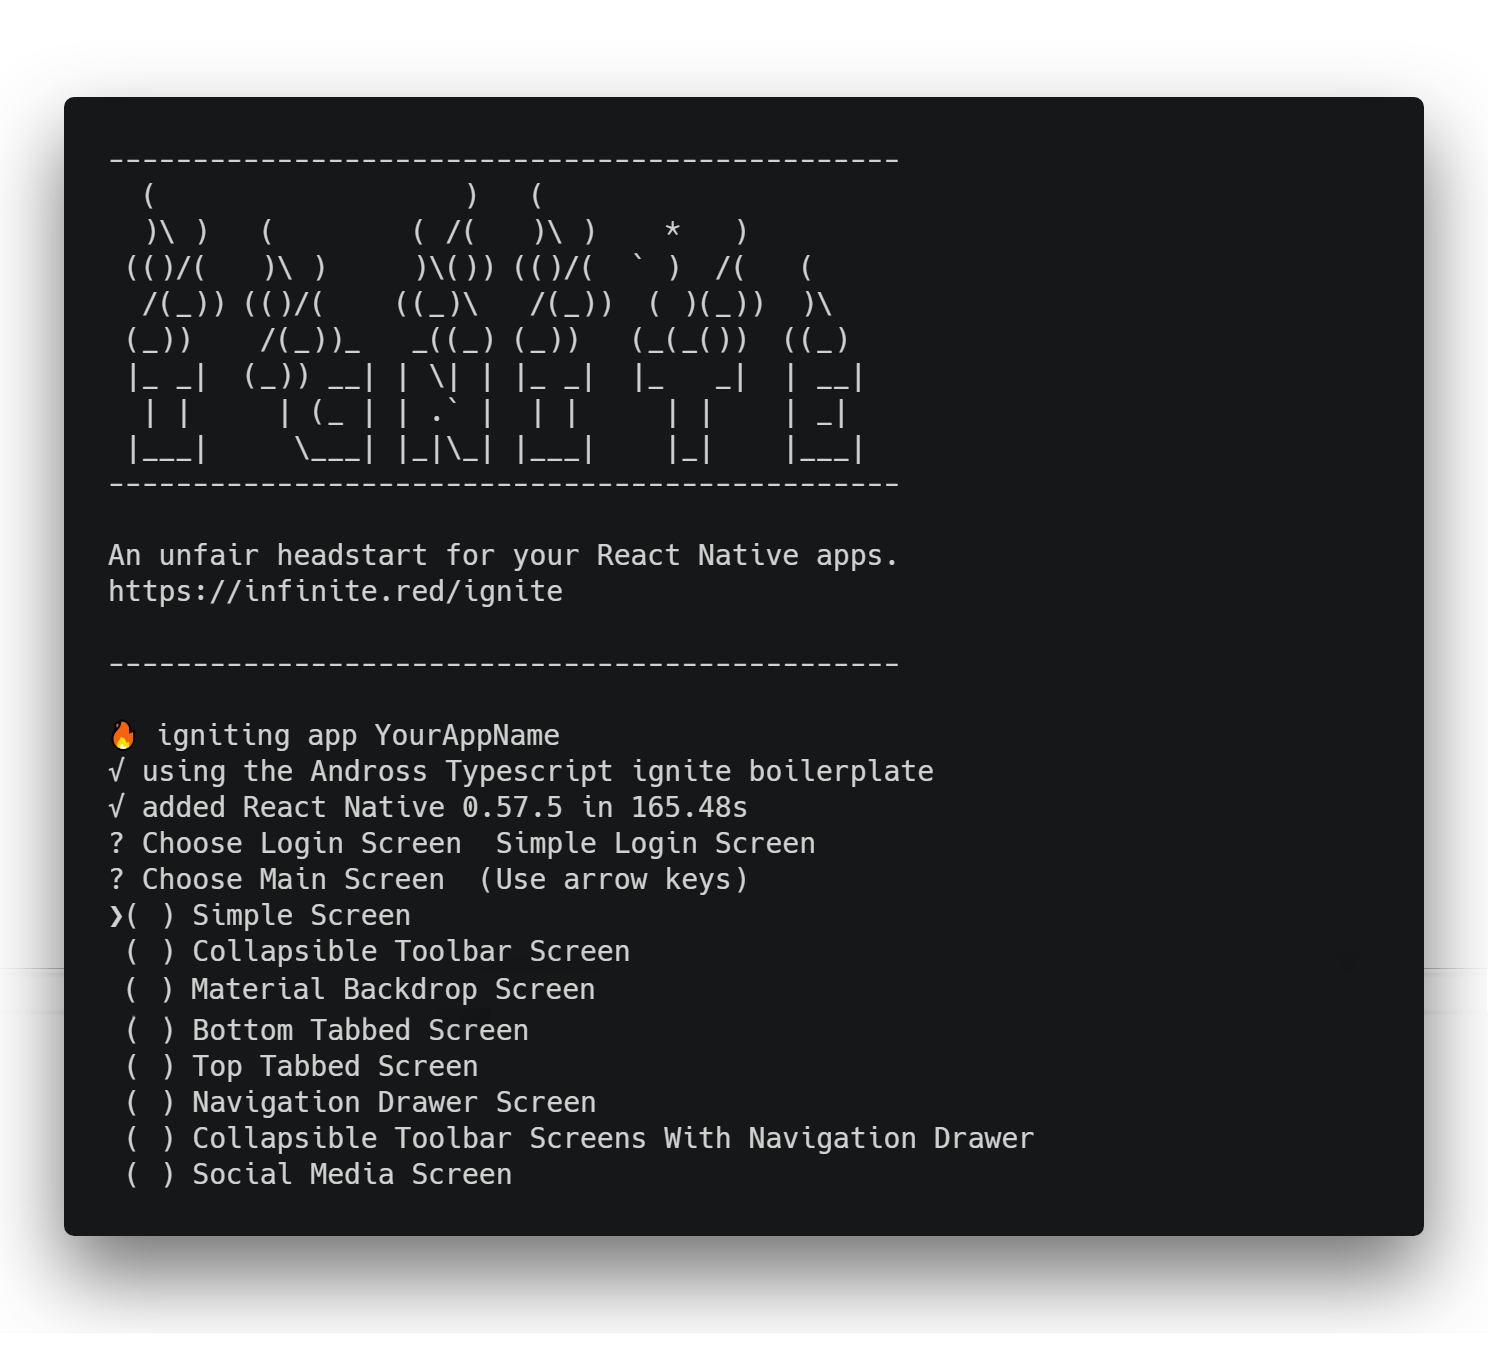
You can choose your main screen style or just a simple screen:
 You can see a gif and read about templates in below links:
Social Media
Bottom Tab Bar
Top Tab Bar
Navigation Drawer
You can work with combination of this options for example if you choose sms login and social media after installation your app will be like this:
after installation run below commands:
```
cd YourAppName
react-native link
npm start
react-native run-ios or react-native run-android
```
## :exclamation: Possible Errors
if you've got transform-hmr error on boundle so start your boundler with this command:
`` react-native start --reset-cache ``
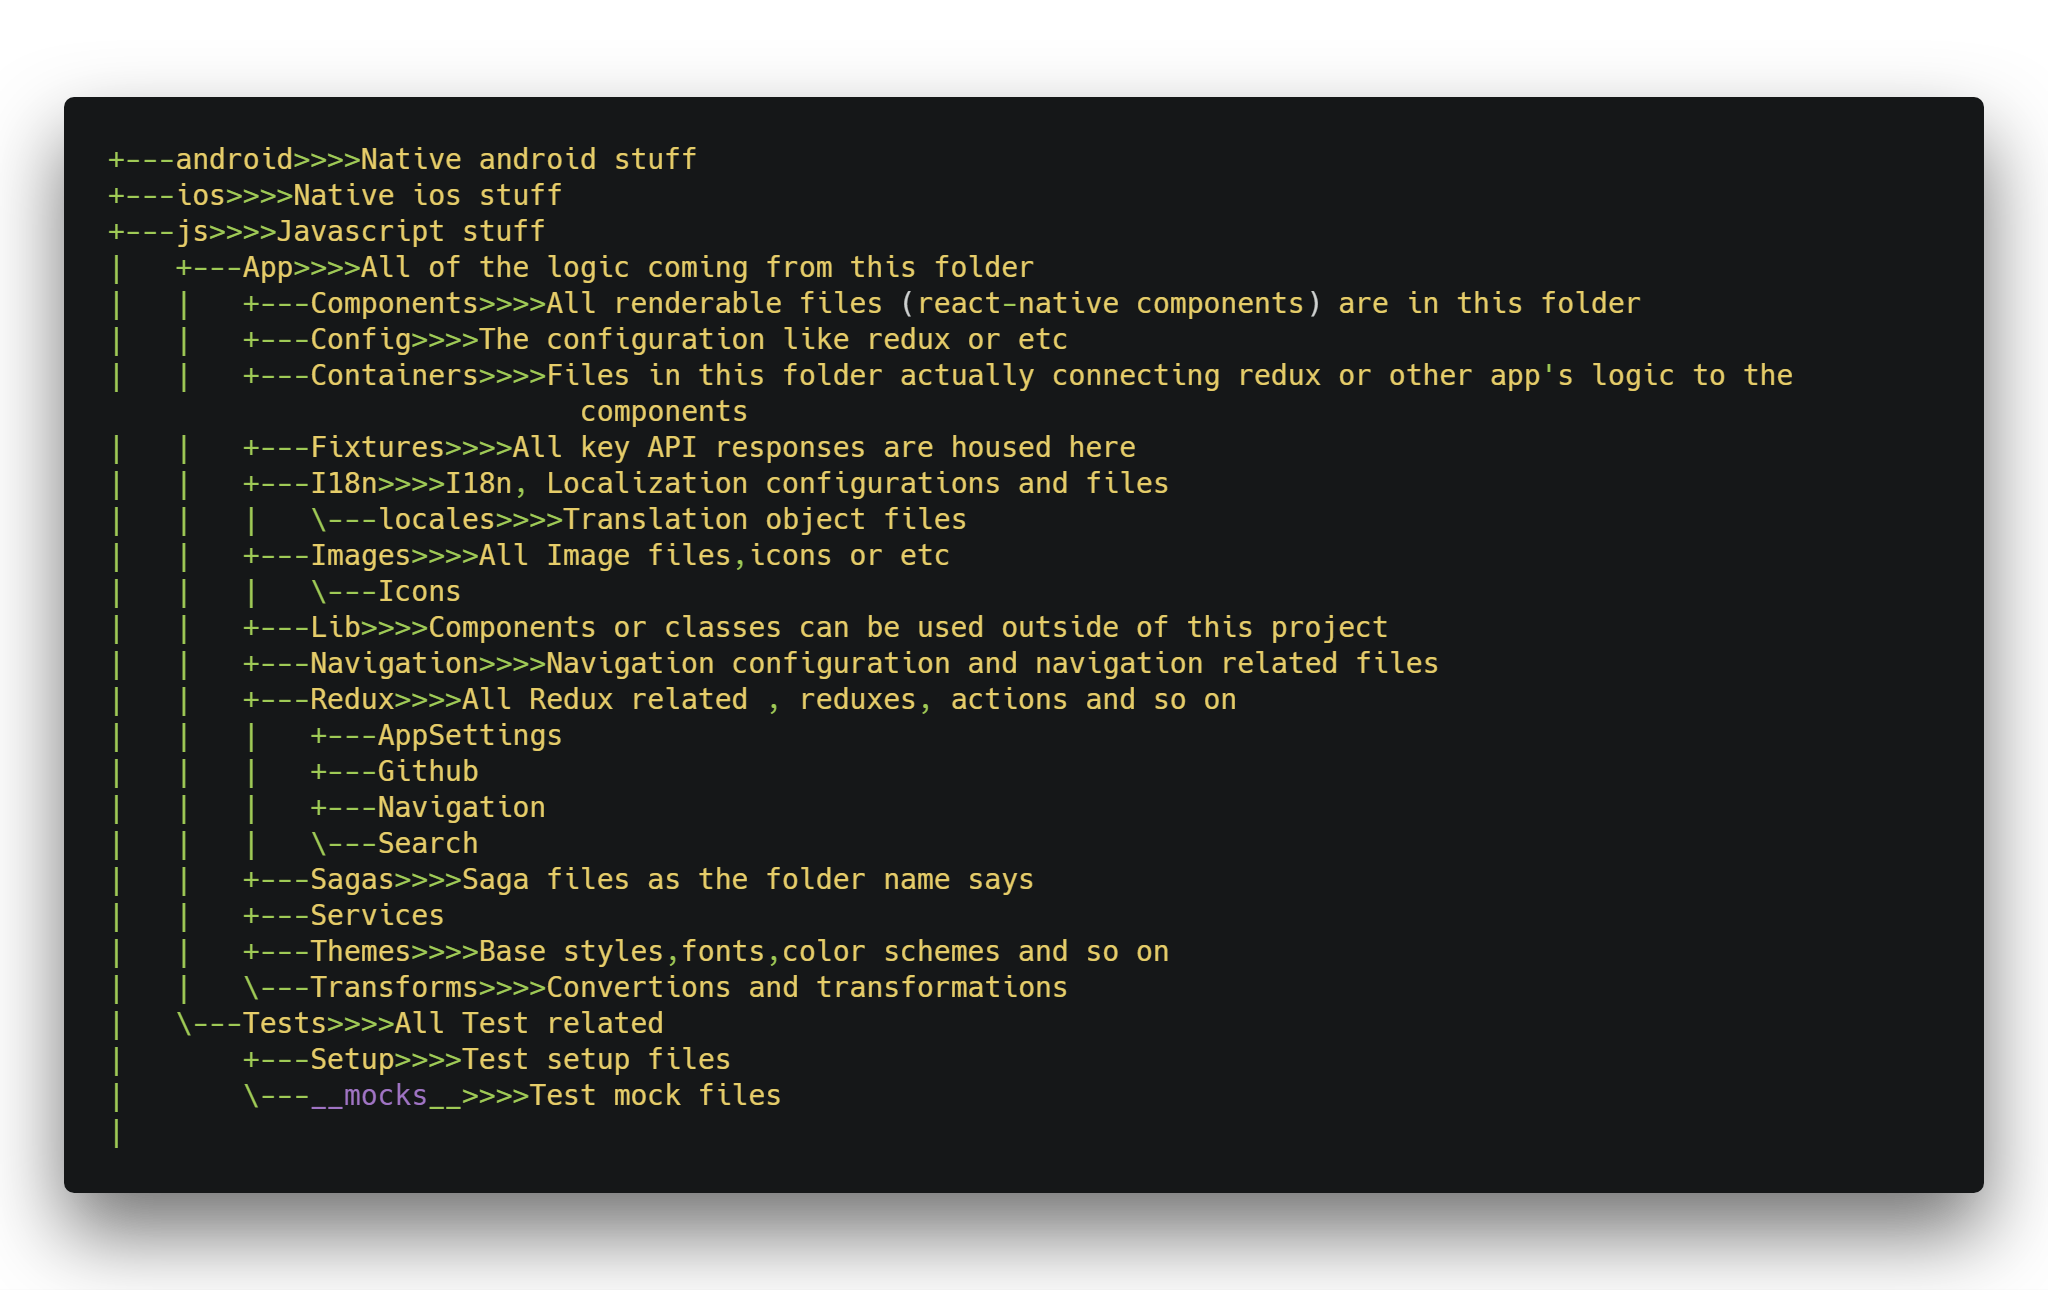
## :file_folder: Folder Structure
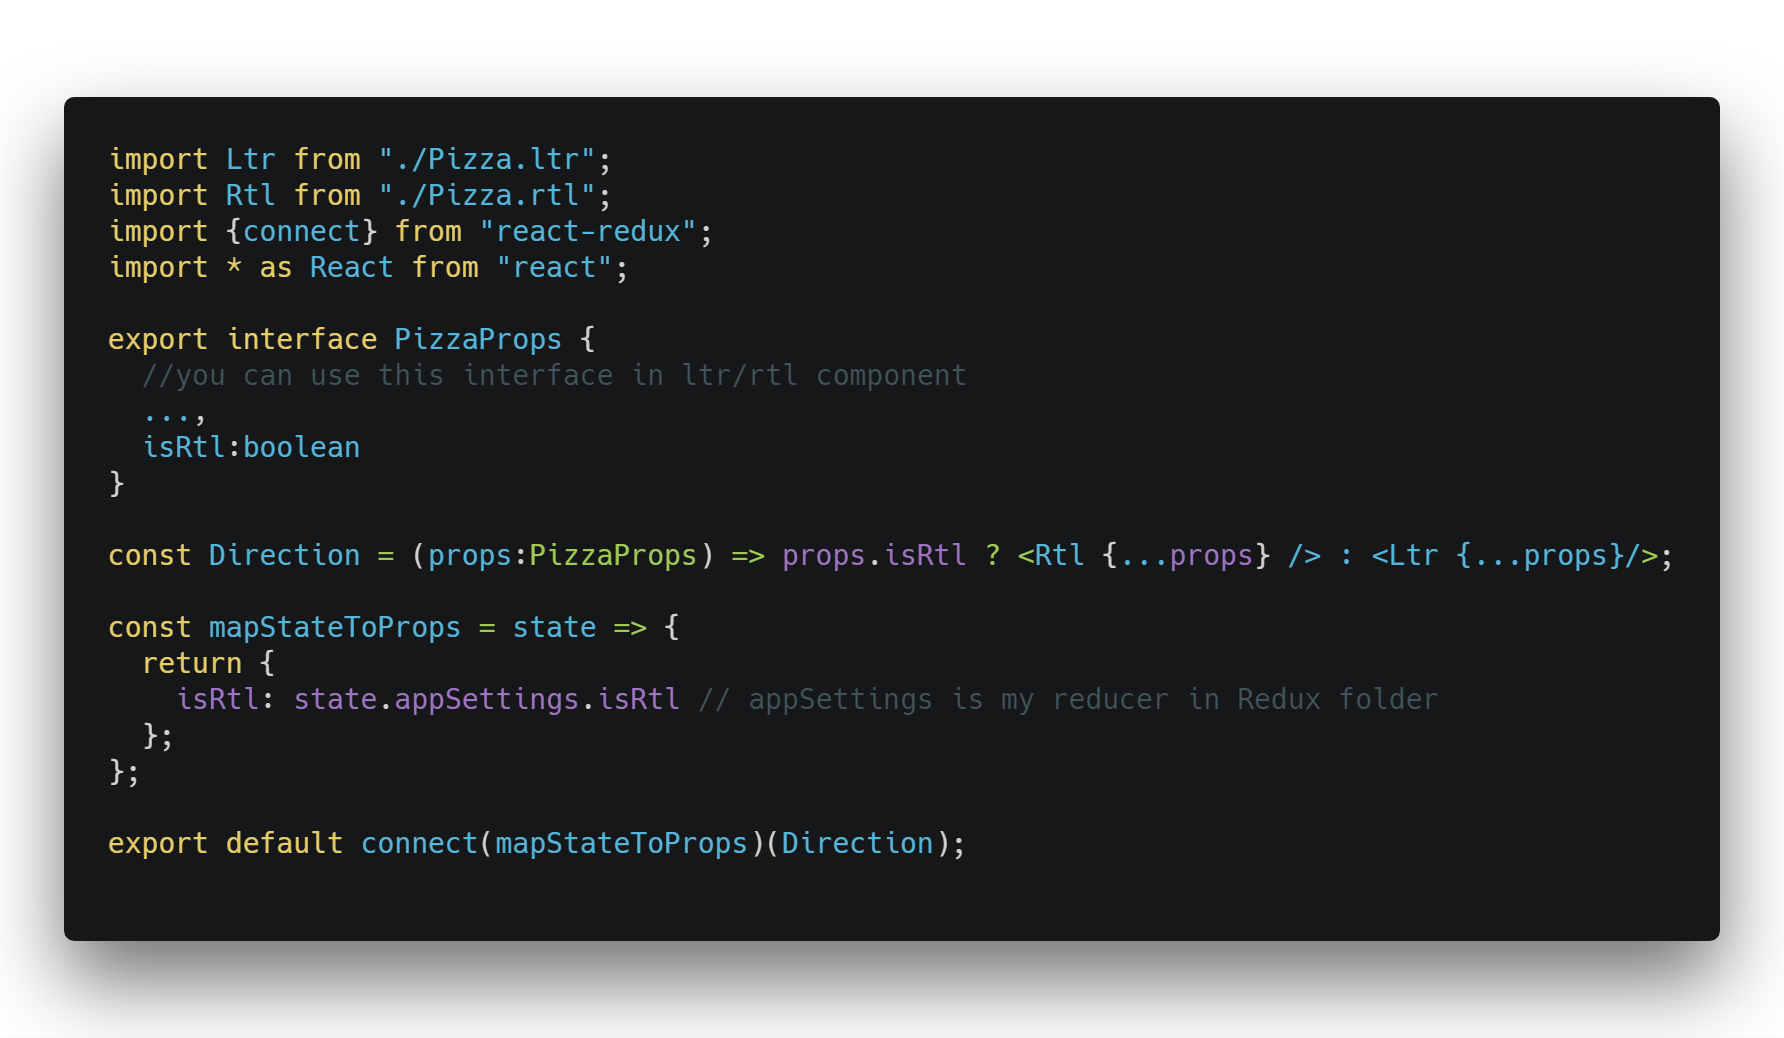
## :arrow_down_small: Rtl Support Component Generate
If you want to your app support ltr/rtl layouts separately
you can just use this command inside the app folder (just replace pizza with your app name):
```
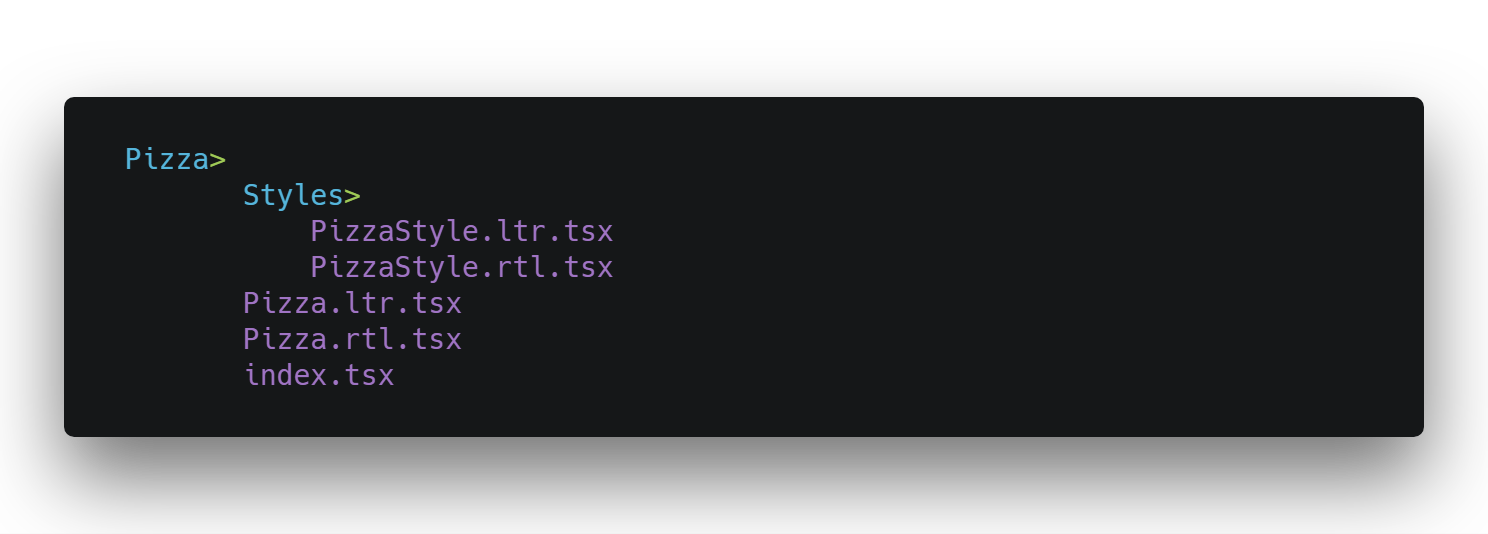
ignite g component pizza --rtlsupport
```
it will produce this file/folders inside your Components folder :
Just use it as :
```typescript jsx
import Pizza from './path/to/Pizza'
```
The generated index.tsx will be like below:
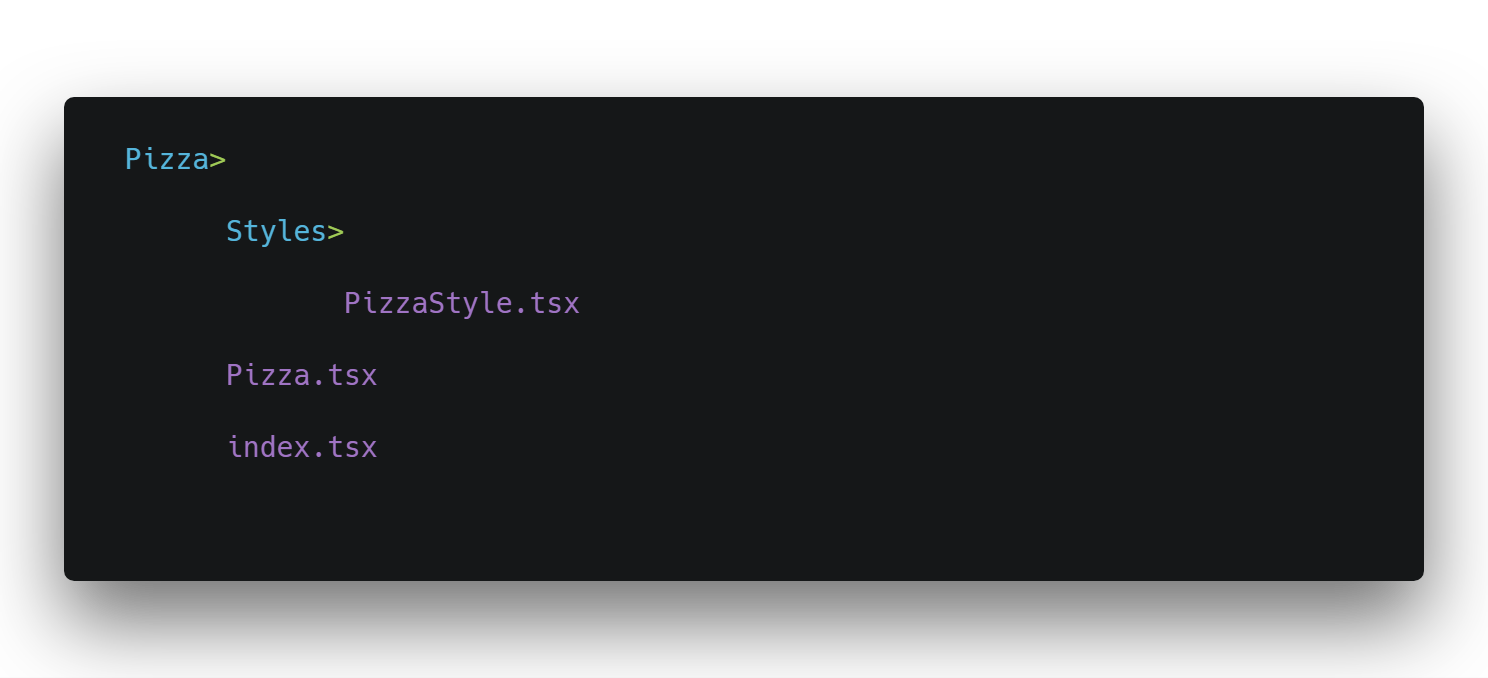
## :arrow_down_small: Normal Component Generate
If you don't want Rtl/Ltr Switchable component us just create the component with this command:
```
ignite g component pizza
```
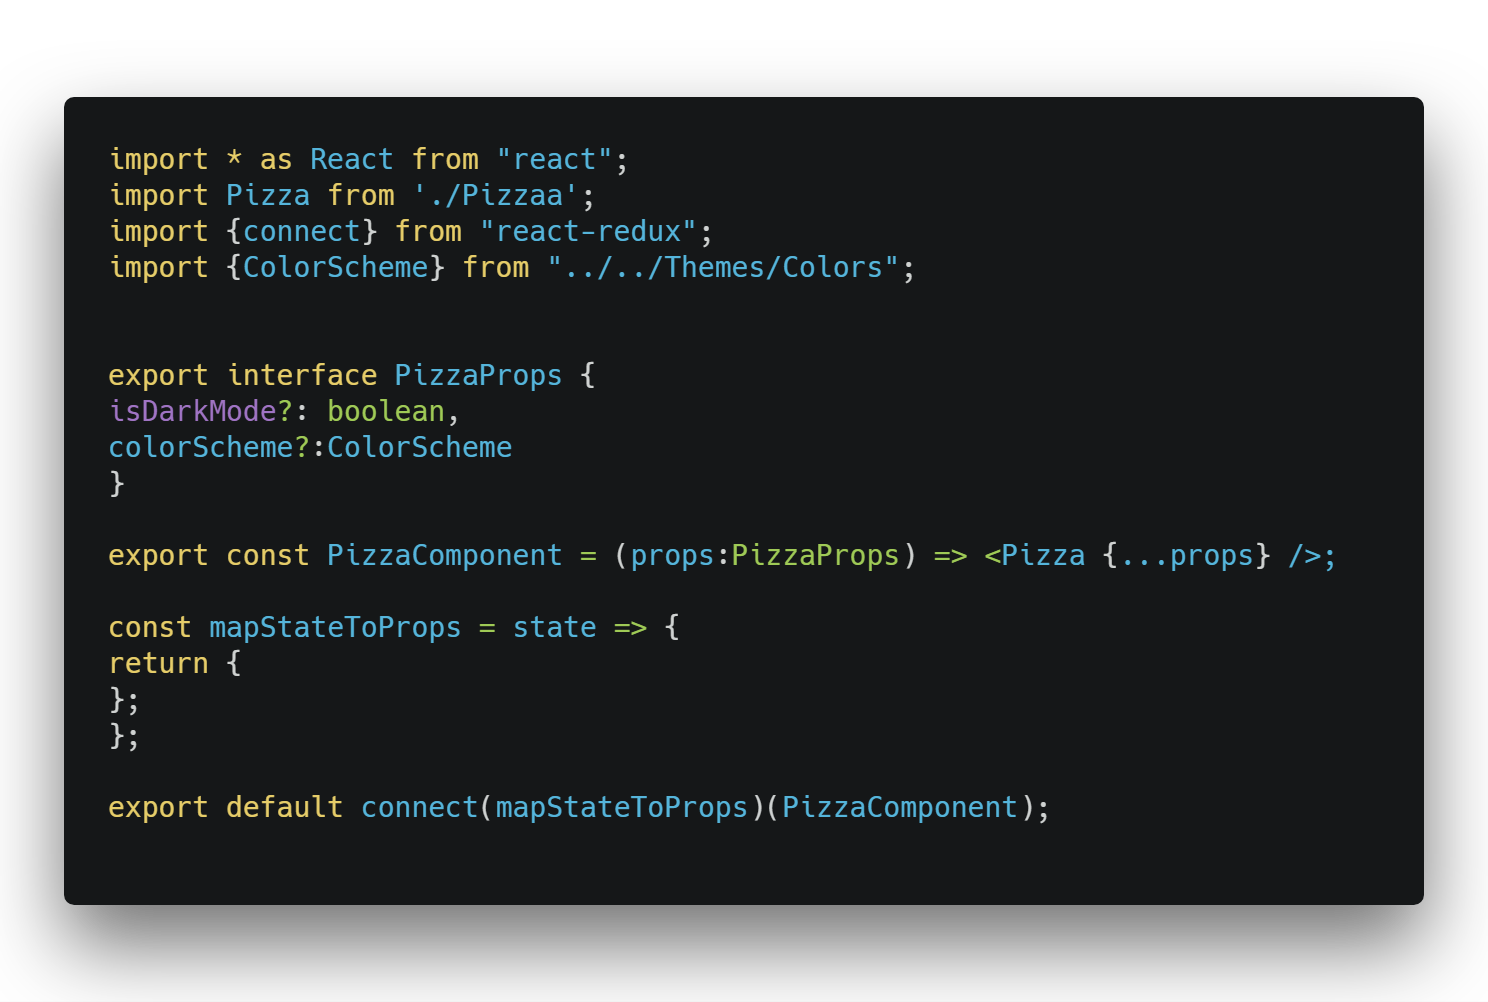
it will produce this file/folders inside your Components folder :
Just use it as :
```typescript jsx
import Pizza from './path/to/Pizza'
```
The generated index.tsx will be like below:
## :arrow_down_small: Screen Generate
You can generate normal screens in containers folder then add them to the navigation by this command
```
ignite g container ScreenName
```
## :arrow_down_small: Generate Login Screens
You can also generate a material designed Login screen with some related components and reduxs by this command:
Normal Login Screen
```
ignite g container LoginScreen
```
Or Choosing Simple login screen at project initialization
Sms Login Screen
```
ignite g container SmsLoginScreen
```
Or Choosing Sms login screen at project initialization
then just add
```typescript jsx
login: require('./Login/LoginRedux').reducer
```
in the end of
```typescript jsx
reducers: Reducer = combineReducers
```
array in
```
App/Redux/index.tsx
```
If you want set the login screen as launch screen edit
```
App/Navigation/AppNavigation.tsx
```
this way :
```typescript jsx
...
initialRouteName: "LoginScreen",
...
```
## :arrow_down_small: Switchable color scheme

actually below reducer And action playing important roles for settings like direction(rtl/ltr)
or colorScheme and any settings like these :
```
App/Redux/AppSettingsRedux
```
```
App/Redux/Actions/AppSettinsAction
```
for example for colorScheme we have colorScheme state in this reducer which contans below structure :
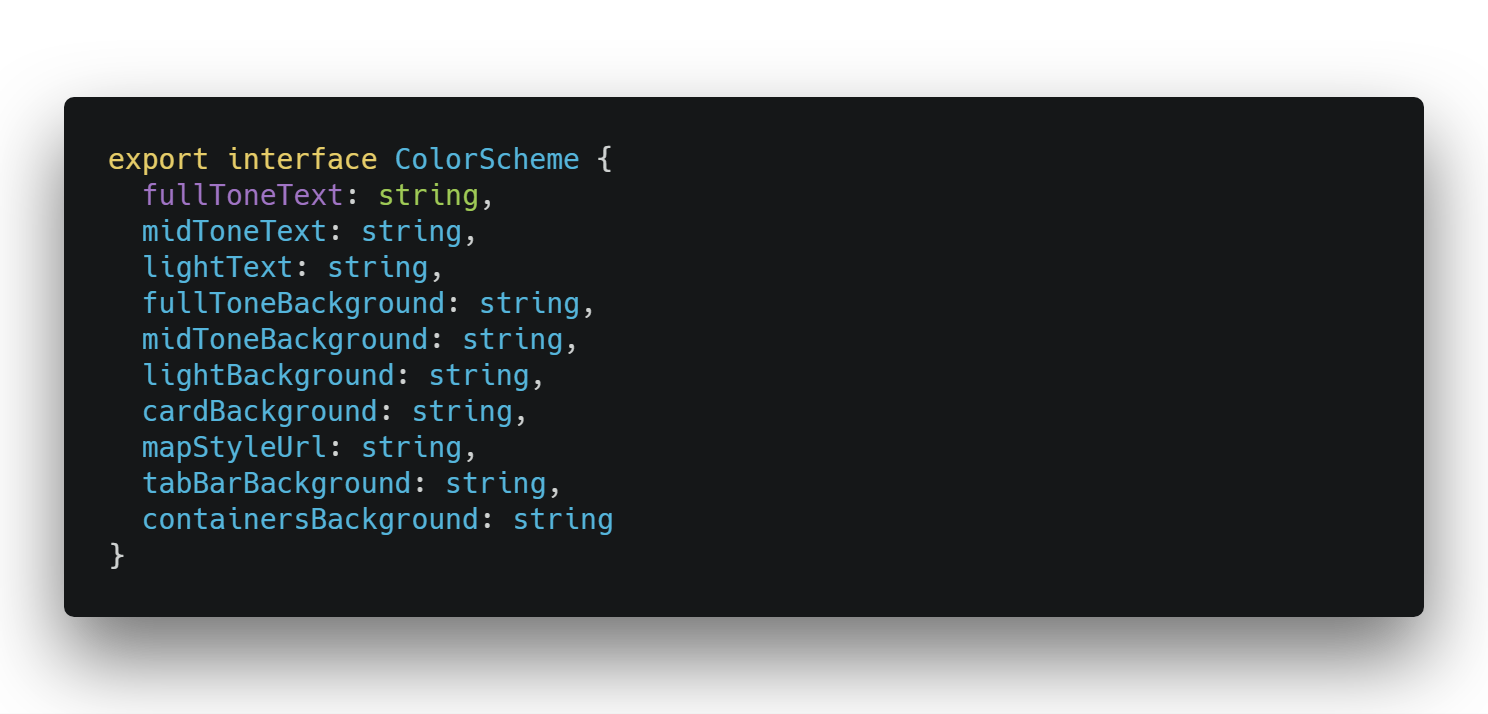
you can also view or change it's structure and values in below file :
`App/Themes/Colors`
this scheme have two states for now dark and light themes
this is how we can change state of this scheme in a redux connected component :
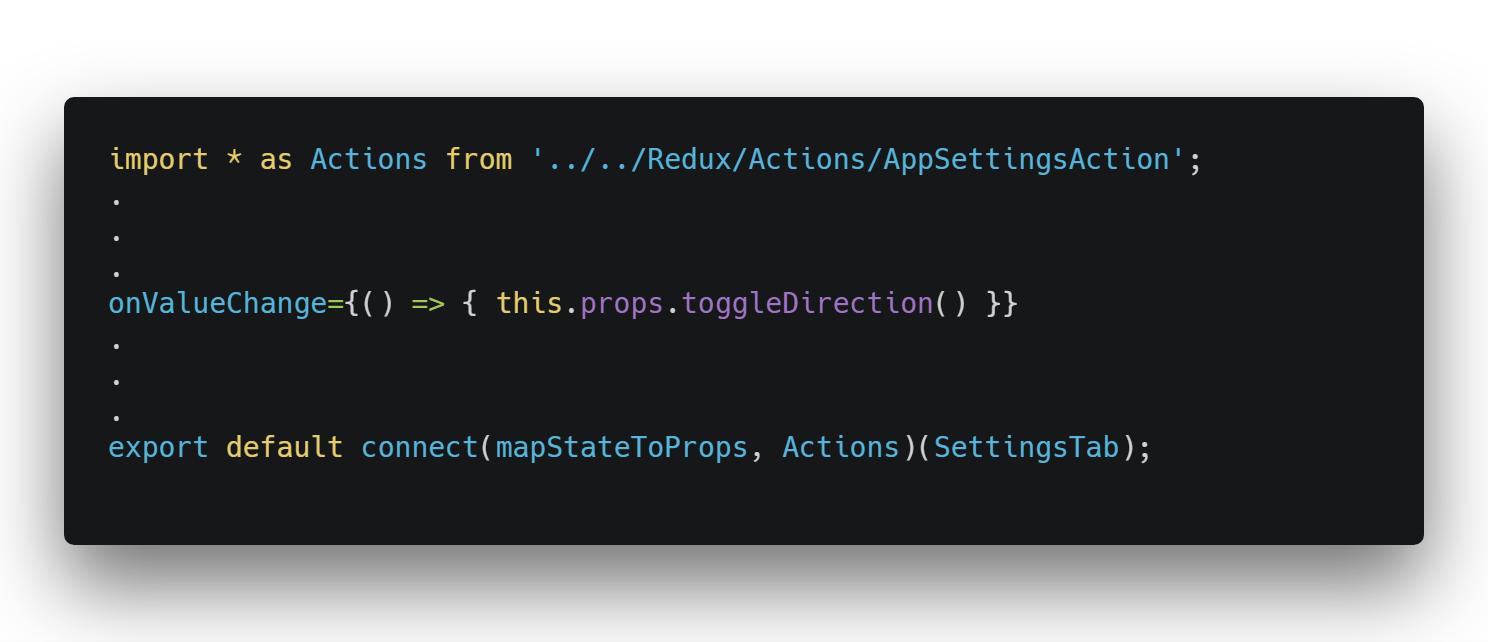
you can see below file for more detail :
`App/Containers/MainTabs/SettingsTab.tsx`
then you can use it as :
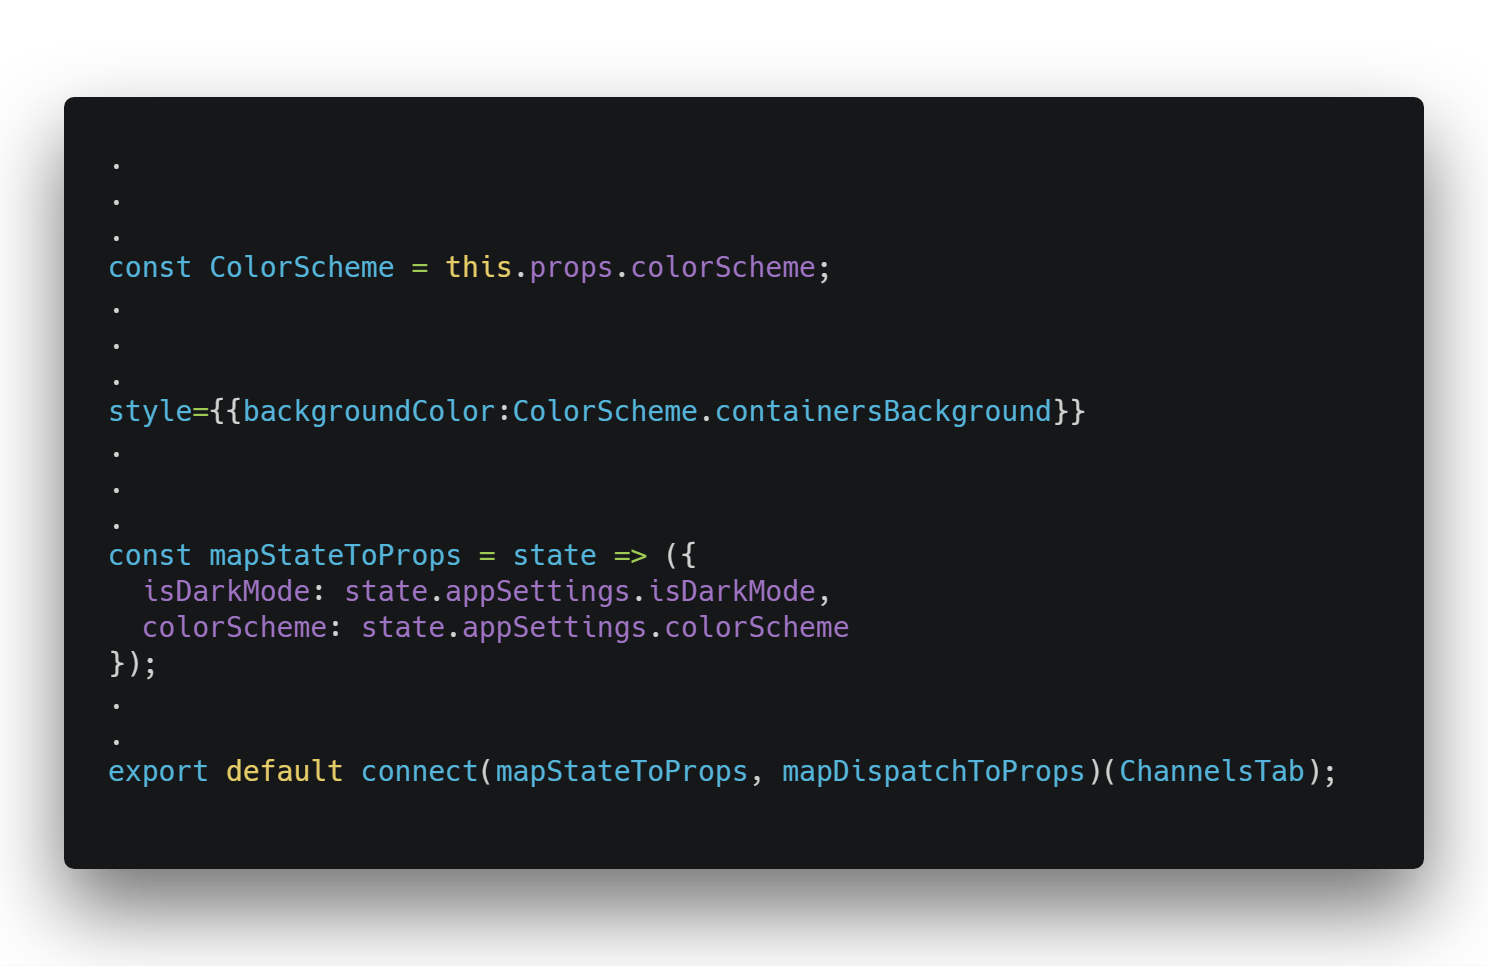
you can see similiar usage in example files inside Container folder or another folders ...
you can also test this in the settings tab
## :arrow_down_small: Switchable locale

you can change/select locale in a redux connected component this way:

you can create you locales in `App/I18n/locales folder` like :
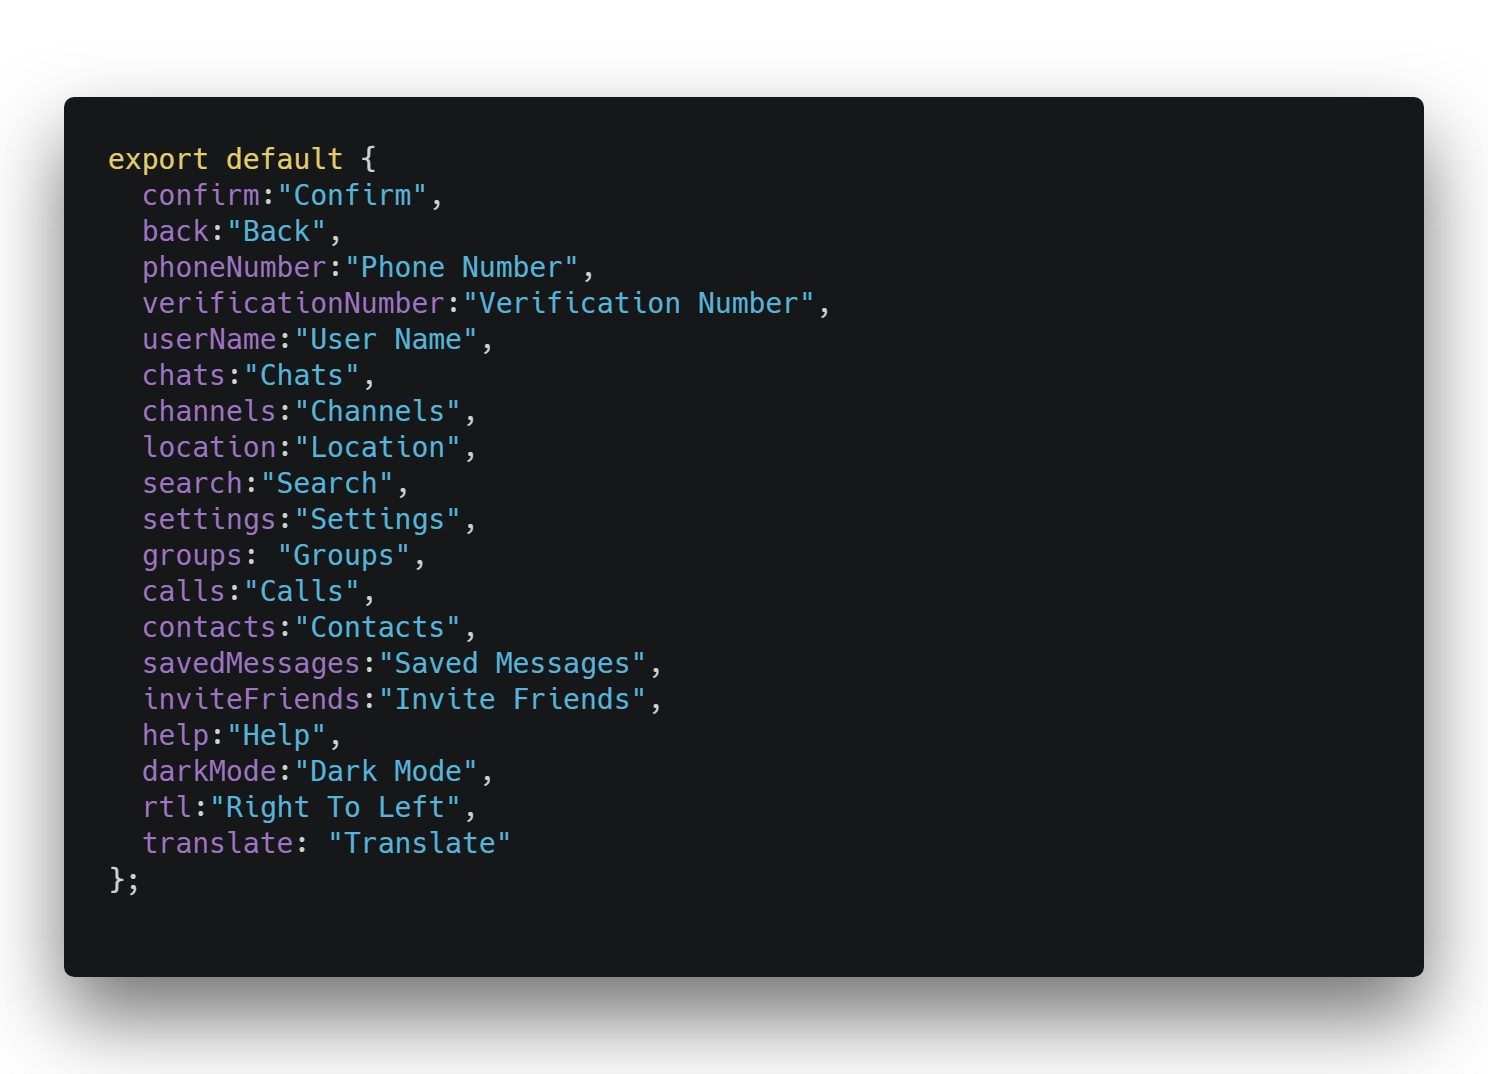
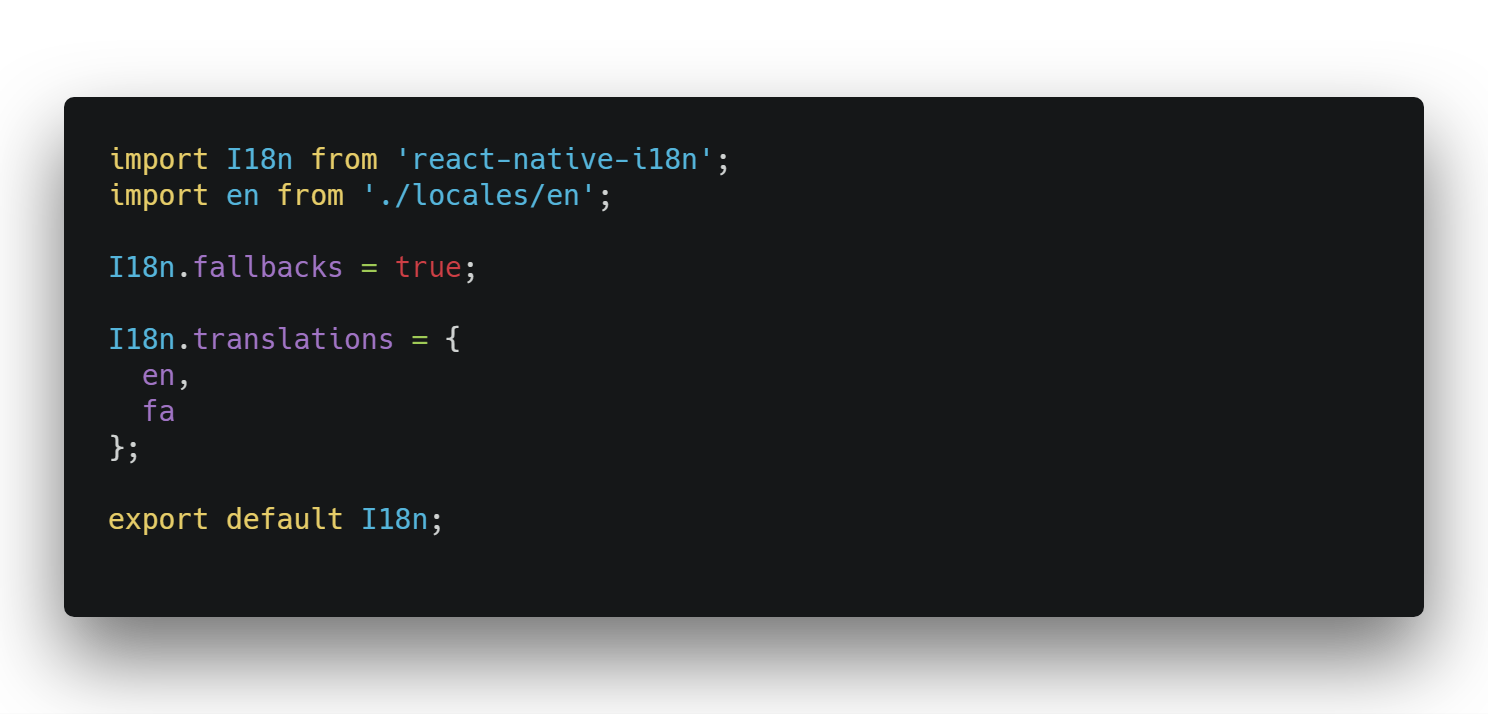
then in `App/I18n` folder I18n.ts file :
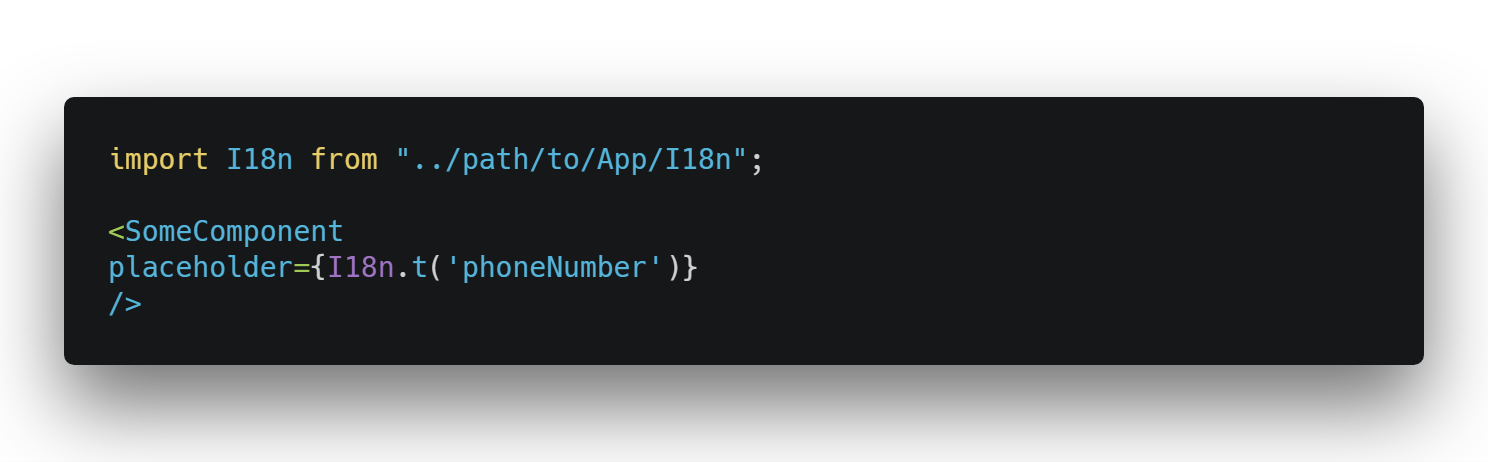
End usage:
## :arrow_down_small: Persisted States (Redux-Persist)
for using redux-persist to persist your settings or any states you can go to this path
`App/Config/ReduxPersist.tsx`
then add your reducer name to this array :
`whitelist: ["reducer Name",...],`
then go to your reducer and add this code :
`case REHYDRATE:
return {...state,...action.payload.yourReducerName};`
then changes on your reducer will be persisted
## :smiley: Social Media Template
This template provides some components and screens with navigation for starting a chat app project. it's also an example of how to start working with this boiler plate.
Inside the template i used farid safi's Gifted Chat for chat screen.
You can use this template by choosing it on boilerplate installation.
this is a preview of Social Media Template :

## :arrow_heading_down: Bottom Tabbed Template
This template provides some components and screens with navigation for having a bottom tabbed container with 5 tabs in the first page of your app.
you can change tabs names and contents after installation.
You can use this template by choosing it on boilerplate installation.
this is a preview of Bottom Tabbed Template :
You can generate a screen with this template using below command :
```
ignite g container YourScreenName BottomTabbed
```
this command will produce a screen file with tab files and will add this screen to AppNavigation file
## :top: Top Tabbed Template
This template provides some components and screens with navigation for having a top tabbed container with 3 tabs with list content in the first page of your app.
you can change tabs names and contents after installation.
You can use this template by choosing it on boilerplate installation.
this is a preview of Top Tabbed Template :

You can generate a screen with this template using below command :
```
ignite g container YourScreenName TopTabbed
```
this command will produce a screen file with tab files and will add this screen to AppNavigation file
## :top: Navigation Drawer Template
This template provides some components and screens with navigation for having a navigation drawer container with 5 pages.
you can change tabs names and contents after installation.
You can use this template by choosing it on boilerplate installation.
this is a preview of Navigation Drawer Template :
You can generate a screen with this template using below command :
```
ignite g container YourScreenName Drawer
```
this command will produce a screen file with tab files and will add this screen to AppNavigation file
## :heart: Recommended Components For Use In The Project
### Mapbox Component
You can install mapbox and link it then use it as below
and you can get your token key with instructions inside mapbox github https://github.com/mapbox/react-native-mapbox-gl
then you can use it inside `App>Config>MapboxConfig.tsx`
#### then use it like :
```typescript jsx
import MapboxGL from '@mapbox/react-native-mapbox-gl';
import MapboxConfig from "../../Config/MapboxConfig";
MapboxGL.setAccessToken(MapboxConfig.accessToken);
...
```
### List Component
https://docs.nativebase.io/Components.html#list-avatar-headref
### Material Button Component
#### Component's Location
MaterialComponents/MaterialButton
#### Usage:
```typescript jsx
```
### FAB
Component's Location
MaterialComponents/MaterialFab
#### Usage :
```typescript jsx
// props {size,color,onPress,iconColor,icon}
```
### Toggle
https://github.com/xinthink/react-native-material-kit#toggles
### CheckBox
https://github.com/xinthink/react-native-material-kit#checkbox
### RadioButton
https://github.com/xinthink/react-native-material-kit#radio-button
### MaterialColors
import {MKColor} from 'react-native-material-kit';
### BottomTabNavigation (See MainTabNavigator.tsx for more info)
import {createMaterialBottomTabNavigator} from 'react-navigation-material-bottom-tabs';
### TopTabNavigation (See ChatsTabNavigator.tsx for more info)
import {createMaterialTopTabNavigator, TabBarTop} from 'react-navigation-tabs';
### Material input (installed on the boilerplate)
https://github.com/n4kz/react-native-material-textfield
## :closed_lock_with_key: Secrets
This project uses [react-native-config](https://github.com/luggit/react-native-config) to expose config variables to your javascript code in React Native. You can store API keys
and other sensitive information in a `.env` file:
```
API_URL=https://myapi.com
GOOGLE_MAPS_API_KEY=abcdefgh
```
and access them from React Native like so:
```
import Secrets from 'react-native-config'
Secrets.API_URL // 'https://myapi.com'
Secrets.GOOGLE_MAPS_API_KEY // 'abcdefgh'
```
The `.env` file is ignored by git keeping those secrets out of your repo.
### Get started:
1. Copy .env.example to .env
2. Add your config variables
3. Follow instructions at [https://github.com/luggit/react-native-config#setup](https://github.com/luggit/react-native-config#setup)
4. Done!