Assume you want to render an image 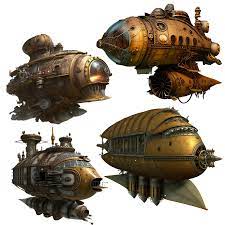
## Prepare:
1. **Set up a web server:** jsge is a library for a web application, so you will need a web server.
In this tutorial, we will use a Node.js web server. First, install Node.js and npm.
2. **Create a folder** to contain your game files and place an image named "images.jpg" in it.
3. **Create a `package.json` file** to store information about the game and its main dependencies. You can do this from the command line (terminal) with
```
npm init
```
4. **Install jsge**:
```
npm i jsge
```
6. **Install a webserver**:
```
npm i http-server
```
7. **Add a command to run the server in the `package.json`:**
```
"scripts": {
"start": "http-server -c-1 -p 9000 -o /"
},
```
8. **Start the server** from the command line (terminal):
```
npm start
```
9. **Check `http://127.0.0.1:9000`** in the browser, it will show your folder structure.
## App logic:
1. **Create index.html file**:
```
```
2. **Create index.js file**, which will store app logic. Inside index.js create a {@link System} instance, passing game options or a {@link SystemSettings} object and game canvas container:
```
import { System, SystemSettings } from "jsge";
const app = new System(SystemSettings, document.getElementById("game_map"));
```
3. **Create you game pages** using classes extended from {@link GameStage}:
```
import { ..., GameStage } from "jsge";
class CustomPage extends GameStage {
}
```
4. **Add the image** passing image key and path to [CustomPage.iLoader]{@tutorial assets_manager}.addImage() in the [GameStage.register()]{@tutorial stages_lifecycle}:
```
class CustomPage extends GameStage {
register() {
this.iLoader.addImage("image_key", "/images.jpg");
}
}
```
5. **Create an DrawImageObject and add it to the stage**, use image key added on step 4:
```
...
this.player = this.draw.image(100, 200, 16, 28, "image_key", 0);
}
}
```
6. **Register pages in the application:**
```
app.registerStage("CustomPageKey", CustomPage);
```
7. **Run [preloadAllData()]{@link System#preloadAllData}** to load all data you added on step 4:
```
app.preloadAllData().then(() => {
```
8. **After `preloadAllData()` resolves, start the stage rendering** with app.iSystem.startGameStage(pageKey):
```
app.preloadAllData().then(() => {
app.iSystem.startGameStage("CustomPageKey");
});
```
9. **Now visit `http://127.0.0.1:9000`** Your image now will be rendered!
10. **Use `document.addEventListener`** to attach mouse or keyboard controllers and
move attached object on the screen changing `x`, `y`, or `rotation` properties
## Live example:
See the Pen
JsGE basic example by Arturas-Alfredas Lapinskas (@yaalfred)
on CodePen.