# Earthquakes
In this topic you'll create an application that fetches data on earthquakes in Iceland,
and show the information in two views: a table, and a map.
You'll do this in a series of labs.
Important: The labs inside this Tutorial cannot run currently, since the Google Maps API changed
and our addon needs adjustments. The chapters still contain valuable input.
## Goals
What are the goals of this lengthy topic?
- To give you hands-on coding a simple app
- To introduce fundamental Neo concepts
Most of these labs are copy-and-paste because we're focusing on _what_ the code is doing on rather than _how_.
For this tutorial don't worry about syntax details. Other tutorials and guides will spend more and
more time on syntax.e
## Key concepts
A few key concepts we'll be discussing:
- Creating a starter app
- Configuring components
- Debugging
- Class-based coding
- State providers
- Events
- Controllers
## Advice
A word of advice: Keep a high-level perspective, especially early on. We'll have plenty of time to get
into the code, and we'll do most things multiple times. In other words, focus on what you're accomplishing,
and don't worry about syntax details.
## Lab. Generate a Workspace
In this lab, you'll generate a Neo.mjs workspace and run the starter app.
Wait!
You may already have a workspace! If so, you can skip this lab. For example, if you followed the Getting Started > Setup topic, above, you should already have a workspace.
If you don't have a workspace, then continue on to the next step.
Use the command-line to generate the workspace
Use a terminal window to navigate to some parent folder,
then run
npx neo-app@latest
You'll be prompted for a workspace name, starter app name, etc — accept the default for everything.
As the command finishes it starts a server and opens a browser window.
Inspect the workspace
The workspace contains a local copy of the API docs, an `apps` directory (where your apps are found),
and some other directories.
Start the server
From the root of the `workspace` start the server via `npm run server-start`. That starts a server
at port 8080 and opens a new browser window.
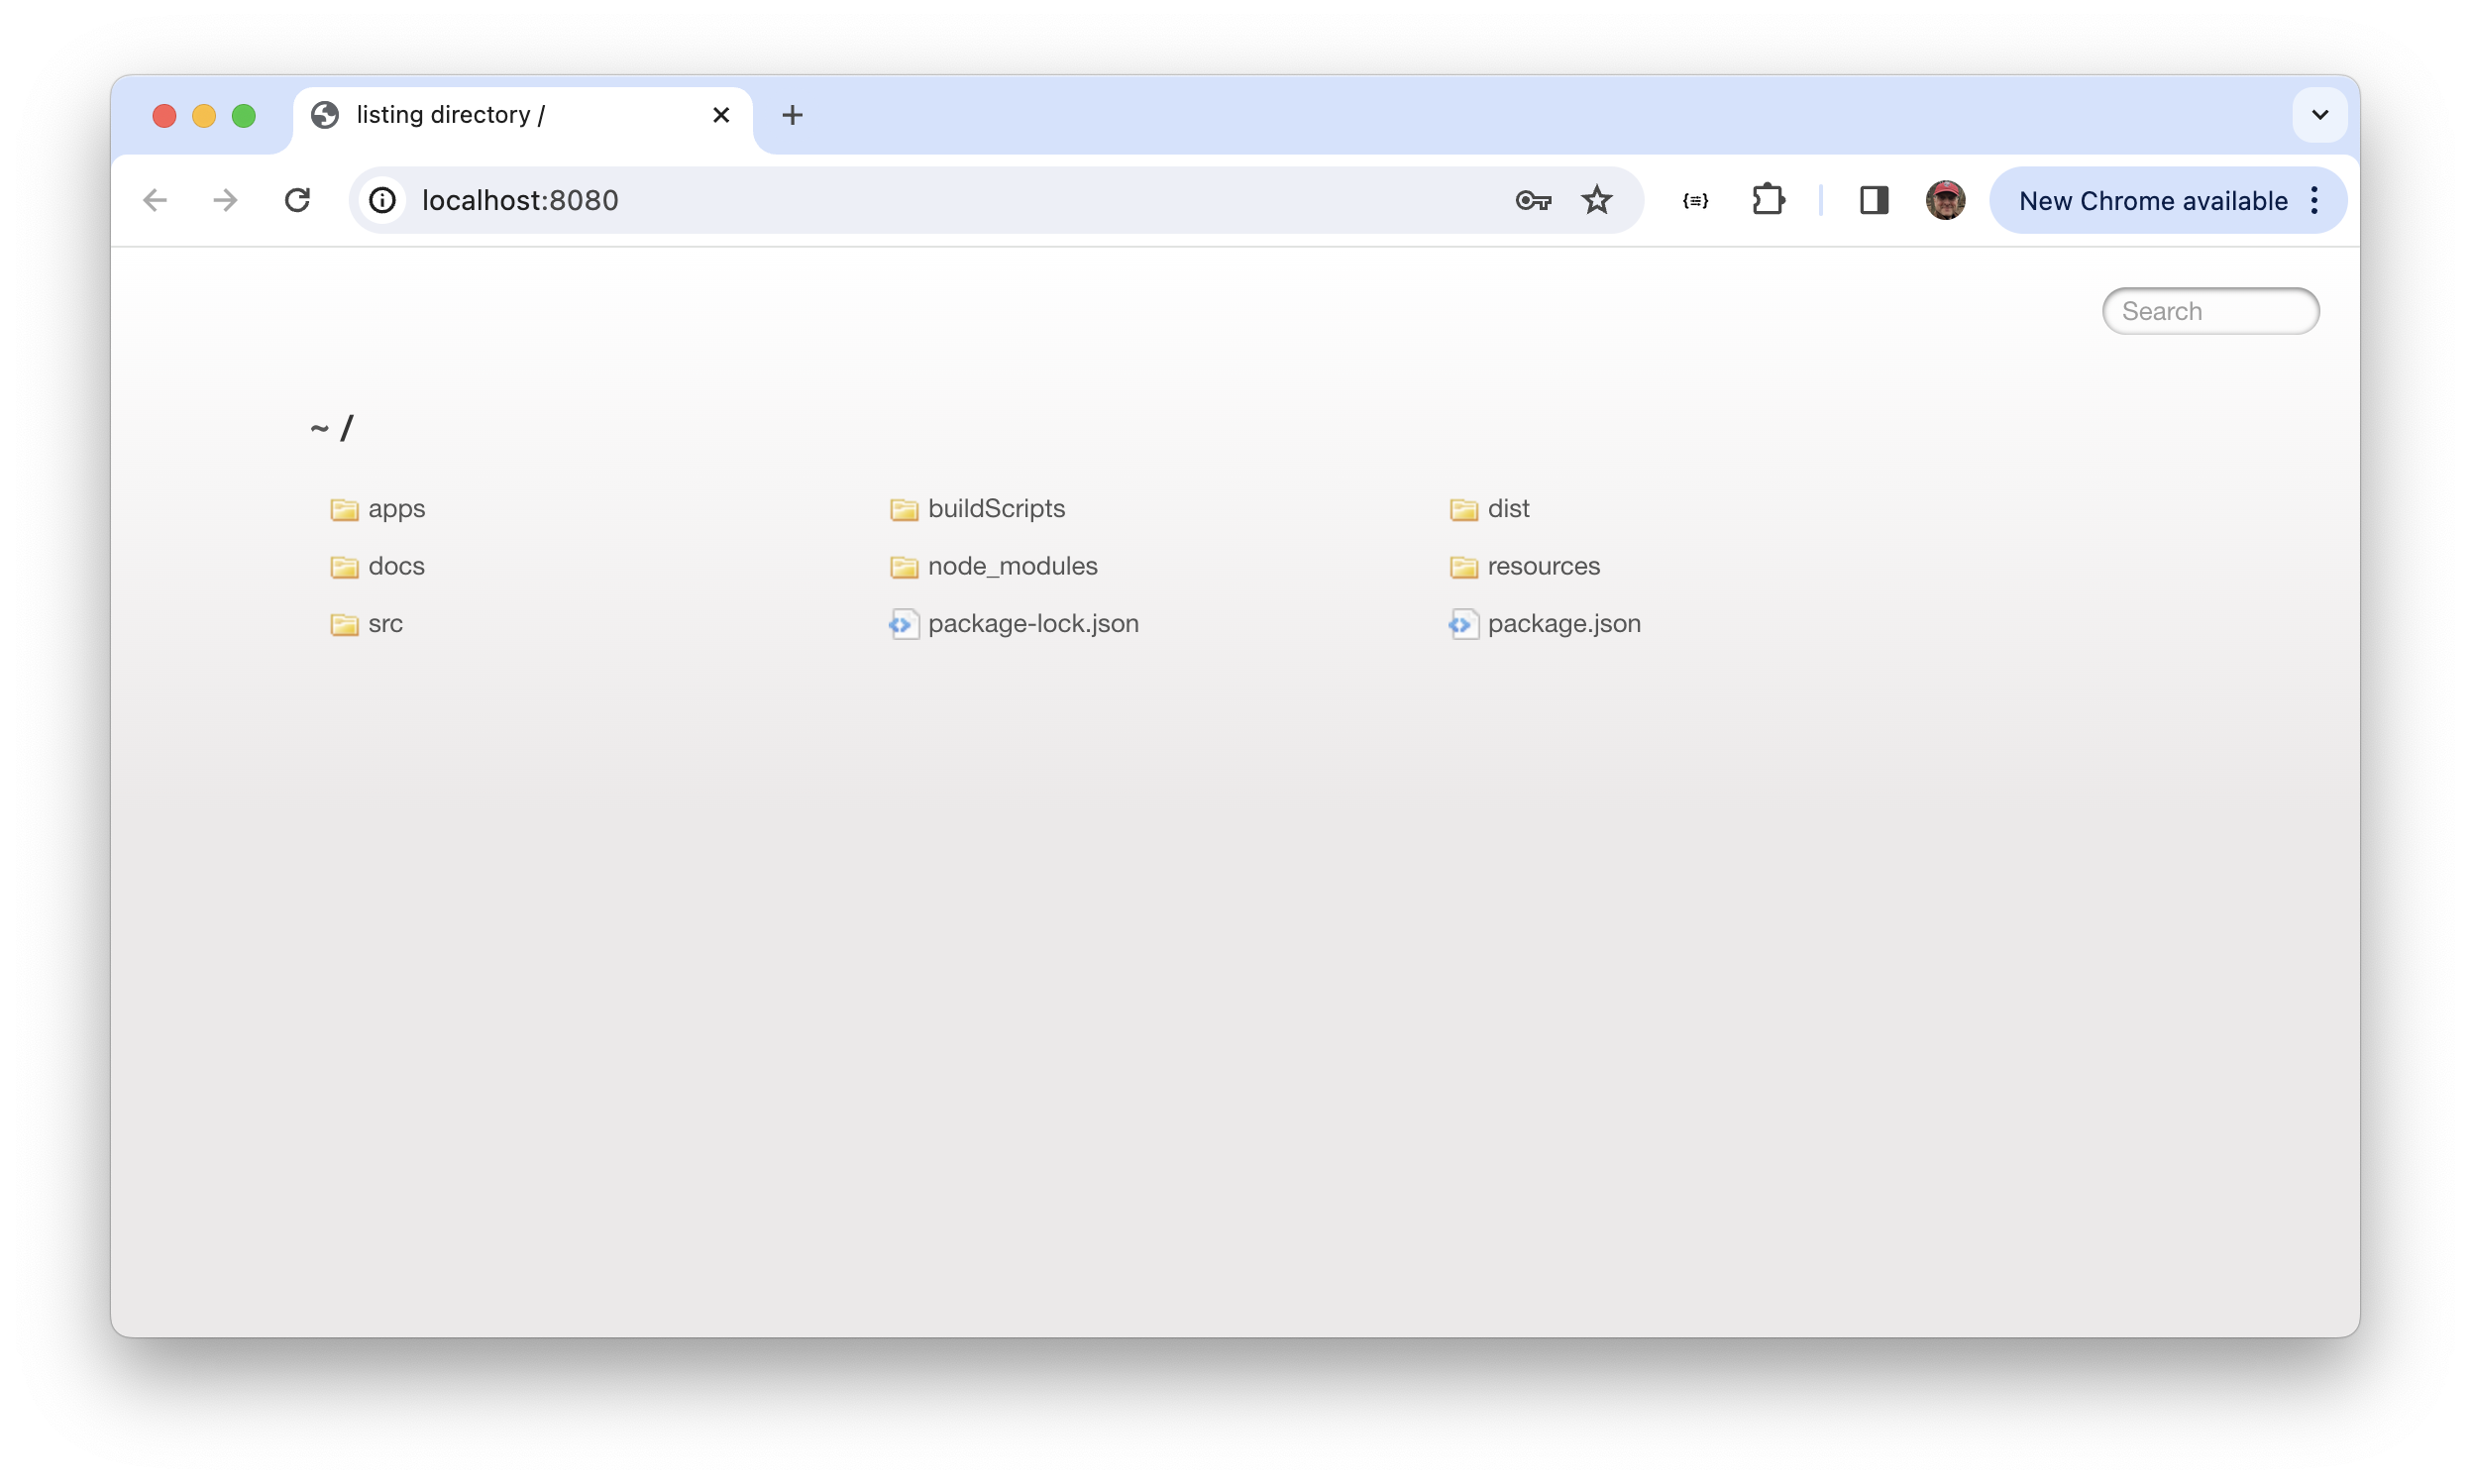
Run the starter app
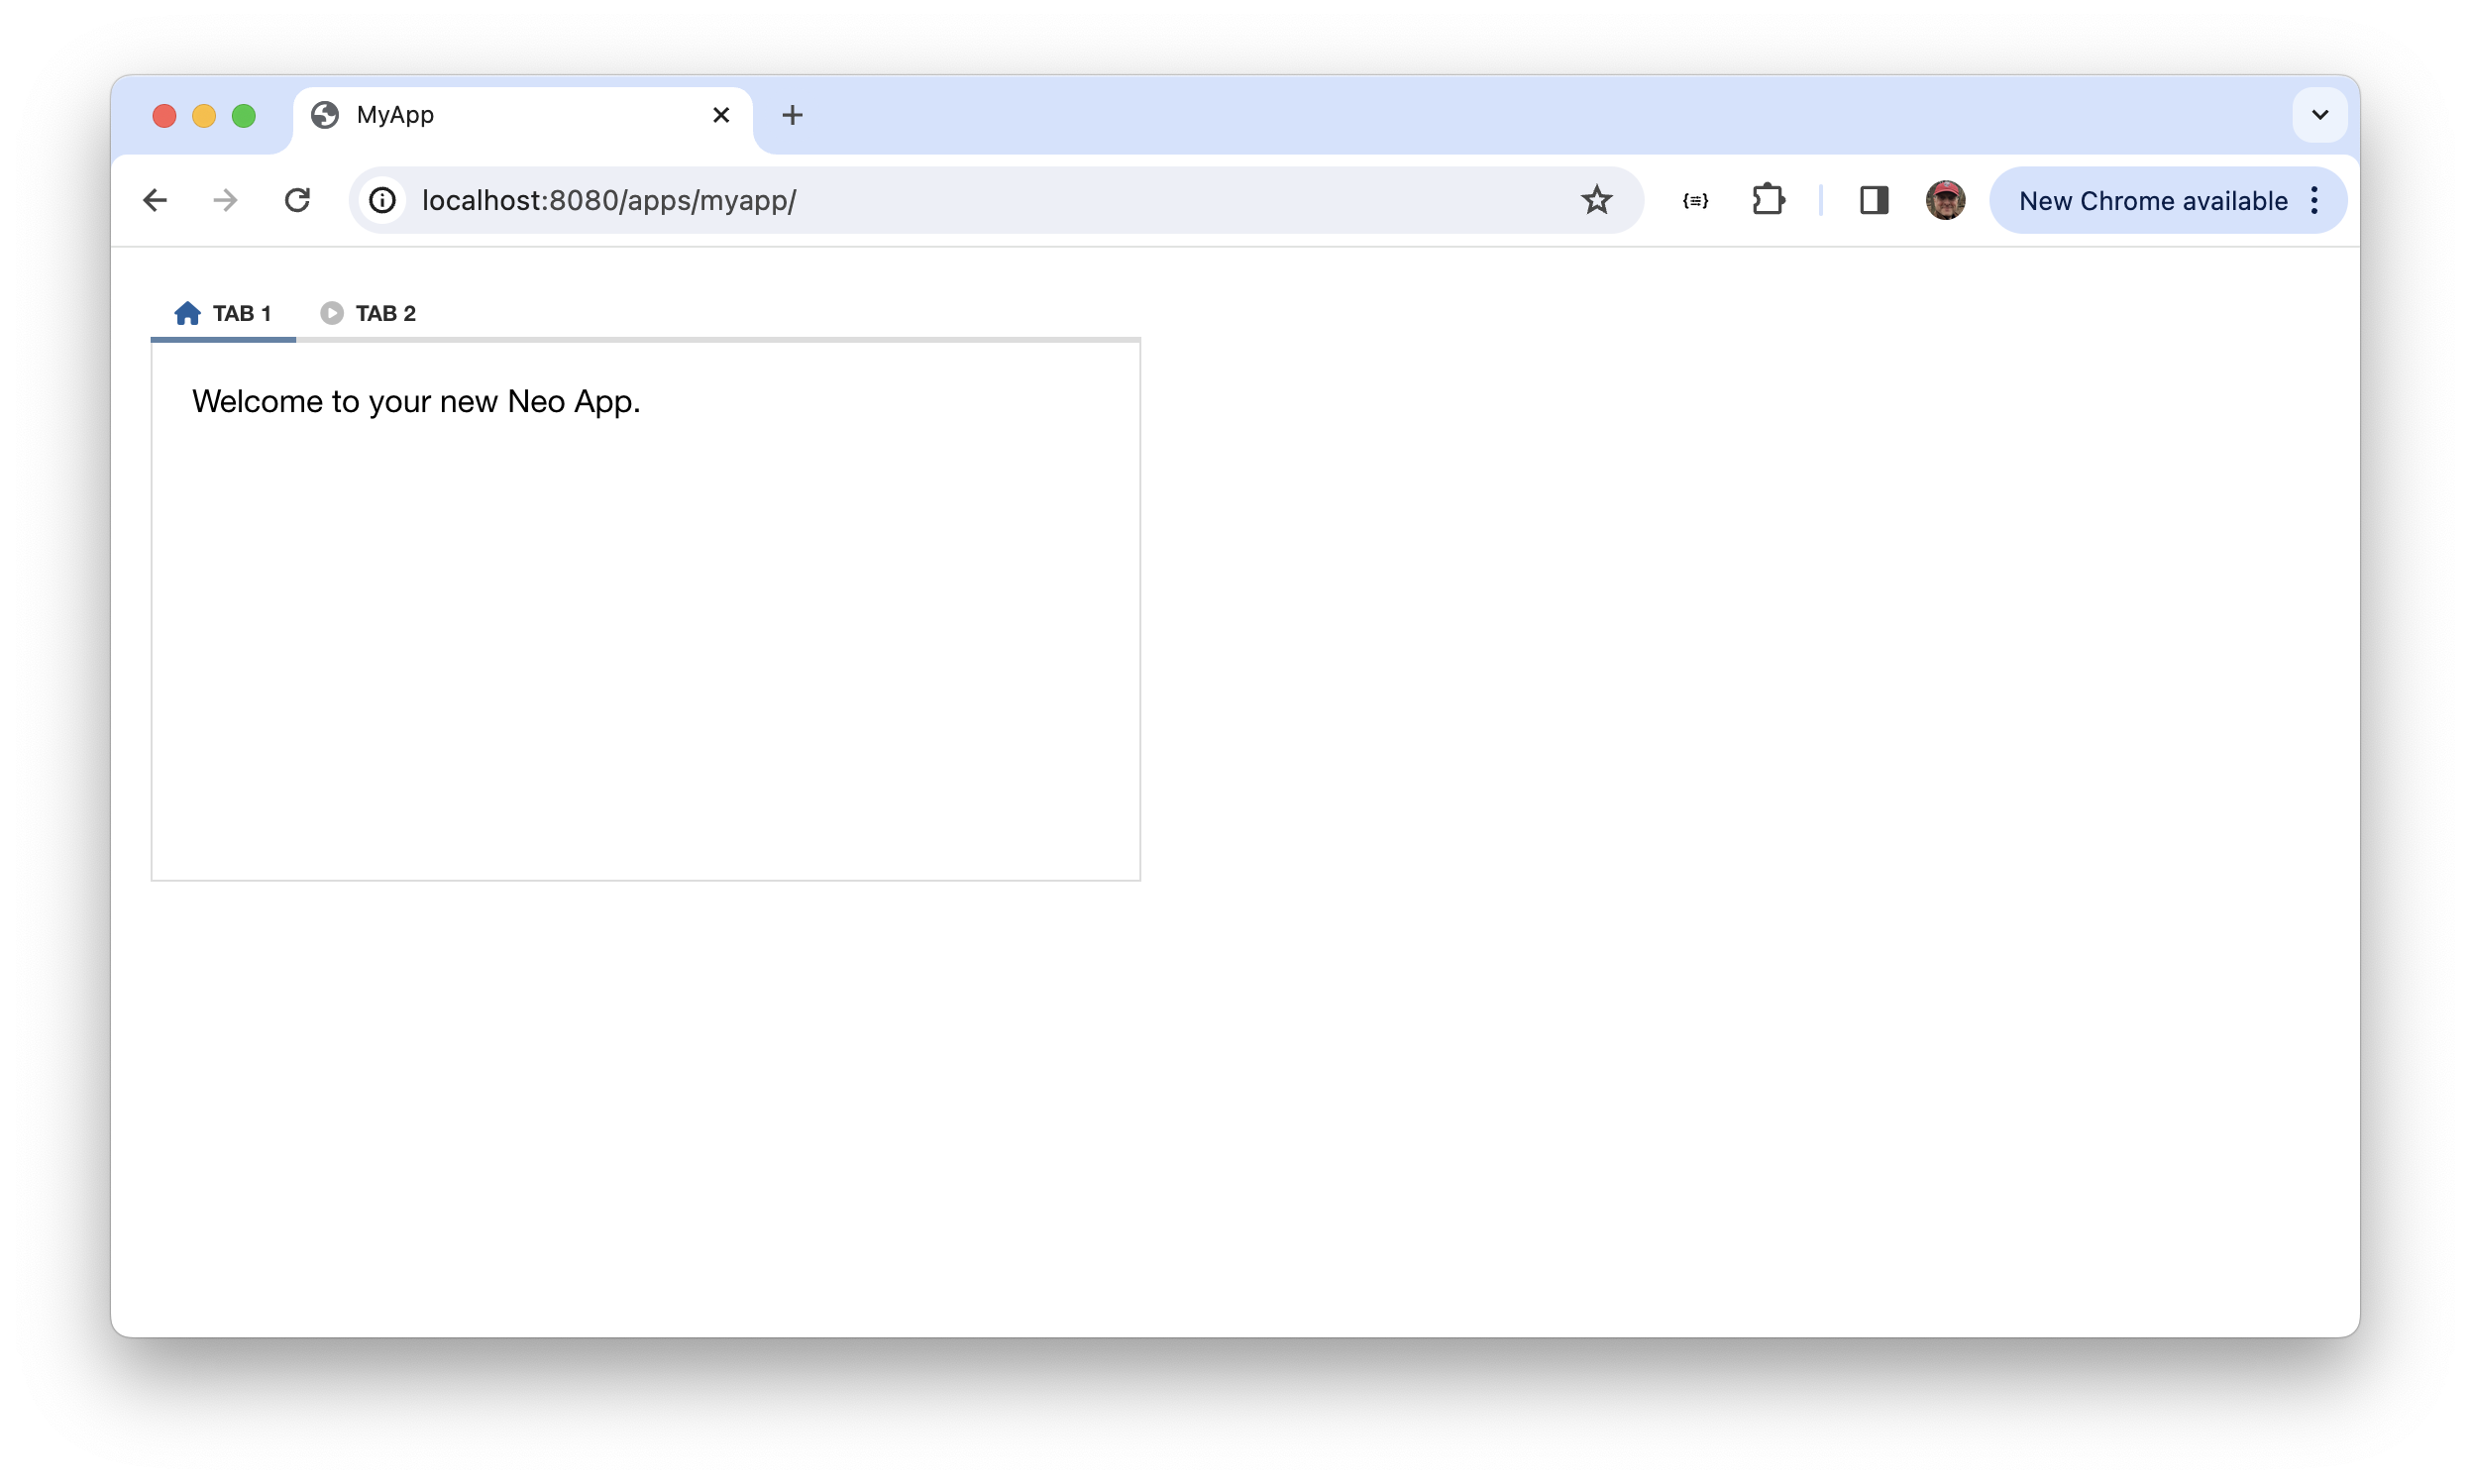
By default, an app named `myapp` was created. You can run it by entering the `apps` directory and
clicking `myapp`. It's a folder containing an `index.html` along with the source code for the app.
##Anatomy
The purpose of the lab was to generate a workspace, but as long as we're here let's take a look
at the `workspace/apps/myapp` directory.
- `view/MainContainer.mjs`
- `app.mjs`
- `index.html`
- `neo-config.json`
Application source is in `.mjs` files. These are standard _modular JavaScript_ files
with `import` and `export` statements, and class definitions. Neo.mjs apps have one class
definition per `.mjs` source file.
The index file contains a script tag that runs `MicroLoader.mjs`, which is a simple
file that launches the app based on information found in `neo-config.json`.
Don't worry about the file contents for now: we'll do that in the next lab.
##Flow of Execution
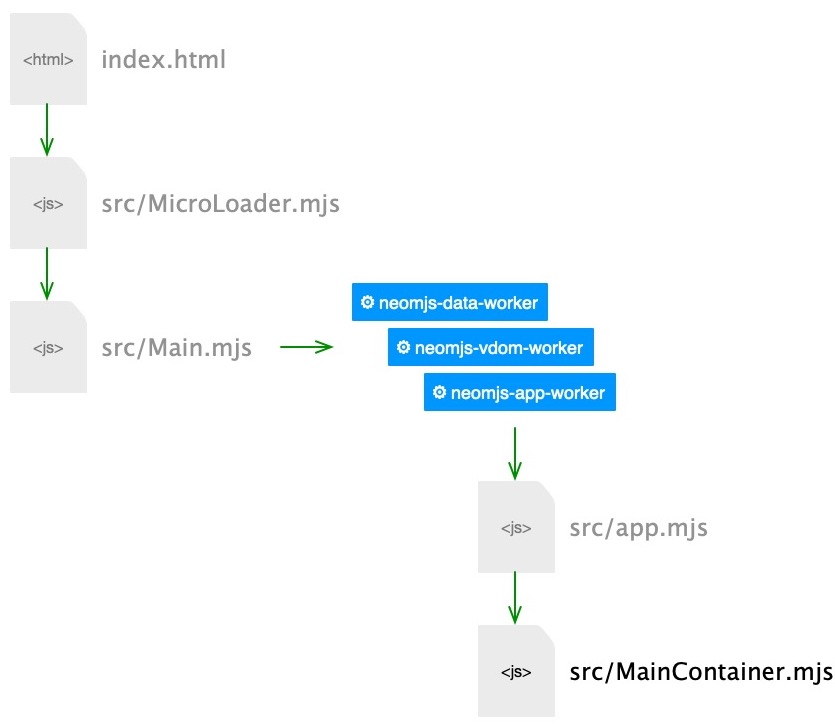 As you can see, `MicroLoader.mjs` runs `Main.mjs`, which in turn spawns the three web-wokers used by Neo.mjs:
- `neomjs-data-worker` handles Ajax calls and sockets
- `neomjs-vdom-worker` keeps track of the view (and applies delta updates to the main thread)
- `neomjs-app-worker` is where app logic is run
Neo.mjs apps run in multiple webworkers, and each webworker is run in a separate parallel thread.
Parallel processing — along wih the efficient way the vdom worker applies delta updates — is why Neo.mjs applications run so fast.
##Commonly-used Scripts
If you look in the `package.json` script block you'll see several scripts used for generating applications
and classes, doing builds, and starting a server. We'll use several of them throughout the tutorials.
- — creates a simple demo app
- create-app-minimal — creates a application shell with no content
- server-start — starts a server with webroot set to the workspace
- build-all — builds minimized versions of your apps
- build-themes — creates app .css from .scss files found in `resources/scss`
- watch-themes — creates app .css as you save changes to any app
##Lab. Create the Earthquakes Starter App
In this lab you'll create a starter app and add a single component.
As you can see, `MicroLoader.mjs` runs `Main.mjs`, which in turn spawns the three web-wokers used by Neo.mjs:
- `neomjs-data-worker` handles Ajax calls and sockets
- `neomjs-vdom-worker` keeps track of the view (and applies delta updates to the main thread)
- `neomjs-app-worker` is where app logic is run
Neo.mjs apps run in multiple webworkers, and each webworker is run in a separate parallel thread.
Parallel processing — along wih the efficient way the vdom worker applies delta updates — is why Neo.mjs applications run so fast.
##Commonly-used Scripts
If you look in the `package.json` script block you'll see several scripts used for generating applications
and classes, doing builds, and starting a server. We'll use several of them throughout the tutorials.
- — creates a simple demo app
- create-app-minimal — creates a application shell with no content
- server-start — starts a server with webroot set to the workspace
- build-all — builds minimized versions of your apps
- build-themes — creates app .css from .scss files found in `resources/scss`
- watch-themes — creates app .css as you save changes to any app
##Lab. Create the Earthquakes Starter App
In this lab you'll create a starter app and add a single component.
Use the command-line to create a starter app
Use a terminal window to navigate to the workspace and run the following script. Use "Earthquakes"
as the app name, and defaults for everything else.
npm run create-app-minimal
After the script runs yous should see these files in the `app/earthquakes` directory.
`view/MainContainer.mjs`
- `app.mjs`
- `index.html`
- `neo-config.json`
If you look in `neo-config.json` you should see this content. Note the `mainThreadAddons` block
— it reflects the add-ons you chose when you followed the instructions in the script.
```json readonly
{
"appPath" : "../../apps/earthquakes/app.mjs",
"basePath" : "../../",
"environment" : "development",
"mainPath" : "../node_modules/neo.mjs/src/Main.mjs",
"mainThreadAddons": ["DragDrop", "Navigator", "Stylesheet"],
"workerBasePath" : "../../node_modules/neo.mjs/src/worker/"
}
```
You're free to edit `neo-config.json` if you were to change your mind later about the theme or need for other add-ons.
If you refresh browser at http://localhost:8080/apps/
you'll see the new _earthquakes_ app listed, and if you run it you'll see... nothing! That's because the
minimal starter app is the shell of an application without any view content. We'll add a little content
later in the lab.
Look at the main view source
Use a code editor and look at `workspace/apps/earthquakes/src/view/MainView.mjs`. You'll see the
following class definition:
```javascript readonly
import Base from '../../../node_modules/neo.mjs/src/container/Base.mjs';
import Controller from './MainViewController.mjs';
import MainStateProvider from './MainStateProvider.mjs';
class MainView extends Base {
static config = {
className: 'Earthquakes.view.MainView',
ntype: 'earthquakes-main',
controller: {module: Controller},
stateProvider: {module: MainStateProvider},
layout: {ntype: 'fit'},
items: [],
}
}
export default Neo.setupClass(MainView);
```
As you can see, `MainView extends Base`, and `Base` is a _container_ (`Neo.container.Base`).
A container is a component — it holds other components, specified in `items:[]`. There
are no items in the starter app. The `layout` config specifies how the items are arranged.
Add a component
Let's add a button. To do that, add an import for the button base class, then configure it
in the container's `items:[]`. If you were to read the API docs for buttons, you'd see
that buttons have various configs, such as `text`, which is the button text, `iconCls`, which
is typically a FontAwesome CSS class used to show an icon, and `handler`, which specifies
which method to run when the button is clicked. We'll use `text`.
```javascript readonly
import Base from '../../../node_modules/neo.mjs/src/container/Base.mjs';
import Button from '../../../node_modules/neo.mjs/src/button/Base.mjs';
import Controller from './MainViewController.mjs';
import MainStateProvider from './MainStateProvider.mjs';
class MainView extends Base {
static config = {
className: 'Earthquakes.view.MainView',
ntype: 'earthquakes-main',
controller: {module: Controller},
stateProvider: {module: MainStateProvider},
layout: {ntype: 'fit'},
items: [{
module: Button,
text: 'Button!'
}],
}
}
export default Neo.setupClass(MainView);
```
When you run the app you'll see the single button.
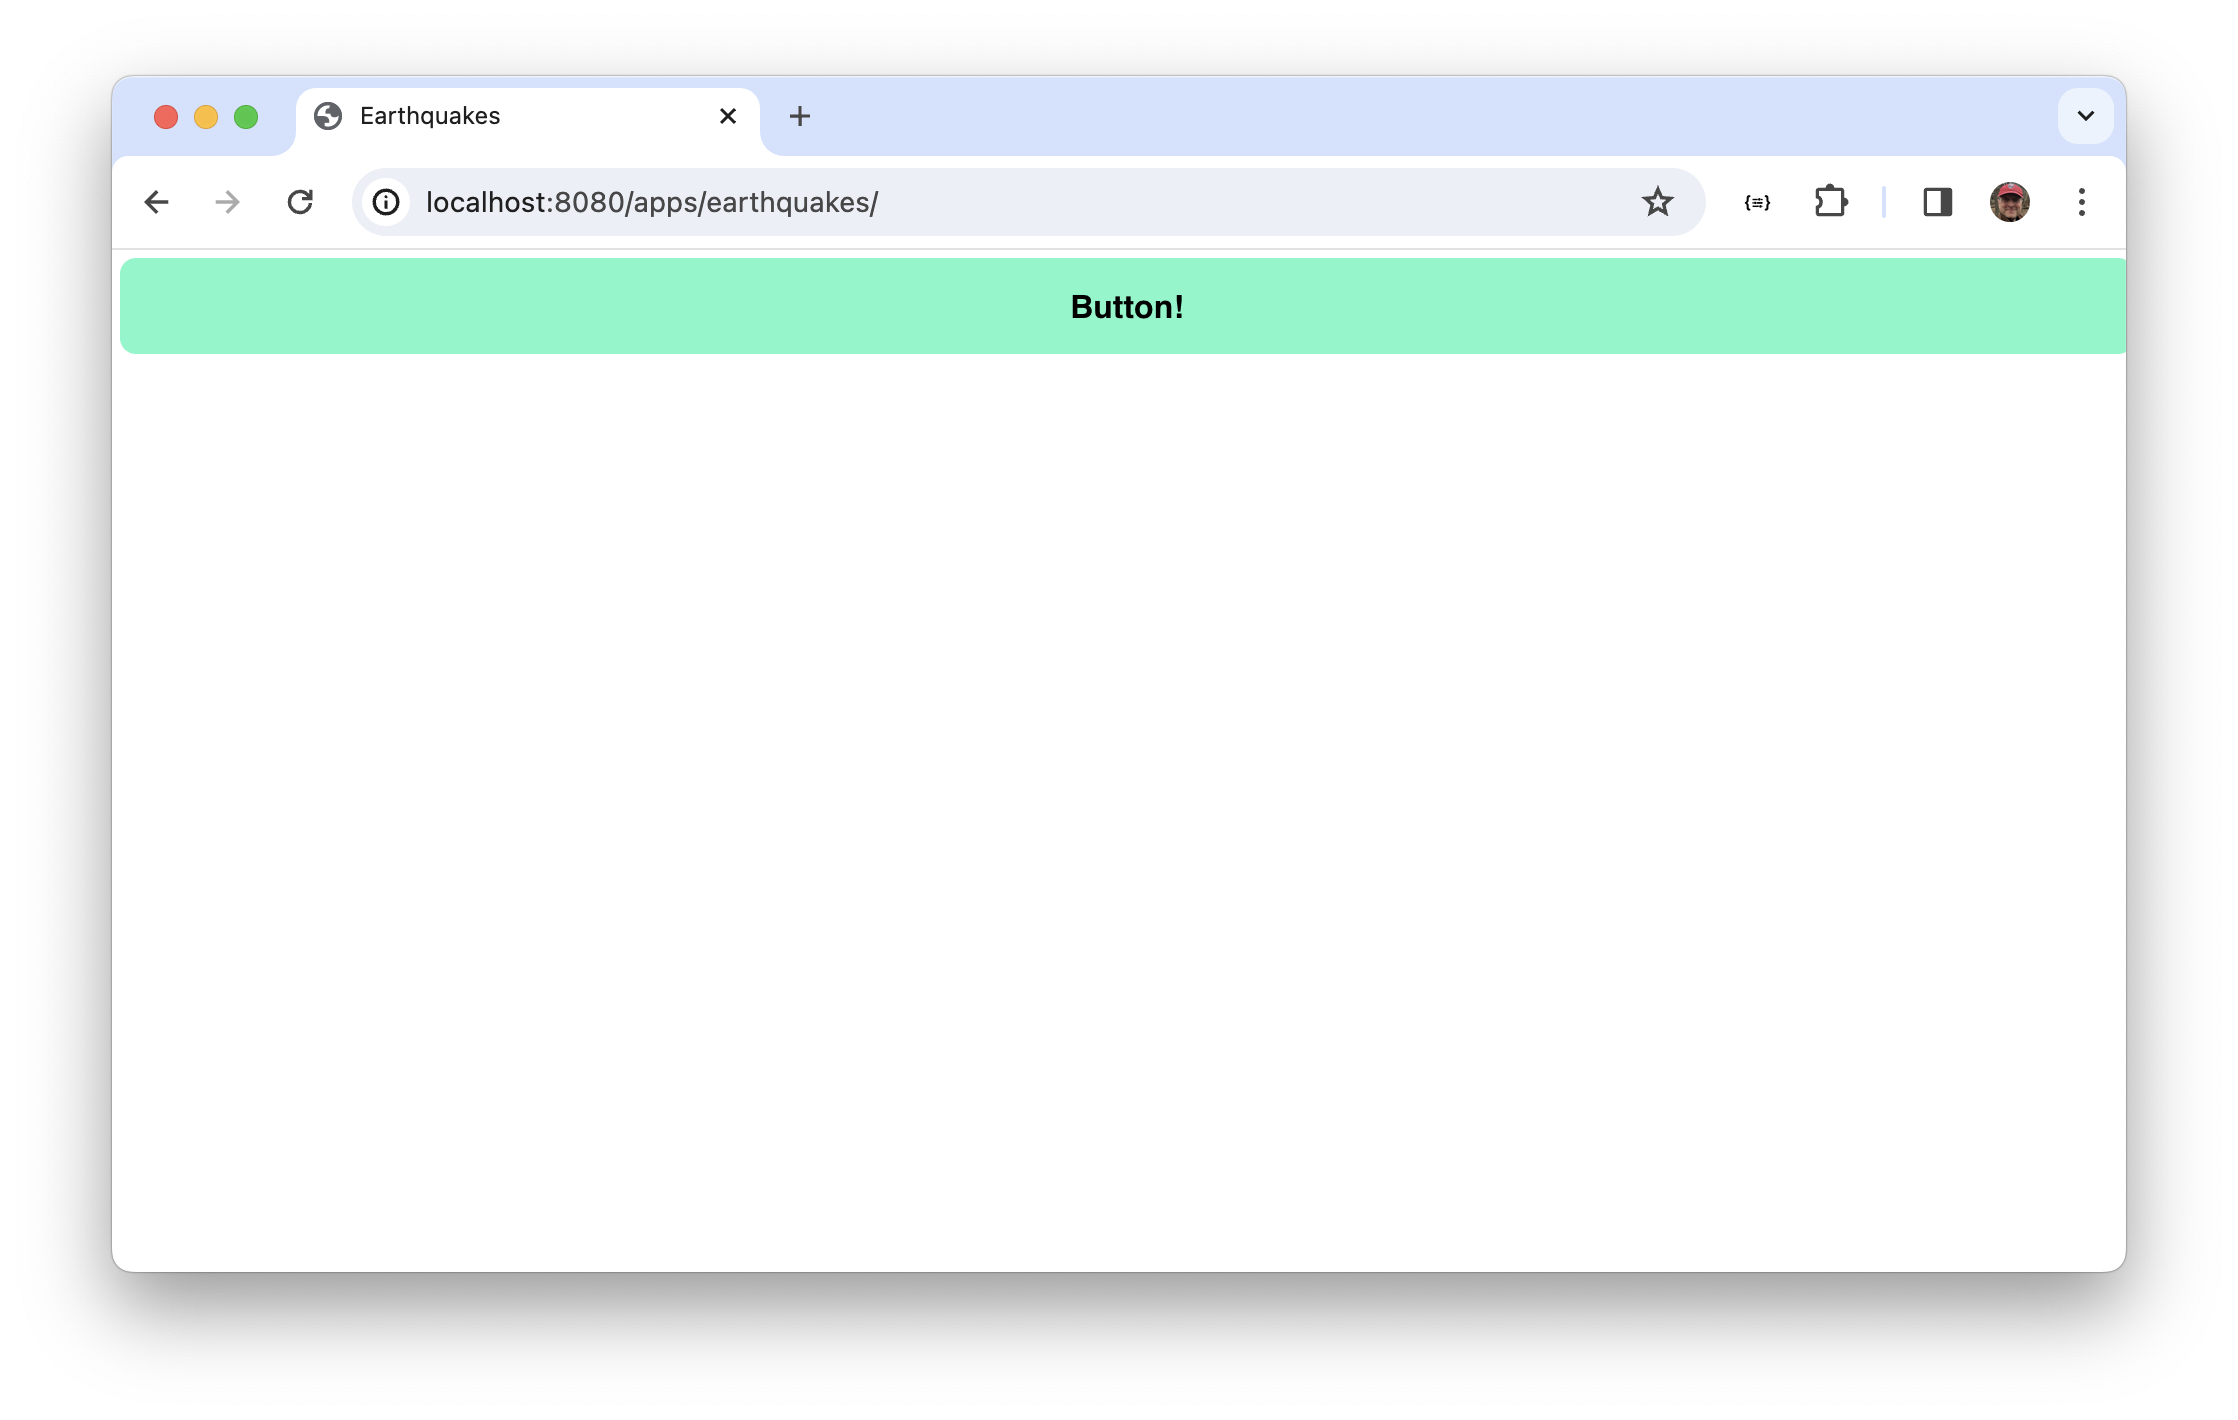 The button takes up the full width. Buttons look different depending on the theme. We're using
the _neo-theme-neo-light_ theme, which controls button height. Otherwise, child items a using the _fit_ layout
take up the full window.
The button takes up the full width. Buttons look different depending on the theme. We're using
the _neo-theme-neo-light_ theme, which controls button height. Otherwise, child items a using the _fit_ layout
take up the full window.
Modify the layout
The `layout` configures how child items are visually arranged. First, note that the config
specifies `ntype`. We used `module` for the button config. An `ntype` is a class alias — if a class
has already been imported, you can use the `ntype` rather than importing it again and using the `module`
config. We haven't imported any layouts, but it turns out that `Neo.container.Base` _does_ import all the
layout types, which means we're always free to use `ntype` with layouts. You're free to specify an `ntype`
for the classes you define.
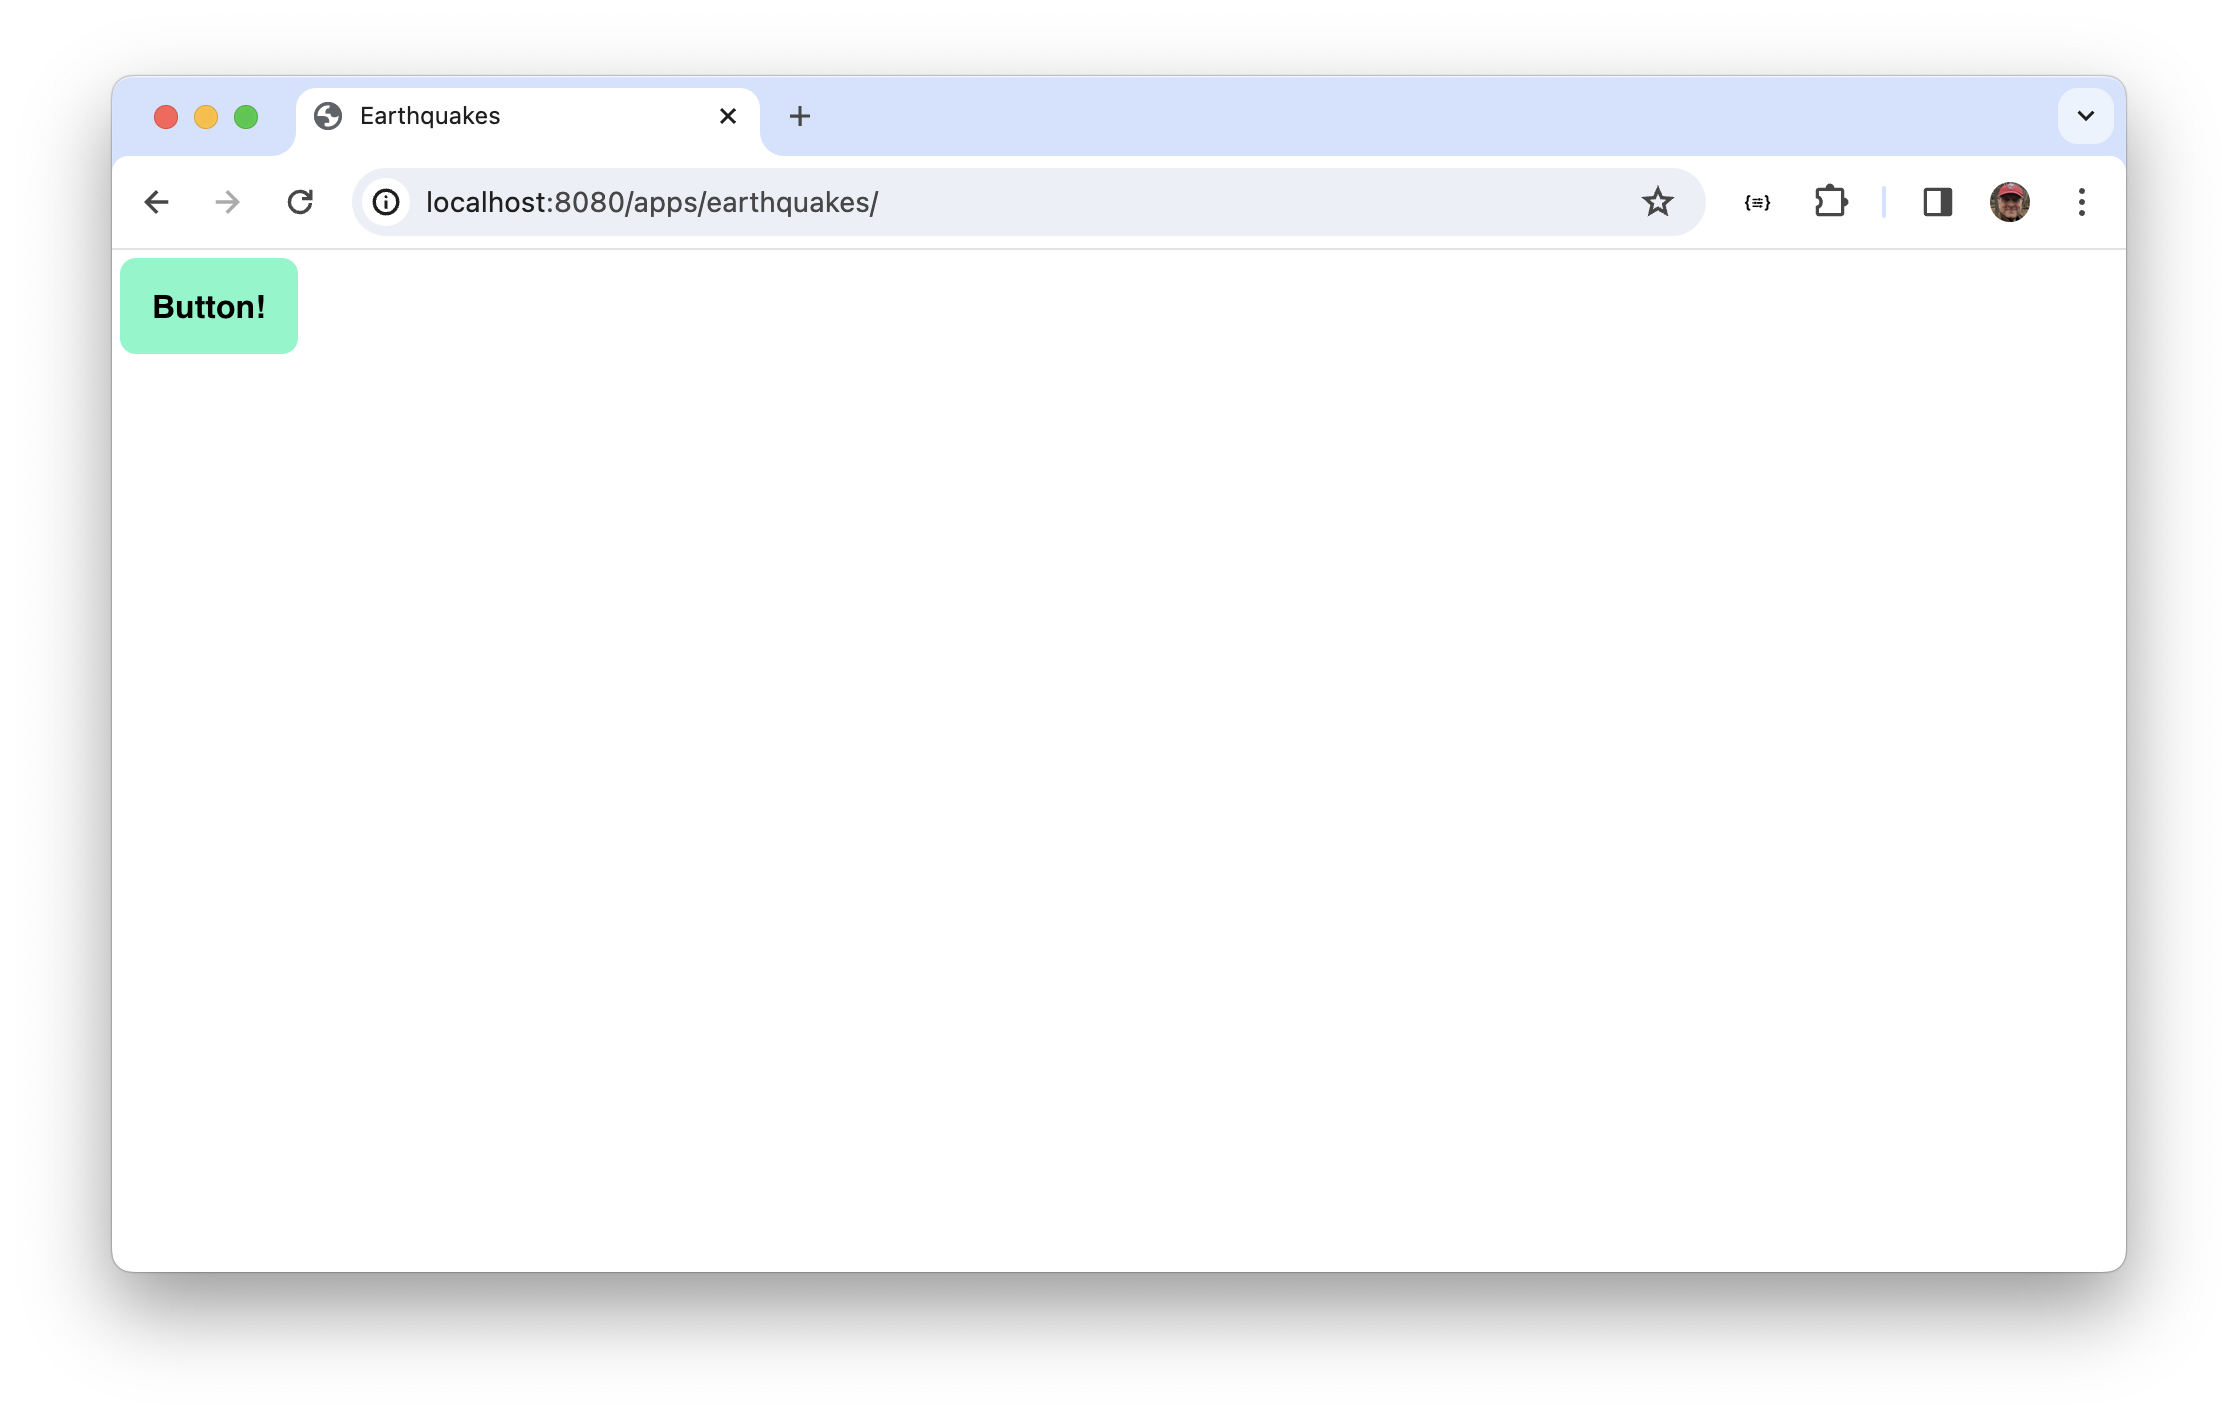
Let's change the layout to arrange items vertically, with items aligned horizontally at the start.
```javascript readonly
layout: {
ntype: 'vbox',
align: 'start'
}
```
## Debugging
At startup, a Neo.mjs application launches three Web Workers:
- neomjs-app-worker
- neomjs-data-worker
- neomjs-vdom-worker
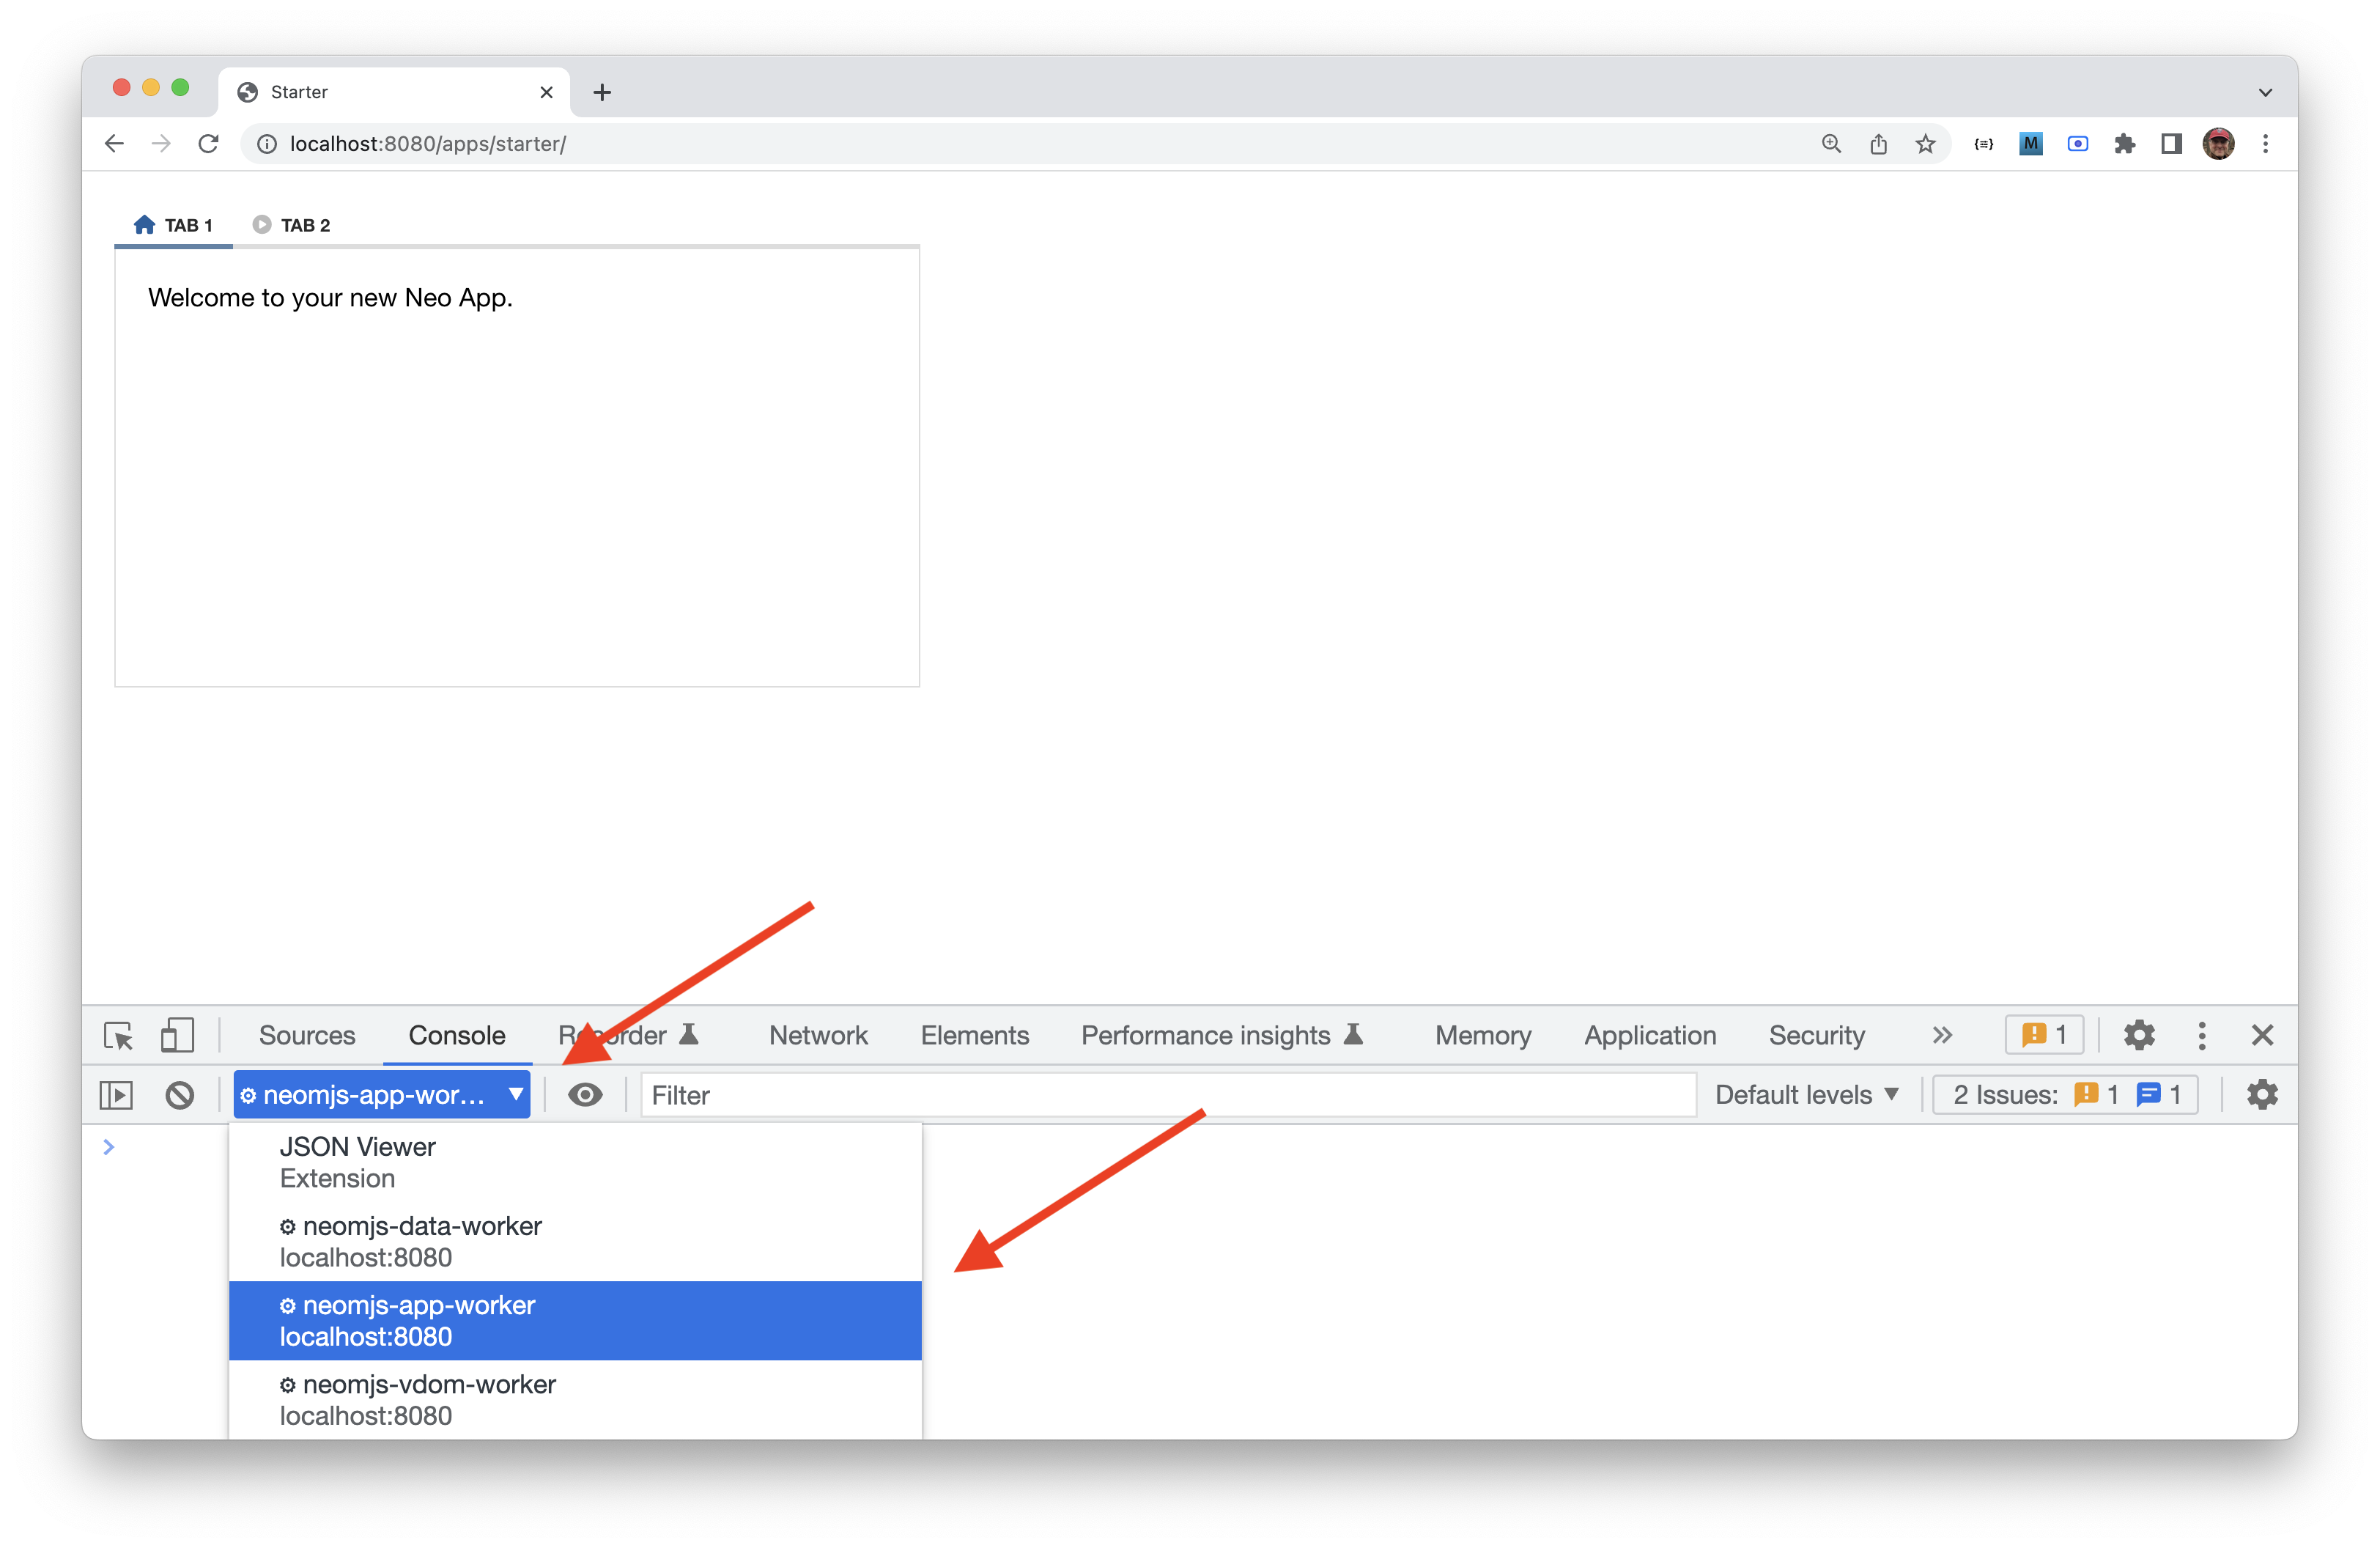
As a developer, your code is run in _neomjs-app-worker_. When you're debugging,
choose that worker in the DevTools JavaScript context dropdown.
 A basic debugging (and coding!) task is getting a reference to a component.
You can then get or update the component's state and run its methods.
When you're debugging, there are a few ways to get a component reference.
- Doing a Shift-Ctrl-right-click on a component
- `Neo.manager.Component.items` — Returns an array of all components in the app
- `Neo.find({property:'value'})` — Returns an array of components matching the specified properties
- `Neo.findFirst({property:'value'})` — Returns the first component that matches the specified properties
Keep in mind that `Neo.manager.Component.items`, `Neo.find()` and `Neo.findFirst()`
are debugging aids _only_, and _should never be used in app logic_.
Why? There's nothing stopping you from using these statements, and they would work fine,
but those methods completely break encapsulation and scoping principles! Their
use would make an application brittle and hard to maintain.
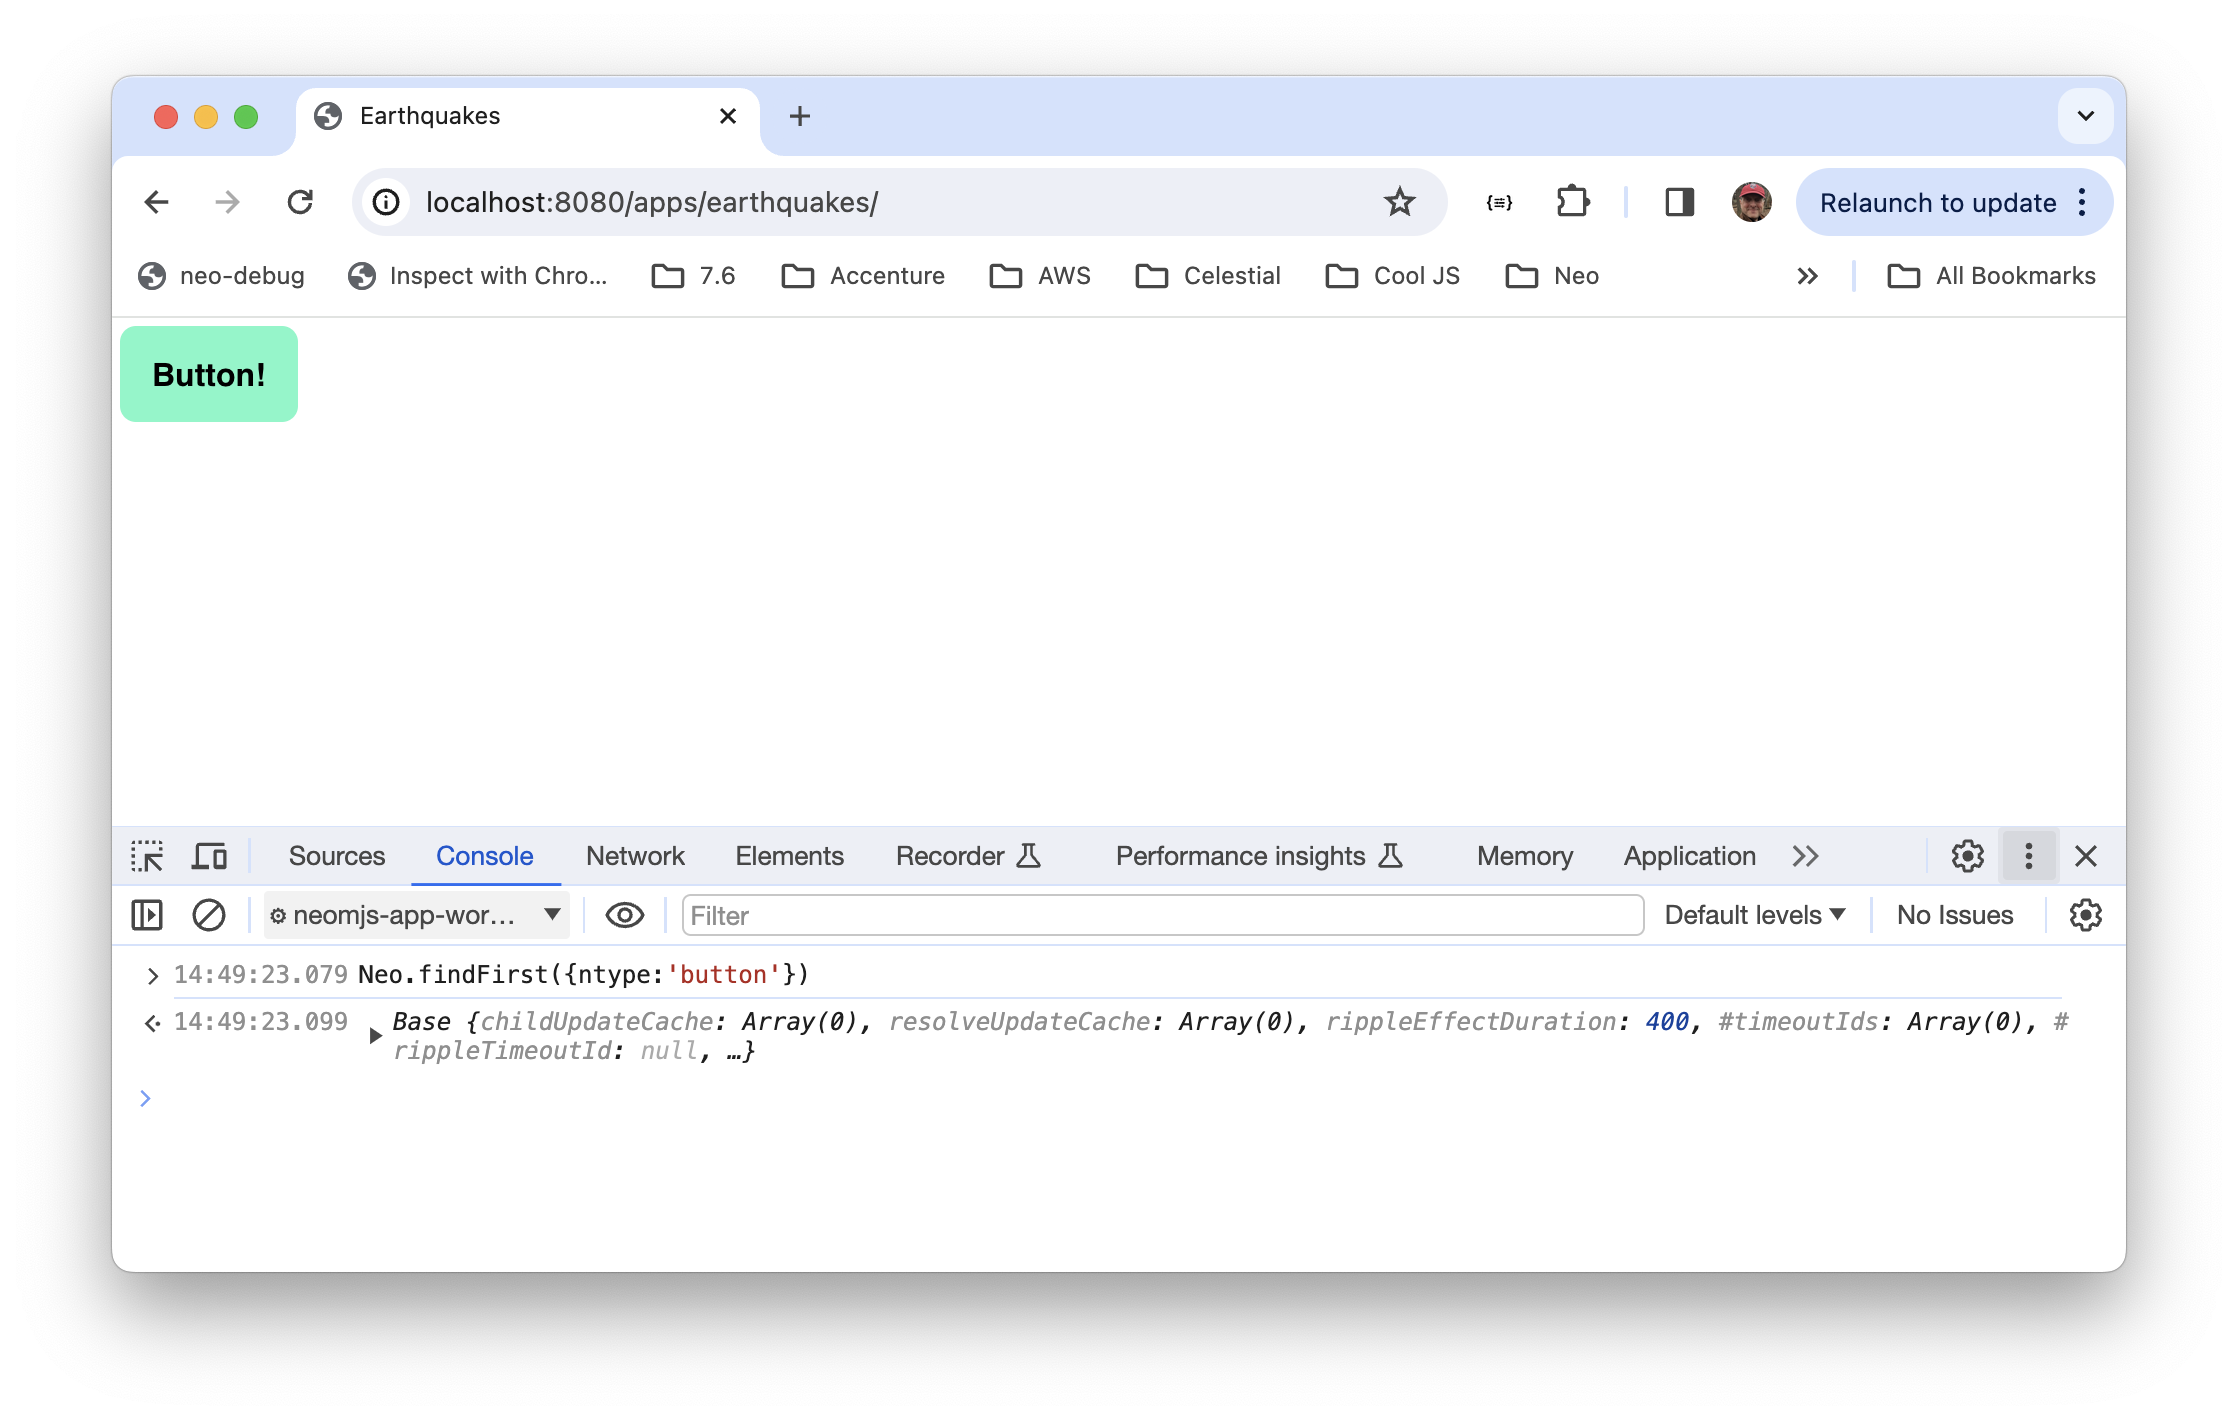
Once we have a reference in the debugger console you can inspect and update its
properties, or run its methods. For example, if we have devtools open in the
`earthquakes` app, then run `Neo.findFirst({ntype:'button'})` from the _neomjs-app-worker_
context, we can inspect the button.
A basic debugging (and coding!) task is getting a reference to a component.
You can then get or update the component's state and run its methods.
When you're debugging, there are a few ways to get a component reference.
- Doing a Shift-Ctrl-right-click on a component
- `Neo.manager.Component.items` — Returns an array of all components in the app
- `Neo.find({property:'value'})` — Returns an array of components matching the specified properties
- `Neo.findFirst({property:'value'})` — Returns the first component that matches the specified properties
Keep in mind that `Neo.manager.Component.items`, `Neo.find()` and `Neo.findFirst()`
are debugging aids _only_, and _should never be used in app logic_.
Why? There's nothing stopping you from using these statements, and they would work fine,
but those methods completely break encapsulation and scoping principles! Their
use would make an application brittle and hard to maintain.
Once we have a reference in the debugger console you can inspect and update its
properties, or run its methods. For example, if we have devtools open in the
`earthquakes` app, then run `Neo.findFirst({ntype:'button'})` from the _neomjs-app-worker_
context, we can inspect the button.
 Once we find the component, we can expand it and scroll down until we see the grayed-out properties —
those are set/get properties.
We can choose whatever property we're interested in, and click on the ellipses. That runs the getter, and if
we change the value we'll be running the setter. An obvious button property to change is `text`.
Editing that value is immediately reflected in the view.
Once we find the component, we can expand it and scroll down until we see the grayed-out properties —
those are set/get properties.
We can choose whatever property we're interested in, and click on the ellipses. That runs the getter, and if
we change the value we'll be running the setter. An obvious button property to change is `text`.
Editing that value is immediately reflected in the view.
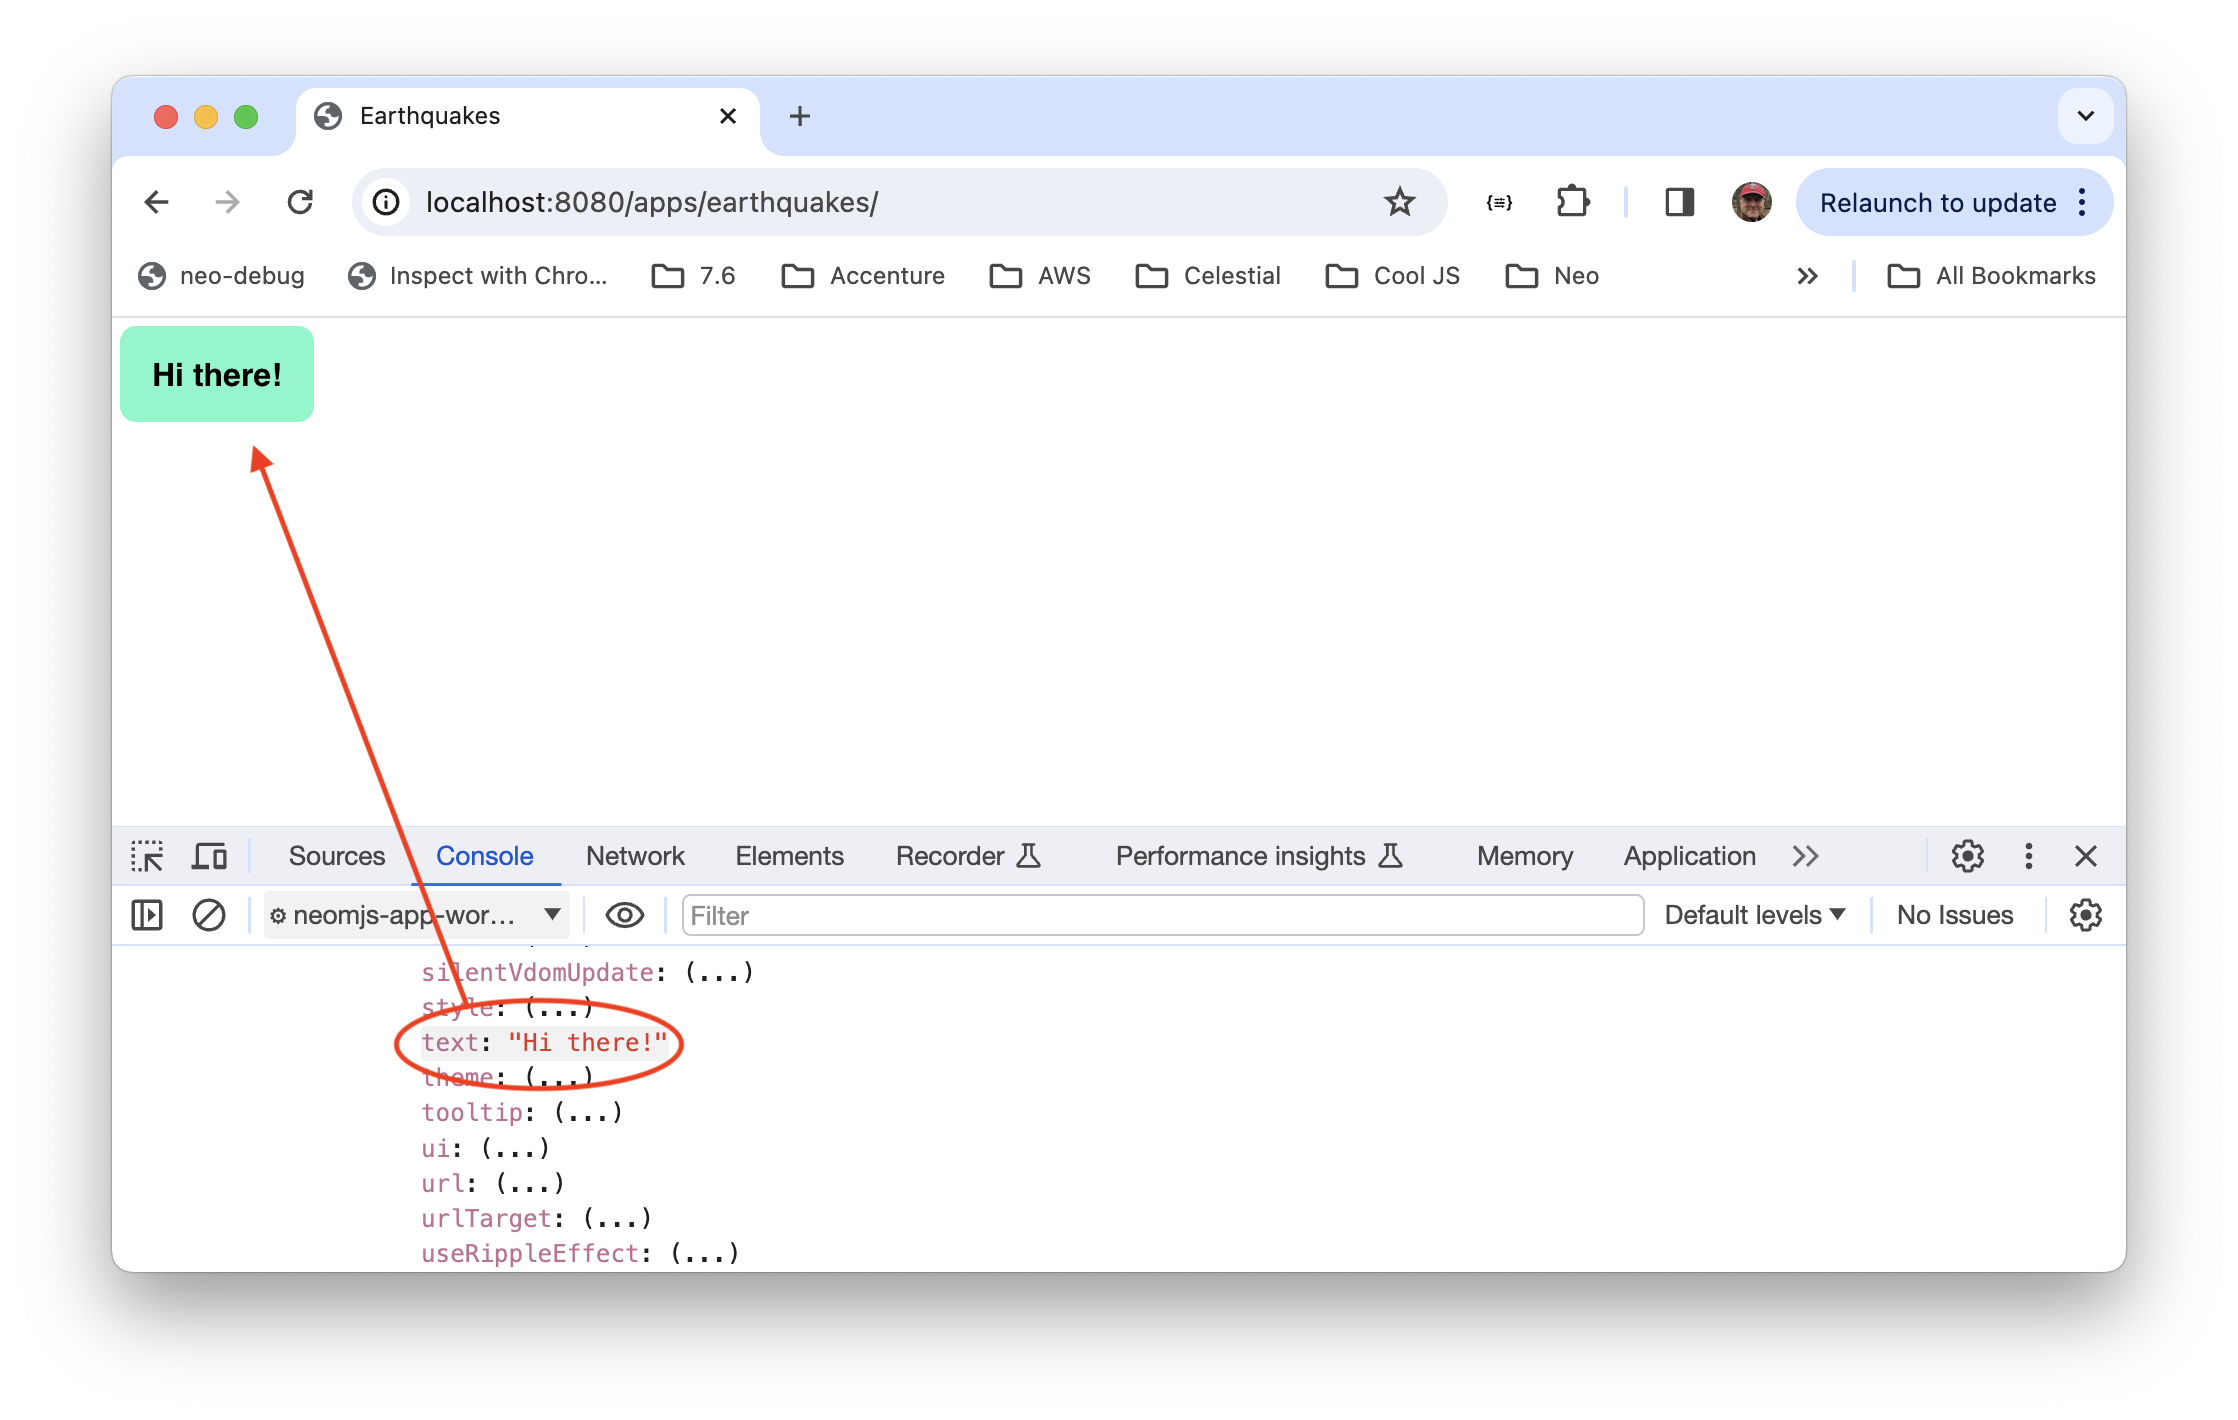 Or, we can change the property directly via `Neo.findFirst({ntype:'button'}).text = "Hi there!`.
There's an even more convenient way to get a component reference: Doing a Shift-Ctrl-right-click on a component
will show the container hierarchy for the selected component.
Or, we can change the property directly via `Neo.findFirst({ntype:'button'}).text = "Hi there!`.
There's an even more convenient way to get a component reference: Doing a Shift-Ctrl-right-click on a component
will show the container hierarchy for the selected component.
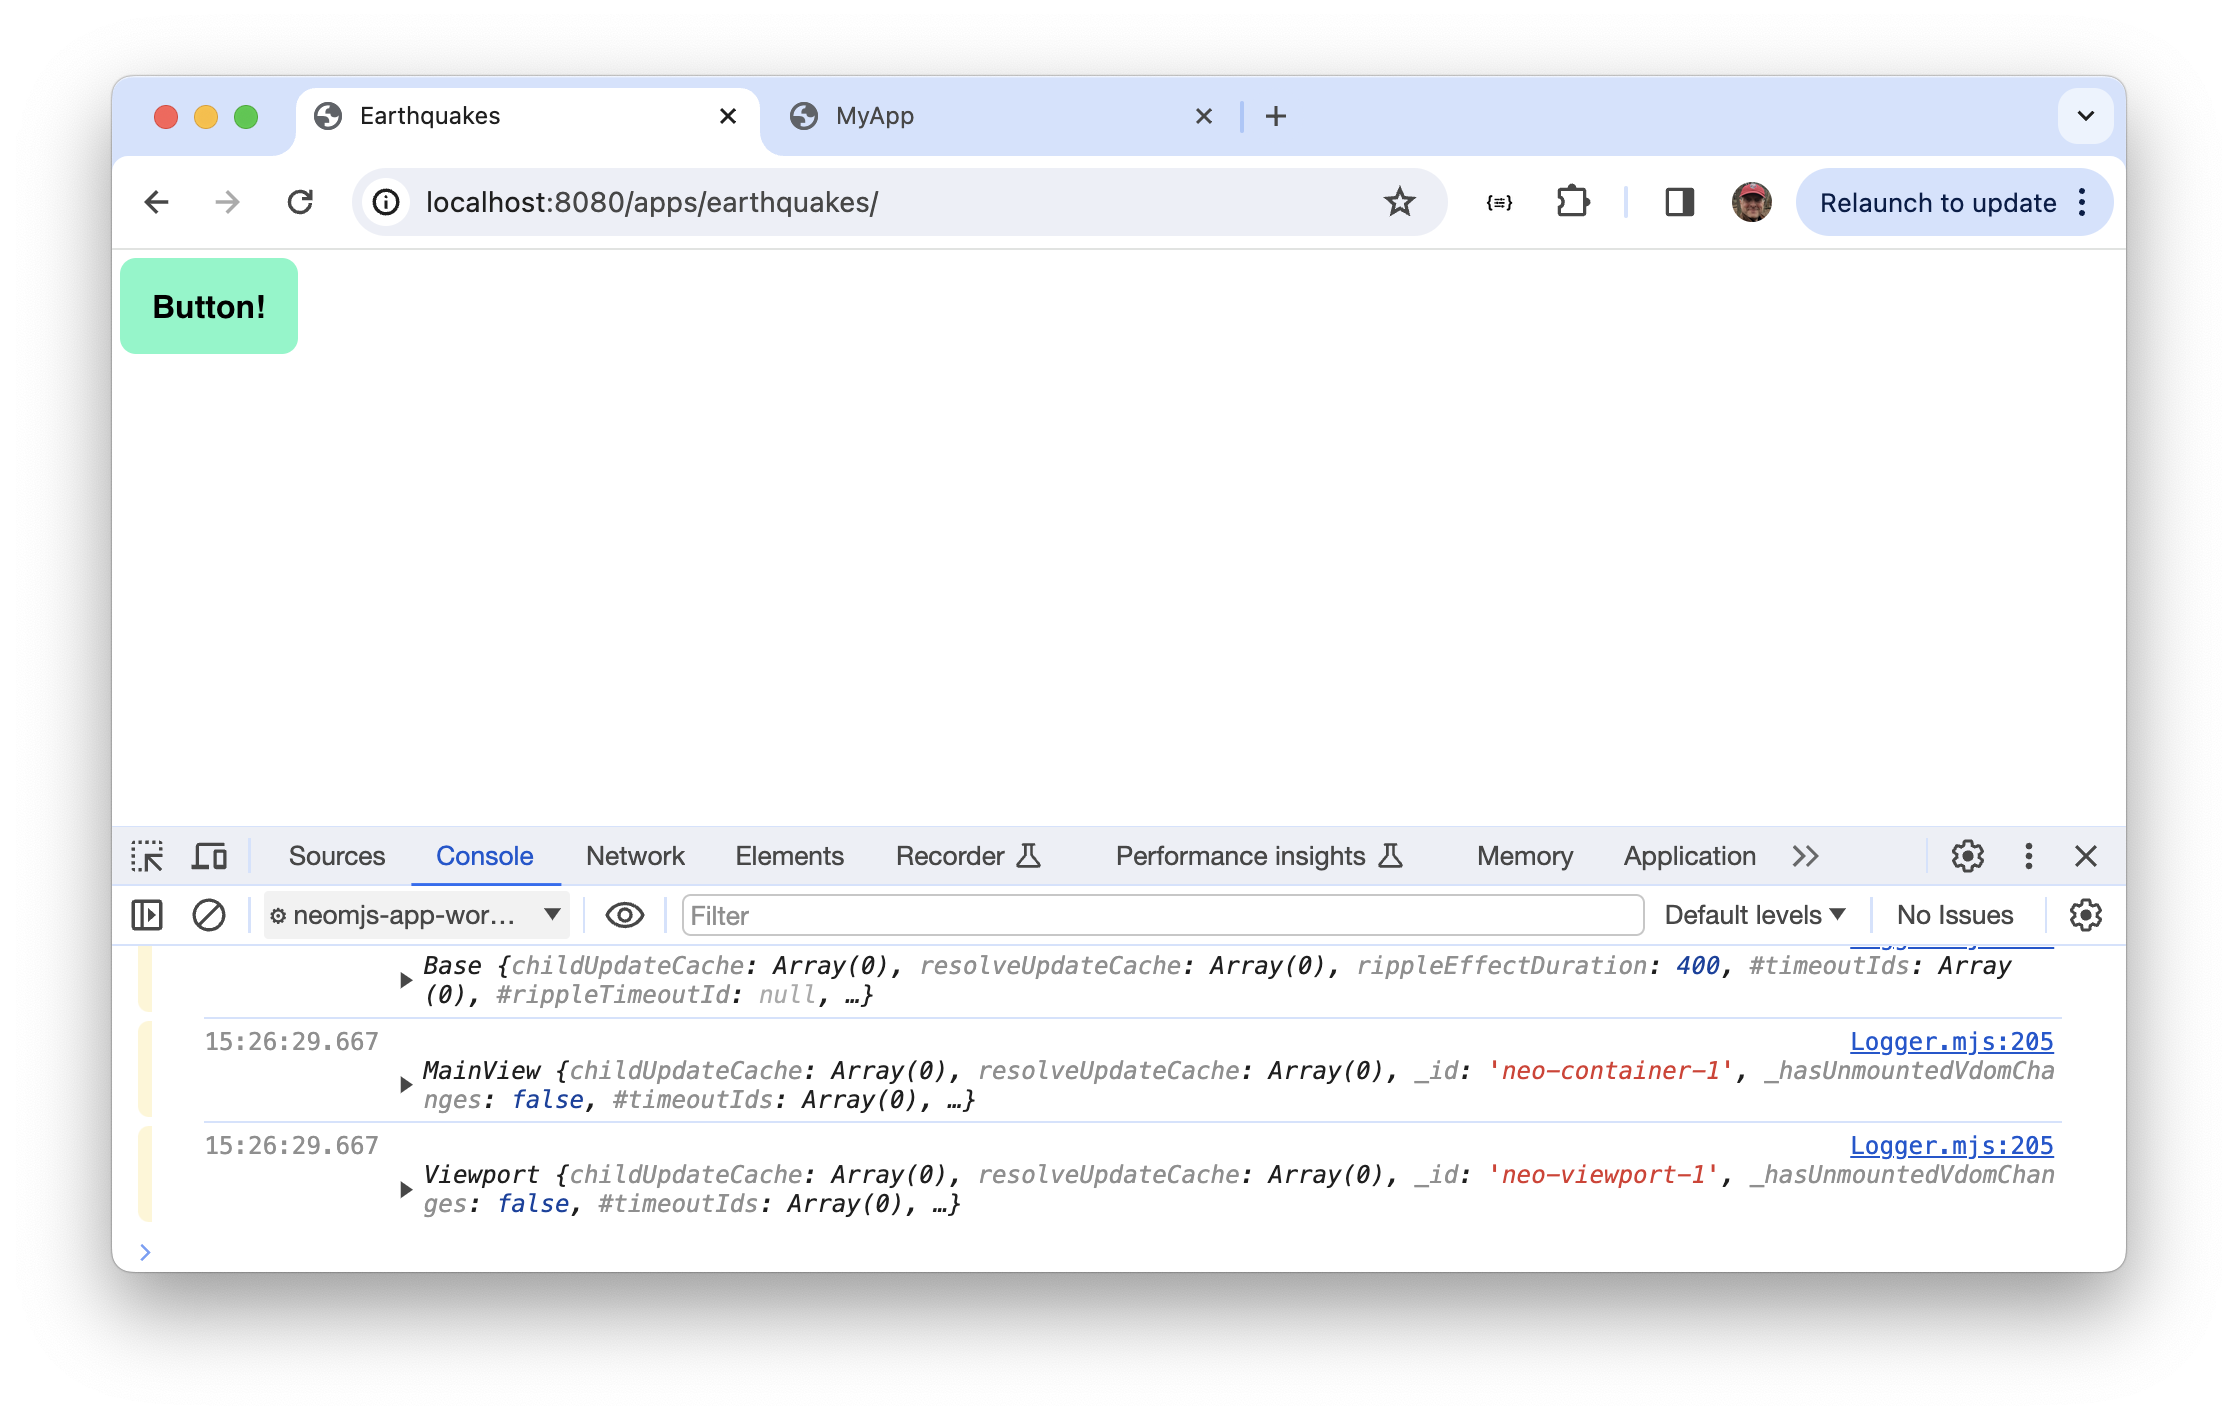 At this point the app is so simple there's not much to see, but in a more complex app you can see the hierarchy
and inspect or update component.
##Lab. Debugging
In this lab you'll get a little debugging practice by getting component references, changing properties,
and runing methods.
Remember that when using the debugger console you need to be in the _neo-app-worker_ context.
At this point the app is so simple there's not much to see, but in a more complex app you can see the hierarchy
and inspect or update component.
##Lab. Debugging
In this lab you'll get a little debugging practice by getting component references, changing properties,
and runing methods.
Remember that when using the debugger console you need to be in the _neo-app-worker_ context.
Use `Neo.manager.Component.items`
While running the _earthquakes_ app, open Chrome devtools, choose the _neomjs-app-worker_ JavaScript
context, and run this statement:
Neo.manager.Component.items
The `items` property is an array of all created components. The array may have a lot of entries, depending on
the complexity of an app and how much you've done while running it. But it's an easy way to explore what's
been created.
Store as global variable
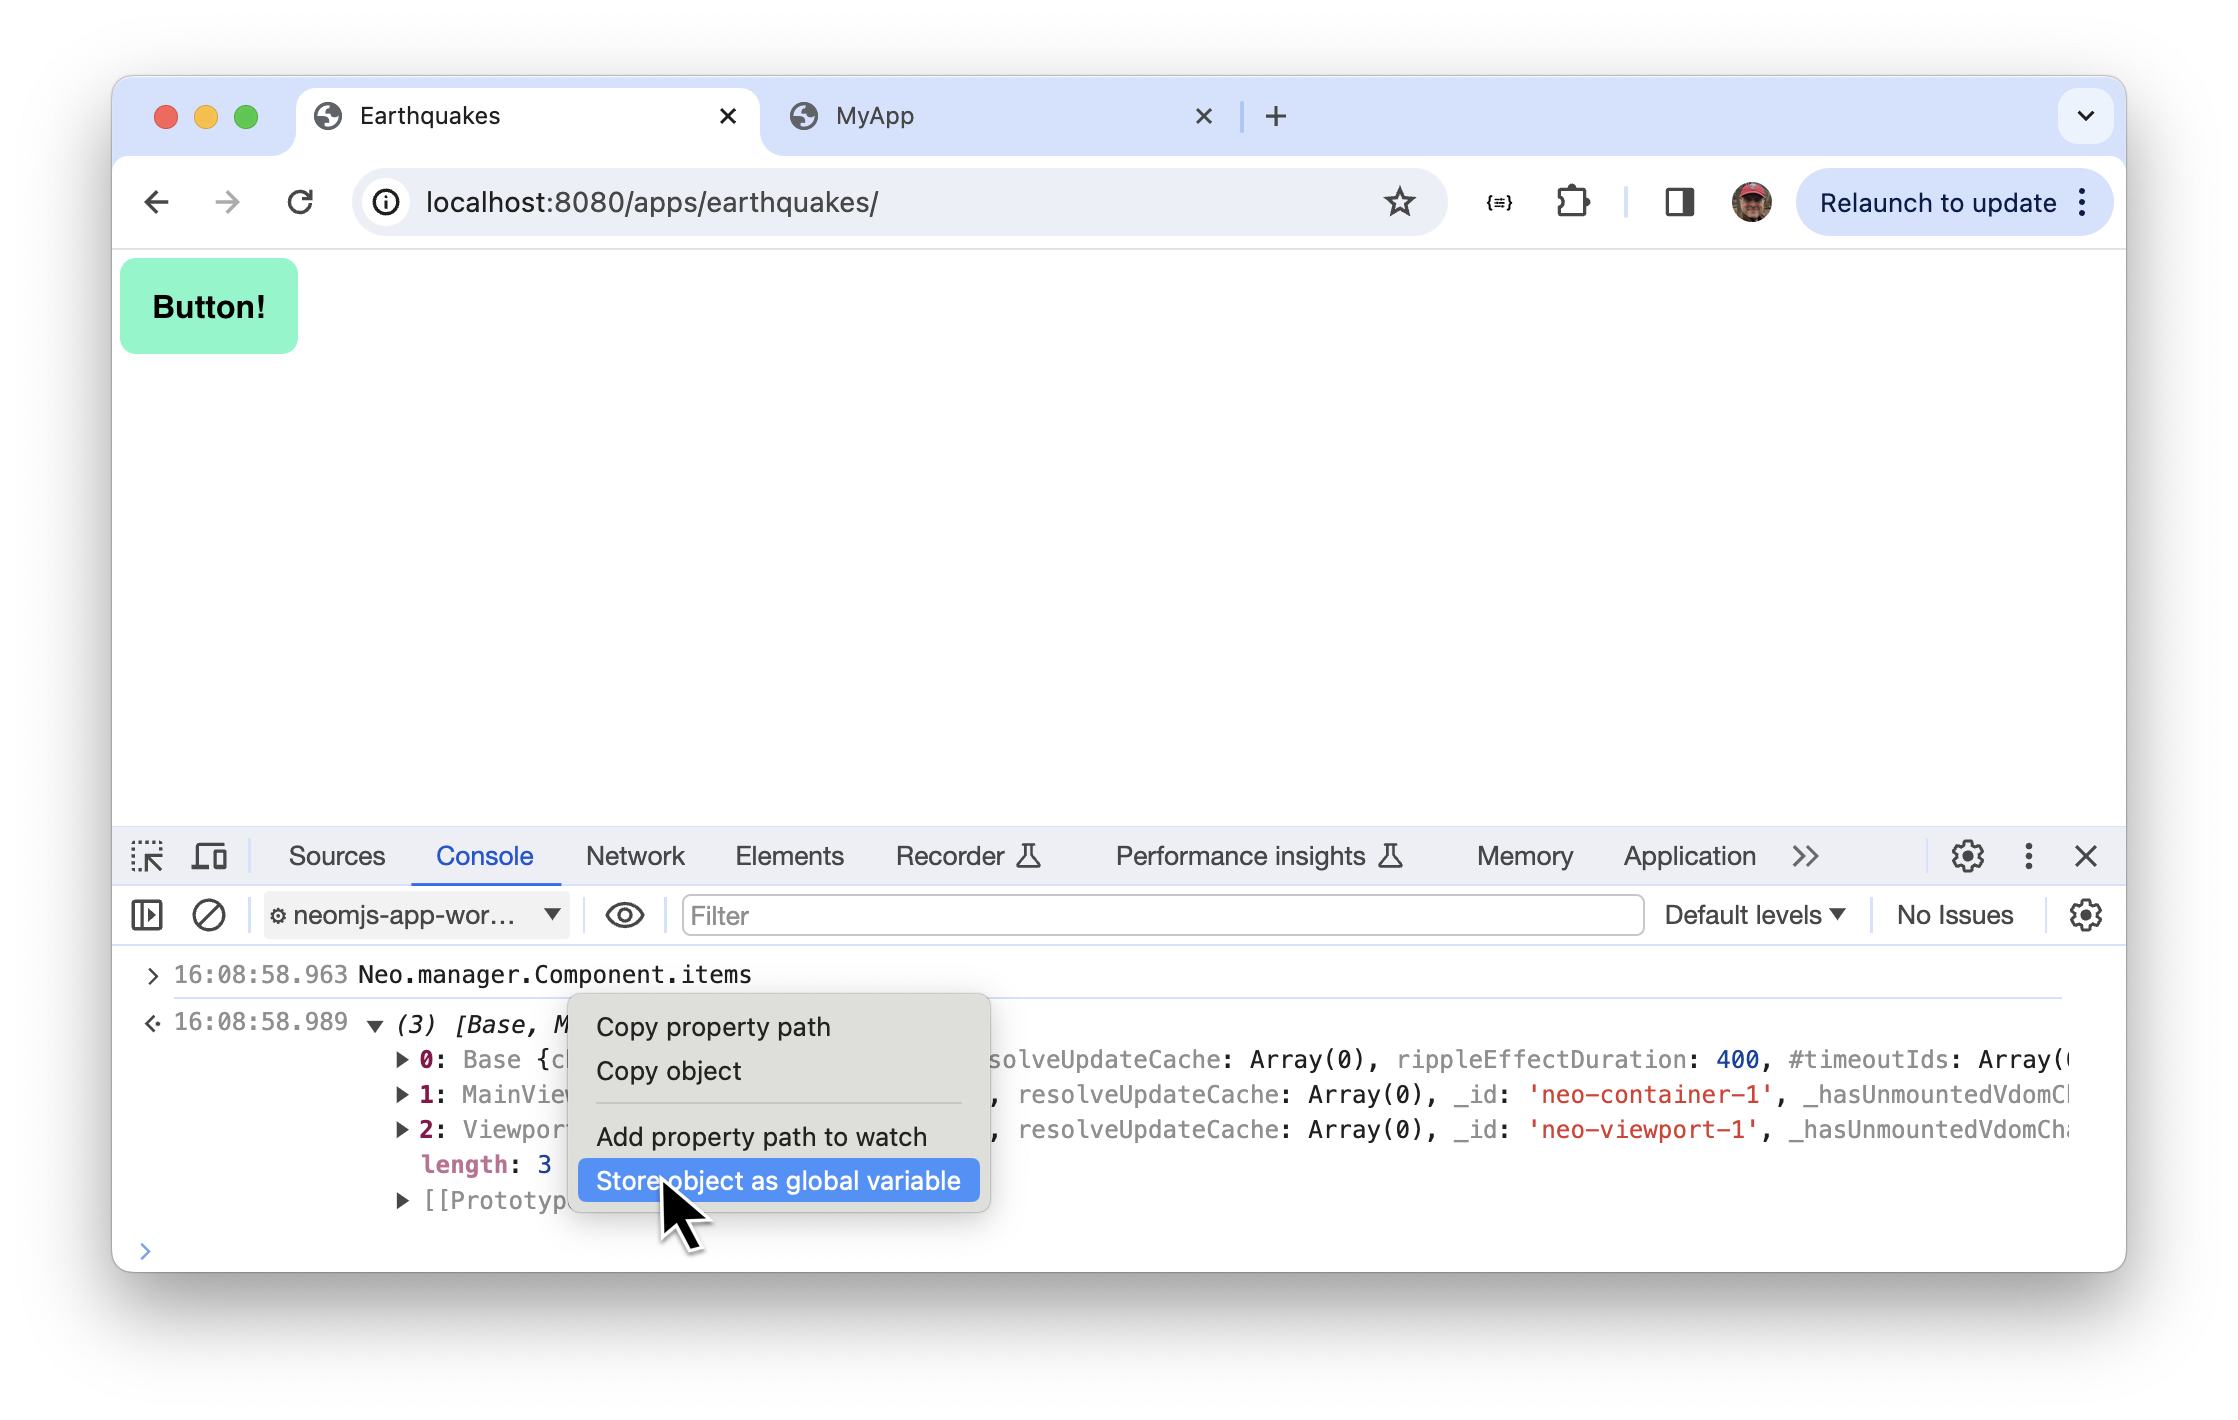
Any time you have a object reference in the console — even if it's nested within an array or object —
you can right click on the object and choose _Store as global_ variable. Chrome will create a variable named
`temp1`, `temp2`, etc., that references the object. That can make it easier to inspect the object and run its methods..
Use `Neo.find()` and `Neo.findFirst()`
If you know what you're looking for, and don't want to bother inspecting everything in `Neo.manager.Component.items`,
you can use `Neo.find()`, passing an object used to match against what you're searching for.
`Neo.find()` returns an array of matching instances, and `Neo.findFirst()` returns the first matching item.
Often you know there's only a single instance, so in practice `Neo.findFirst()` is more commonly used.
You could find the button via Neo.find({ntype:'button'}) or Neo.find({text:'Button!'} (assuming you haven't changed
the button's text.) You can even match a property you give the button. For example, if you configured it with a made-up
property `foo:true`, you could find it via `Neo.findFirst({foo:true})`. The point is you can search for any properties
you'd like.
Try this out.
`Neo.findFirst({text:'Button!'}).text = 'Foo!'
You should see the button's text change immediately.
Use `Shift-Ctrl-right-click`
With your cursor over the button, press _Shift-Ctrl-right-click_. The console will log the button, its parent `MainView`
and the subsequent parent `Viewport. The button reference shows up as `Base` because the button class name is `Neo.button.Base`.
Note that _Shift-Ctrl-right-click_ is only available during development — it isn't available in a build.
Add a method
As we mentioned, when debugging, if you a have a reference you can access or update its properties, or run
its methods. Let's try that out by adding a method.
Edit `apps/earthquakes/view/MainView.mjs` and add a method.
```javascript readonly
import Base from '../../../node_modules/neo.mjs/src/container/Base.mjs';
import Button from '../../../node_modules/neo.mjs/src/button/Base.mjs';
import Controller from './MainViewController.mjs';
import MainStateProvider from './MainStateProvider.mjs';
class MainView extends Base {
static config = {
className: 'Earthquakes.view.MainView',
ntype: 'earthquakes-main',
controller: {module: Controller},
stateProvider: {module: MainStateProvider},
layout: {
ntype: 'vbox',
align: 'start'
},
items: [{
module: Button,
foo: true,
text: 'Button!'
}],
}
doFoo() {
console.log('foo!');
}
}
export default Neo.setupClass(MainView);
```
Save your changes.
As you can see, the code defined an instance method `doFoo()` that simply logs a message. We'll run the method via debugging techniques in the next step.
Use `Neo.component.Manager.items` to run the method
On the console run `Neo.component.Manager.items`. Expand the array and right-click on the entry for `MainView` and
choose `Store object as global variable`. Then type `temp1.doFoo()` — you should see "foo!" being logged.
Remember that you _must_ run console statement in the _neomjs-app-worker_ context, and every time your choose
`Store object as global variable` it'll increment the name of the temp variable: `temp1`, `temp2`, etc.
Use _Shift-Ctrl-right-click_ to run the method
Now try the _Shift-Ctrl-right-click_ technique.
With your cursor over the button, do a _Shift-Ctrl-right-click_ — you'll see the component hierarchy logged.
As you did in the previous step, right-click on the entry for `MainView` and choose `Store object as global variable`.
Then run `doFoo()` using that variable.
At this point we have a application with minimal content. You also know how to do some debugging. Now let's do something more interesting.
##Lab. Fetch Earthquakes Data and Show it in a Table
Add a table
Replace the button with a table by replacing `MainView.mjs` with the following content.
```javascript readonly
import Base from '../../../node_modules/neo.mjs/src/container/Base.mjs';
import Table from '../../../node_modules/neo.mjs/src/table/Container.mjs';
import Store from '../../../node_modules/neo.mjs/src/data/Store.mjs';
import Controller from './MainViewController.mjs';
import MainStateProvider from './MainStateProvider.mjs';
class MainView extends Base {
static config = {
className: 'Earthquakes.view.MainView',
ntype: 'earthquakes-main',
controller: {module: Controller},
stateProvider: {module: MainStateProvider},
layout: {ntype: 'vbox', align: 'stretch'},
items: [{
module: Table,
store: {
module: Store,
model: {
fields: [{
name: "location",
}, {
name: "magnitude",
}, {
name: "timestamp",
type: "Date",
}],
},
url: "https://nameless-tundra-27404.herokuapp.com/go/?fn=earthquakes",
responseRoot: "data",
autoLoad: true,
},
style: {width: '100%'},
columns: [{
dataField: "timestamp",
text: "Date",
renderer: (data) => data.value.toLocaleDateString(undefined,
{weekday: "long", year: "numeric", month: "long", day: "numeric"}
)
}, {
dataField: "location",
text: "Location"
}, {
dataField: "magnitude",
text: "Magnitude",
align: "right",
renderer: (data) => data.value.toLocaleString()
}]
}]
}
}
export default Neo.setupClass(MainView);
```
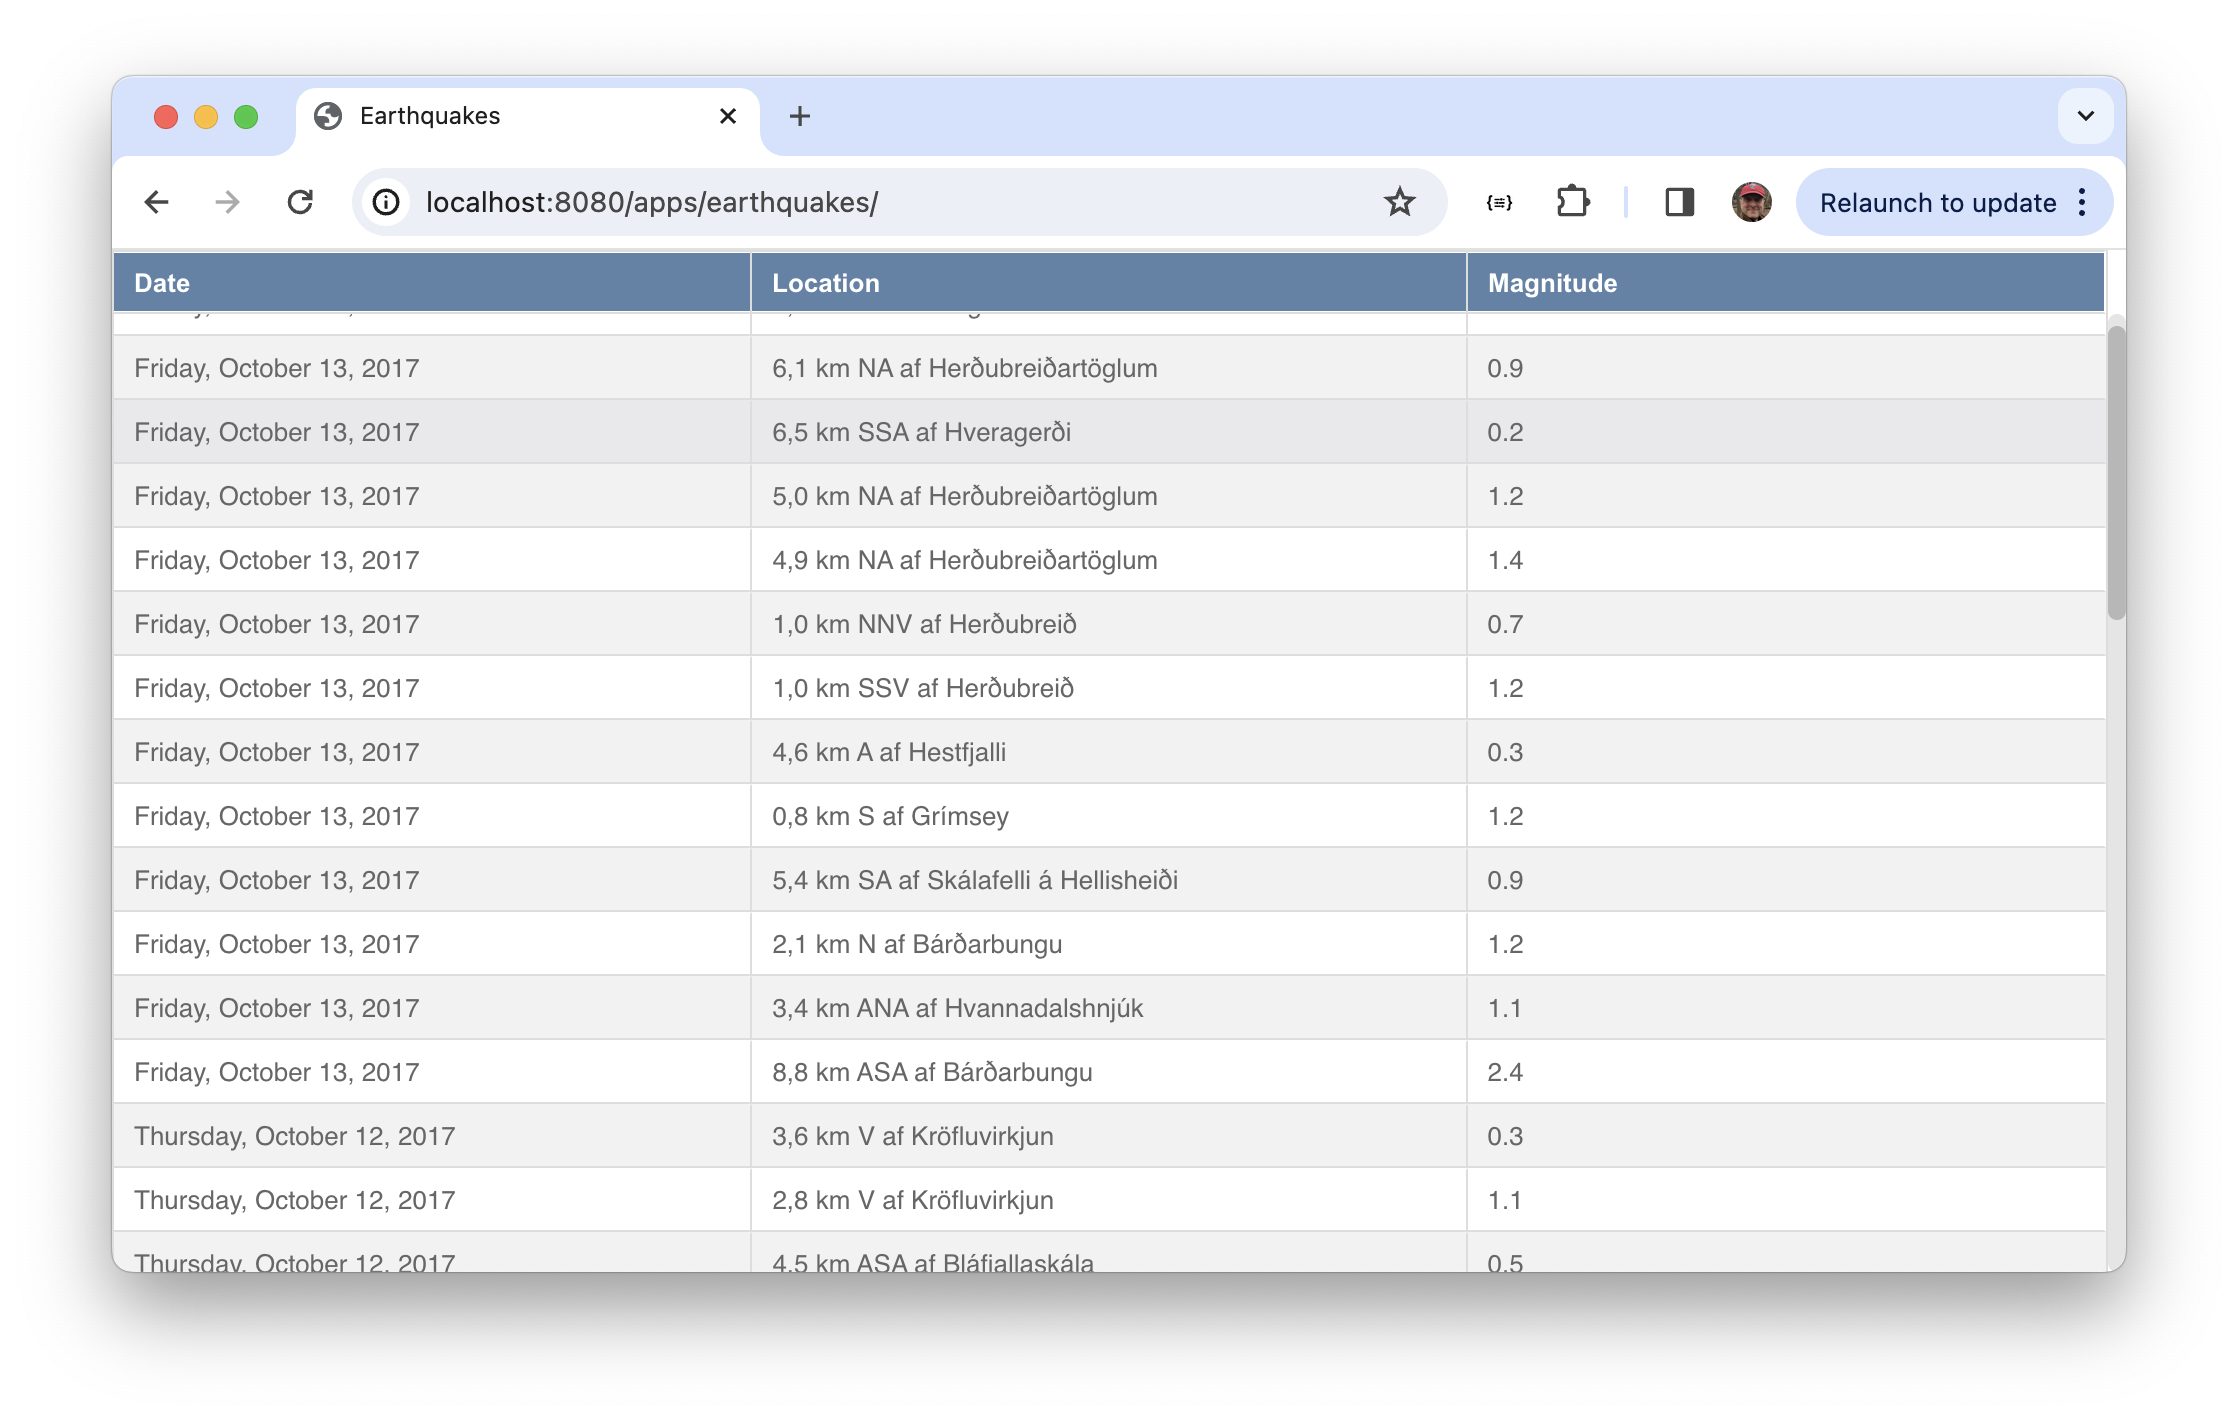
Save and refresh.
##Key Features
The code accomplishes a lot.
As we discussed before, the app is
- Class-based
- Declarative
The app logic
- Calls a web service
- Populates a store
- Shows store data in a table
Let's review the code and see what it's doing.
### The Store
A store is a collection of records. A record is described in the `model` and the model's `fields`.
Here's the config for the store.
```javascript readonly
{
module: Store,
model: {
fields: [{
name: "location",
}, {
name: "magnitude",
}, {
name: "timestamp",
type: "Date",
}],
},
url: "https://nameless-tundra-27404.herokuapp.com/go/?fn=earthquakes",
responseRoot: "data",
autoLoad: true,
}
```
The feed looks like this.
```json readonly
{
"data": [{
"timestamp": "2024-09-29T16:45:14.000Z",
"lat": "64.012",
"lng": "-16.659",
"location": "1.2 km ESE of Hvannadalshnjúkur",
"magnitude": "0.32964",
"depth": "1.2"
}, {
"timestamp": "2024-09-29T16:16:25.000Z",
"lat": "63.929",
"lng": "-21.447",
"location": "2.8 km WSW of Raufarhólshellir",
"magnitude": "0.80979",
"depth": "10.2"
}, ...
]
}
```
The store defines a `type` for the date field. There are a few pre-defined field types that convert
the value from the feed into what's stored in the store's record. The store specifies the URL for the
data feed, and the store uses `responseRoot` to specify the value in the feed that holds the array
of items.
###The Table
Tables have two key configs: `store` and `columns`. Here's the columns config:
```javascript readonly
columns: [{
dataField: "timestamp",
text: "Date",
renderer: (data) => data.value.toLocaleDateString(undefined, {weekday: "long", year: "numeric", month: "long", day: "numeric"}),
}, {
dataField: "location",
text: "Location",
}, {
dataField: "magnitude",
text: "Magnitude",
align: "right",
renderer: (data) => data.value.toLocaleString(),
}]
```
By default, a column just runs `toString()` on the record property specified in the column's `dataField`.
You can also provide a `renderer`, which is a function you provide to format the value any way you'd like.
In the code above it's using standard JavaScript methods to format the data and magnitude.
## Defining Views as Reusable Components
The way we've coded the app, the grid is _not_ reusable. In other words, if we needed two identical grids we'd
have to copy-and-paste the same config block.
You can reuse any class config block by creating a new class that extends the component's class. In other words,
if you want to reuse a table, you create a new class that extends `Neo.container.Table` and uses the same config.
Besides reuse, other good reasons to simplify and modularize your code is to make your views more descriptive and
abstract, and it allows those classes to be tested in isolation.
## Lab. Refactor the Table Into its Own Class
Copy the table into its own class
Create a new file named `apps/earthquakes/view/earthquakes/Table.mjs` with this content.
```javascript readonly
import Base from '../../../../node_modules/neo.mjs/src/table/Container.mjs';
class Table extends Base {
static config = {
className: 'Earthquakes.view.earthquakes.Table',
ntype: 'earthquakes-table',
layout: {ntype: 'vbox', align: 'stretch'},
style: {width: '100%'},
columns: [{
dataField: "timestamp",
text: "Date",
renderer: (data) => data.value.toLocaleDateString(undefined, {weekday: "long", year: "numeric", month: "long", day: "numeric"})
}, {
dataField: "location",
text: "Location"
}, {
dataField: "magnitude",
text: "Magnitude",
align: "right",
renderer: (data) => data.value.toLocaleString()
}],
}
}
export default Neo.setupClass(Table);
```
Review the code
- The class extends `Neo.table.Container`
- It has an `ntype`, which we can use when creating an instance, or when debugging
- Each column has `text` and `dataField` configs, and some have renderers
Use the new component
Edit `apps/earthquakes/view/MainView` and make these changes.
- Add `import EarthquakesTable from './earthquakes/Table.mjs';`
- Replace the `module: Table` with `module: EarthquakesTable`
- Remove the `columns:[]` config
- Leave the `store` config alone
Save and refresh the browser, and your app should run as before.
You can confirm that the new class _is being loaded_ by using DevTools to try to open `earthquakes/Table` — if it
was imported, it'll be listed.
You can confirm that an instance _was created_ by using the DevTools console and searching for it via
Neo.first('earthquakes-table')
Here's the code
```javascript readonly
import Base from '../../../node_modules/neo.mjs/src/container/Base.mjs';
import Controller from './MainViewController.mjs';
import EarthquakesTable from './earthquakes/Table.mjs';
import MainStateProvider from './MainStateProvider.mjs';
import Store from '../../../node_modules/neo.mjs/src/data/Store.mjs';
class MainView extends Base {
static config = {
className: 'Earthquakes.view.MainView',
ntype: 'earthquakes-main',
controller: {module: Controller},
stateProvider: {module: MainStateProvider},
layout: {ntype: 'vbox', align: 'stretch'},
items: [{
module: EarthquakesTable,
store: {
module: Store,
model: {
fields: [{
name: "location",
}, {
name: "magnitude",
}, {
name: "timestamp",
type: "Date",
}],
},
url: "https://nameless-tundra-27404.herokuapp.com/go/?fn=earthquakes",
responseRoot: "data",
autoLoad: true,
},
style: {width: '100%'},
}],
}
}
export default Neo.setupClass(MainView);
```
Why are some things in `MainView` and not in `Table`?
When we refactored the table into its own class we didn't move all the configs. Both
the width styling and `store` were left in `MainView`. Why?
It's a matter of re-use and what you need in a given situation. By leaving the width specification
outside the table class we're to specify a different value in all the places we're using the table.
Similarly, if the store were in the table class, it would be using that specific store and
each instance of the table would have its own instance of the store. If we want multiple
instance of the table with each using a different store — or if
we wanted to share the store with other components — then it makes sense for the
store to be outside the table class.
Make a second instance of the table
To further illustrate that the table is reusable, let's create a second instance.
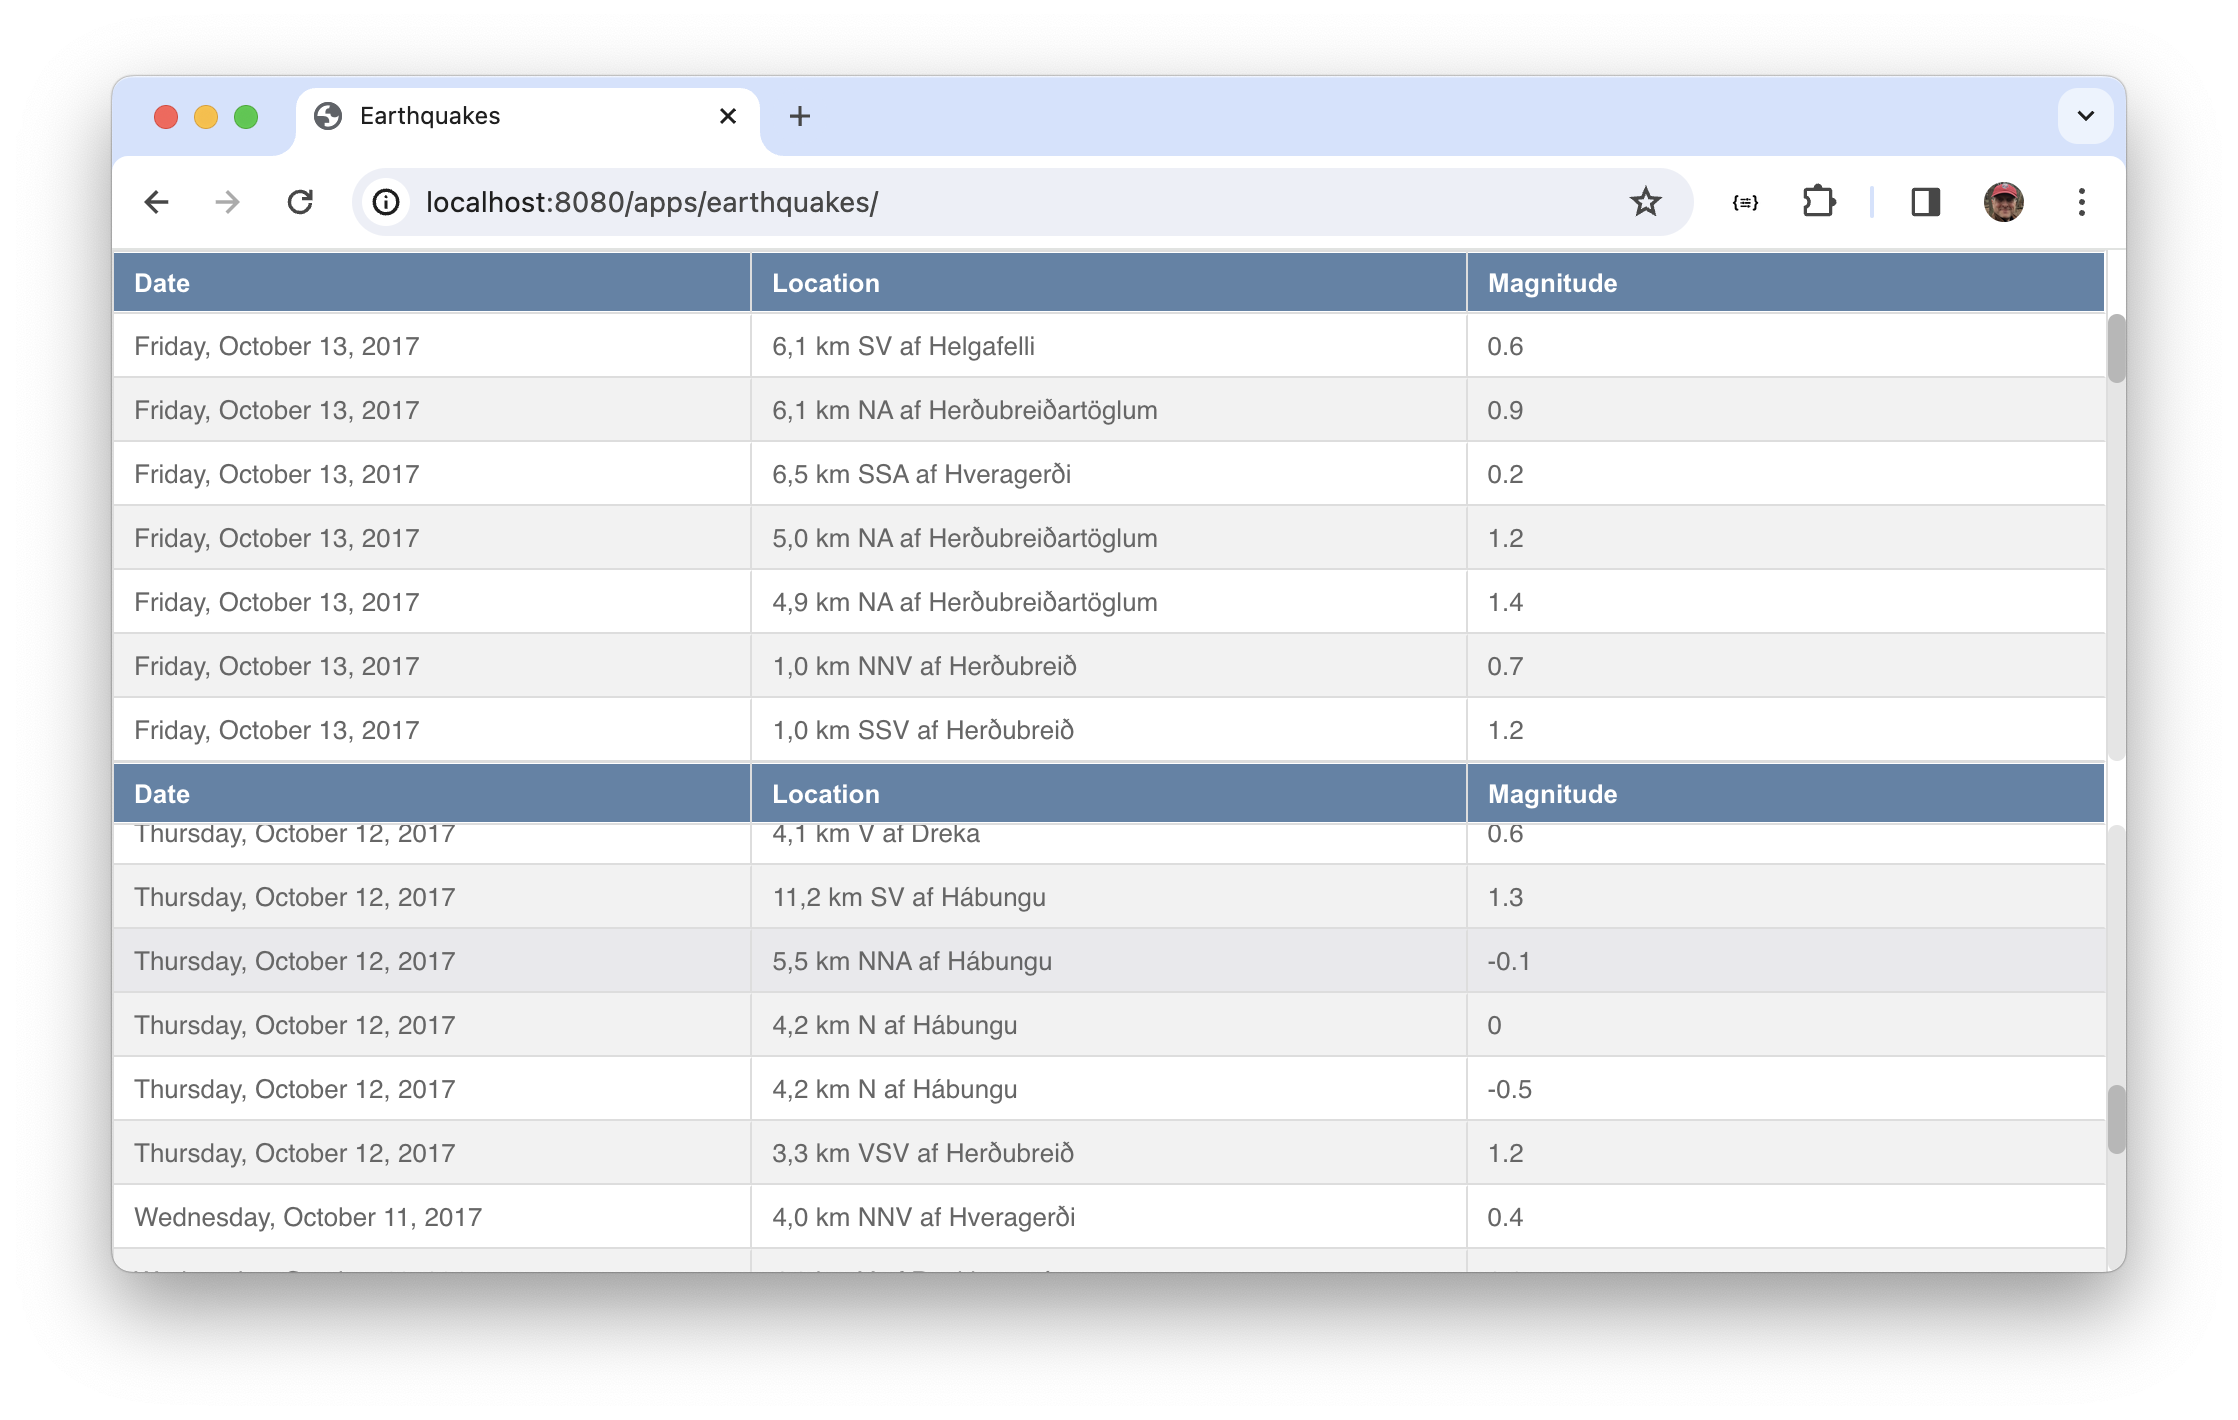
Simply copy-and-paste the value in the `MainView` `items` with an identical second item.
Save and refresh and you should see two tables.
## Shared Bindable Data
The _earthquakes_ app has a problem: even though the table is nicely reusable, we duplicated the config for the store,
and we can't share it. If you were to look at network traffic you'd see that we're also fetching the data
twice.
If we simply wanted to re-use the store's description we could refactor the store config into a new
store class, just like we did for the table. But in _earthquakes_ we want to share the store _instance_.
Neo has a feature that allows shared, bindable, data. A `Neo.state.Provider` instance holds properties that
can be values like strings, numbers, or even references, like component or store references. `Neo.state.Provider`
is commonly called a _state provider_.*
The `create-app-minimal` script includes a state provider and view controller config.
The state provider will hold the store.
* There's a longer write-up on view controllers in the "Getting Started" section.
## Lab. Use a State Provider
Look at network traffic
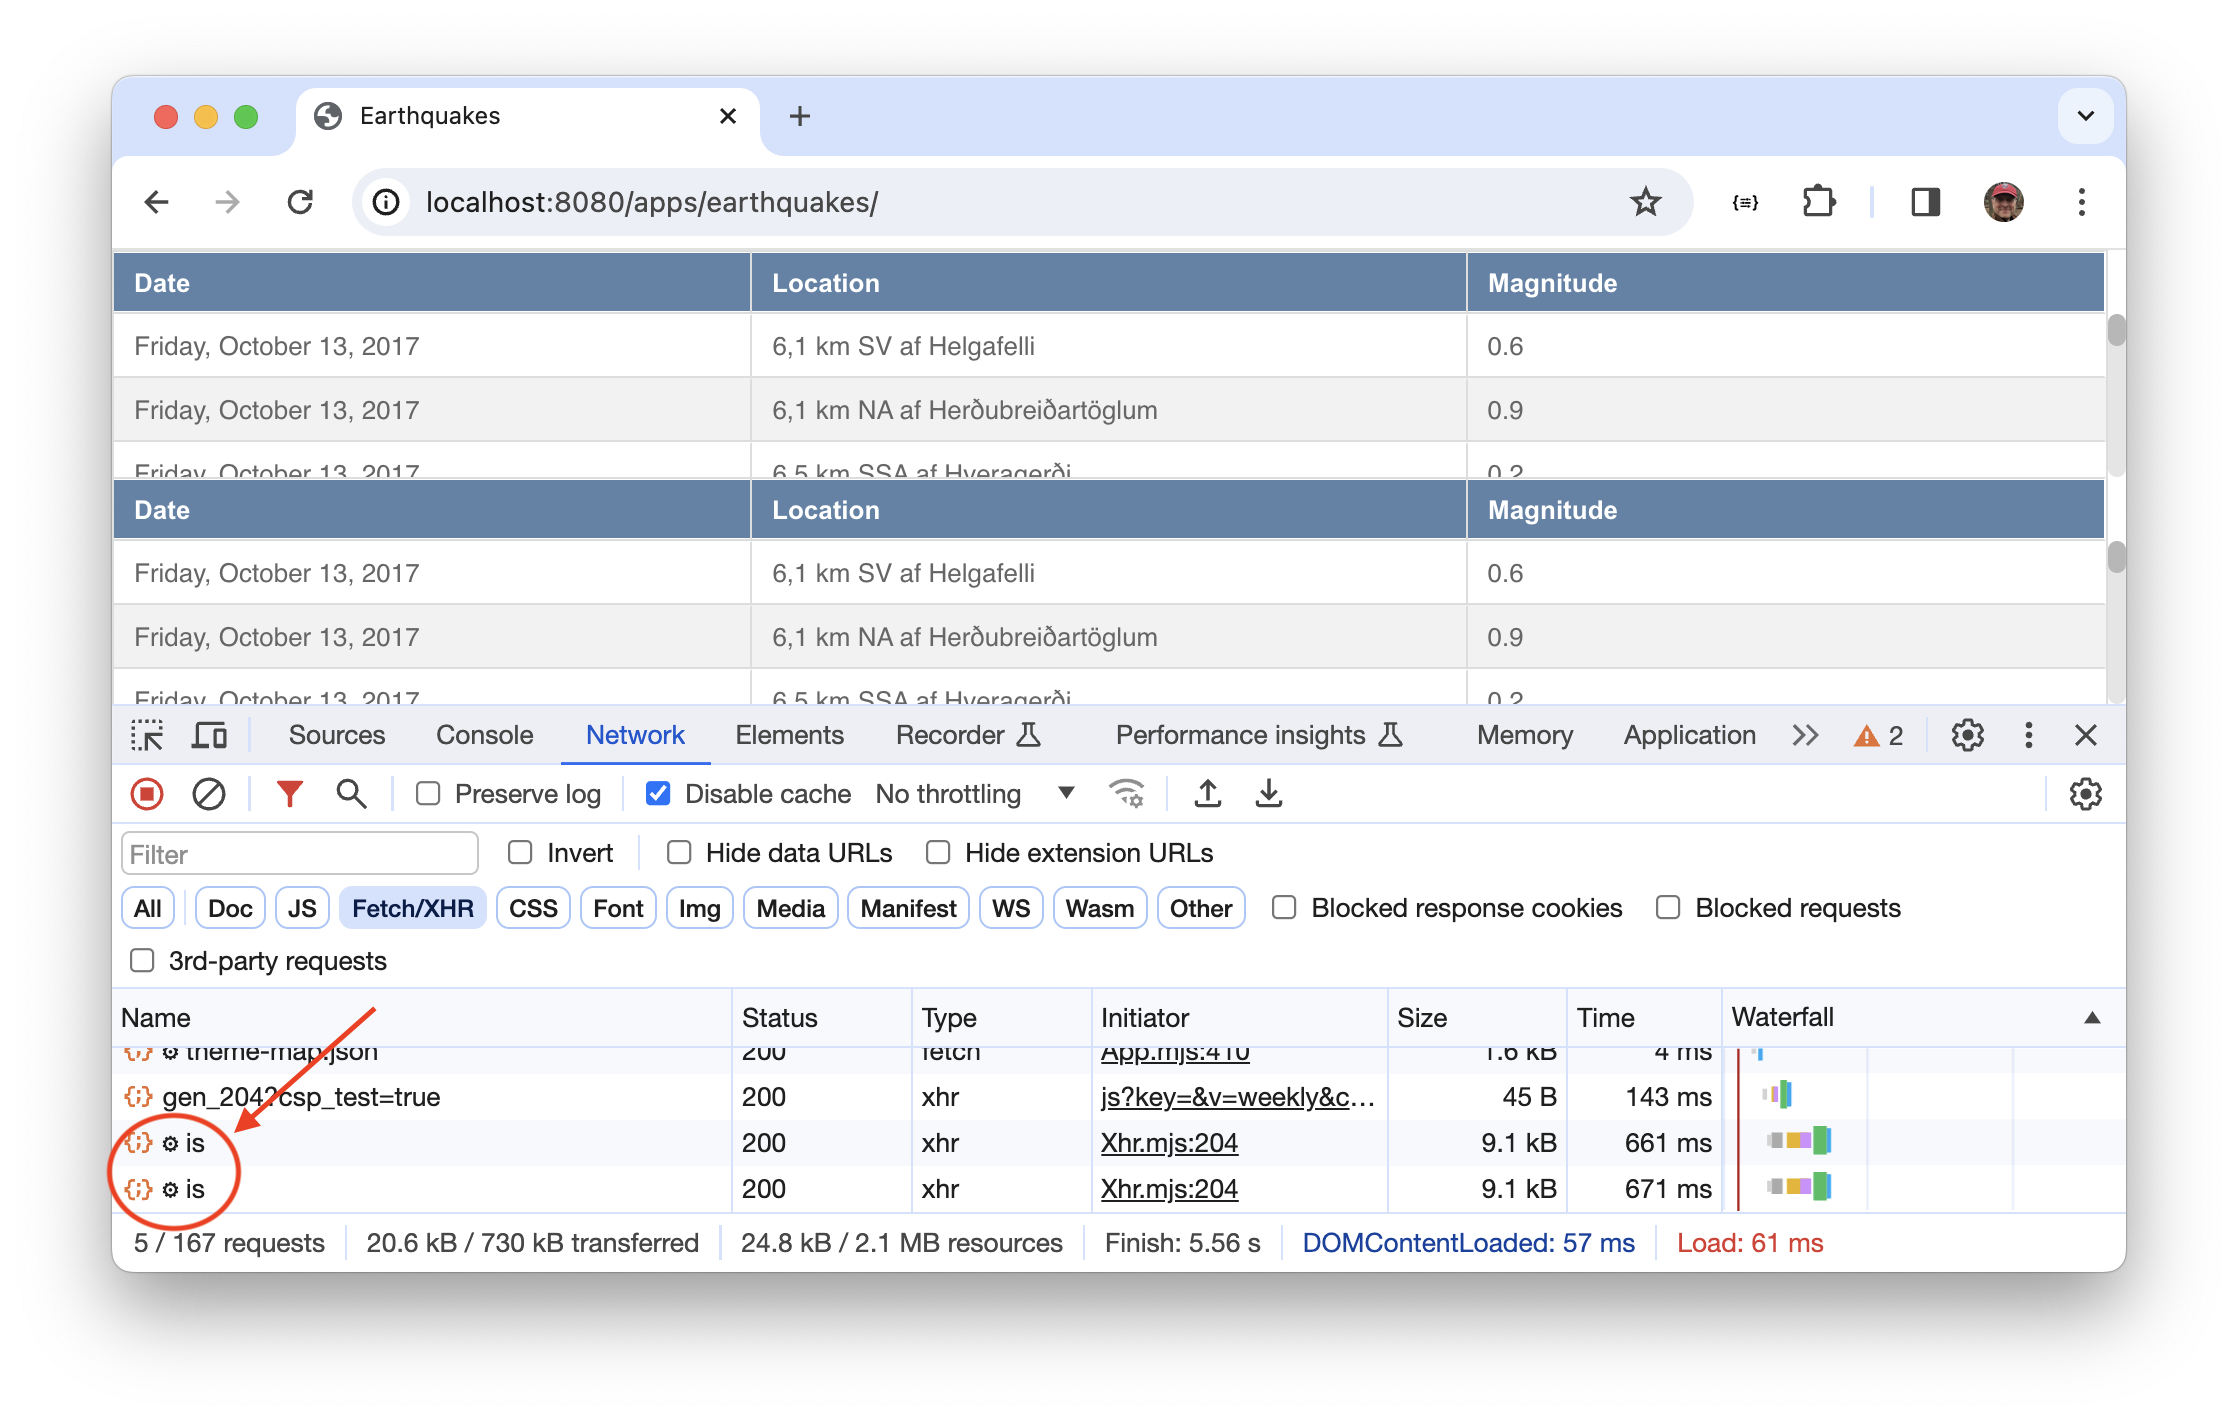
Before making any changes, open devtools in the Network tab and refresh _earthquakes_.
You'll see two calls to the web service.
Copy the store config to the state provider
State Providers have two key configs: `data` and `stores`.
- `data` holds name/value pairs where the value can be a simple value, or object references
- `stores` holds configs of stores
Add a `stores` property to the state provider config that holds a copy of the store.
```javascript readonly
import Base from '../../../node_modules/neo.mjs/src/container/Base.mjs';
import Controller from './MainViewController.mjs';
import EarthquakesTable from './earthquakes/Table.mjs';
import MainStateProvider from './MainStateProvider.mjs';
import Store from '../../../node_modules/neo.mjs/src/data/Store.mjs';
class MainView extends Base {
static config = {
className: 'Earthquakes.view.MainView',
ntype: 'earthquakes-main',
controller: {module: Controller},
stateProvider: {
module: MainStateProvider,
stores: {
earthquakes: {
module: Store,
model: {
fields: [{
name: "location"
}, {
name: "magnitude"
}, {
name: "timestamp",
type: "Date"
}]
},
url: "https://nameless-tundra-27404.herokuapp.com/go/?fn=earthquakes",
responseRoot: "data",
autoLoad: true
},
}
},
layout: {
ntype: 'vbox', align: 'stretch'
},
items: [{
module: EarthquakesTable,
store: {
module: Store,
model: {
fields: [{
name: "location"
}, {
name: "magnitude"
}, {
name: "timestamp",
type: "Date"
}]
},
url: "https://nameless-tundra-27404.herokuapp.com/go/?fn=earthquakes",
responseRoot: "data",
autoLoad: true
},
style: {width: '100%'}
},{
module: EarthquakesTable,
store: {
module: Store,
model: {
fields: [{
name: "location"
}, {
name: "magnitude"
}, {
name: "timestamp",
type: "Date"
}]
},
url: "https://nameless-tundra-27404.herokuapp.com/go/?fn=earthquakes",
responseRoot: "data",
autoLoad: true
},
style: {width: '100%'}
}],
}
}
export default Neo.setupClass(MainView);
```
In the `stores` config we named the store _earthquakes_. We could have named it anything, like _foo_
or _myStore_. We're calling it _earthquakes_ simply because that seems like a good descriptive name
of the data the store holds.
At this point we have _three_ identical store configs! Save and refresh, and look at network traffic — you
should see three calls.
Having an instance in the state provider means we can share it. It can be shared anywhere in the containment
hierarchy. The app doesn't have much of a hierarchy: it's just the main view and two child components (the two
tables). But now that the store is in the parent's state provider we can share it.
Use the shared store
The way to bind an instance to a state provider property is with the `bind` config. For example
bind: {
store: 'stores.earthquakes'
}
binds a `store` property to a store called `foo`. The code is saying _in the future, when the value
of "stores.earthquakes" changes, assign it to this object's "store" property_. In this case, `stores.earthquakes`
starts out undefined, then at runtime within a few milliseconds as the state provider is processed, the configured
store is created and a reference is assigned to `stores.earthquakes`. That wakes the binding up, and the
value is assigned to the table's `store` property.
Replace each table's `store` config with the binding.
```javascript readonly
import Base from '../../../node_modules/neo.mjs/src/container/Base.mjs';
import Controller from './MainViewController.mjs';
import EarthquakesTable from './earthquakes/Table.mjs';
import MainStateProvider from './MainStateProvider.mjs';
import Store from '../../../node_modules/neo.mjs/src/data/Store.mjs';
class MainView extends Base {
static config = {
className: 'Earthquakes.view.MainView',
ntype: 'earthquakes-main',
controller: {module: Controller},
stateProvider: {
module: MainStateProvider,
stores: {
earthquakes: {
module: Store,
model: {
fields: [{
name: "location"
}, {
name: "magnitude"
}, {
name: "timestamp",
type: "Date"
}]
},
url: "https://nameless-tundra-27404.herokuapp.com/go/?fn=earthquakes",
responseRoot: "data",
autoLoad: true
}
}
},
layout: { ntype: 'vbox', align: 'stretch' },
items: [{
module: EarthquakesTable,
bind: {
store: 'stores.earthquakes'
},
style: {width: '100%'}
},{
module: EarthquakesTable,
bind: {
store: 'stores.earthquakes'
},
style: {width: '100%'}
}]
}
}
export default Neo.setupClass(MainView);
```
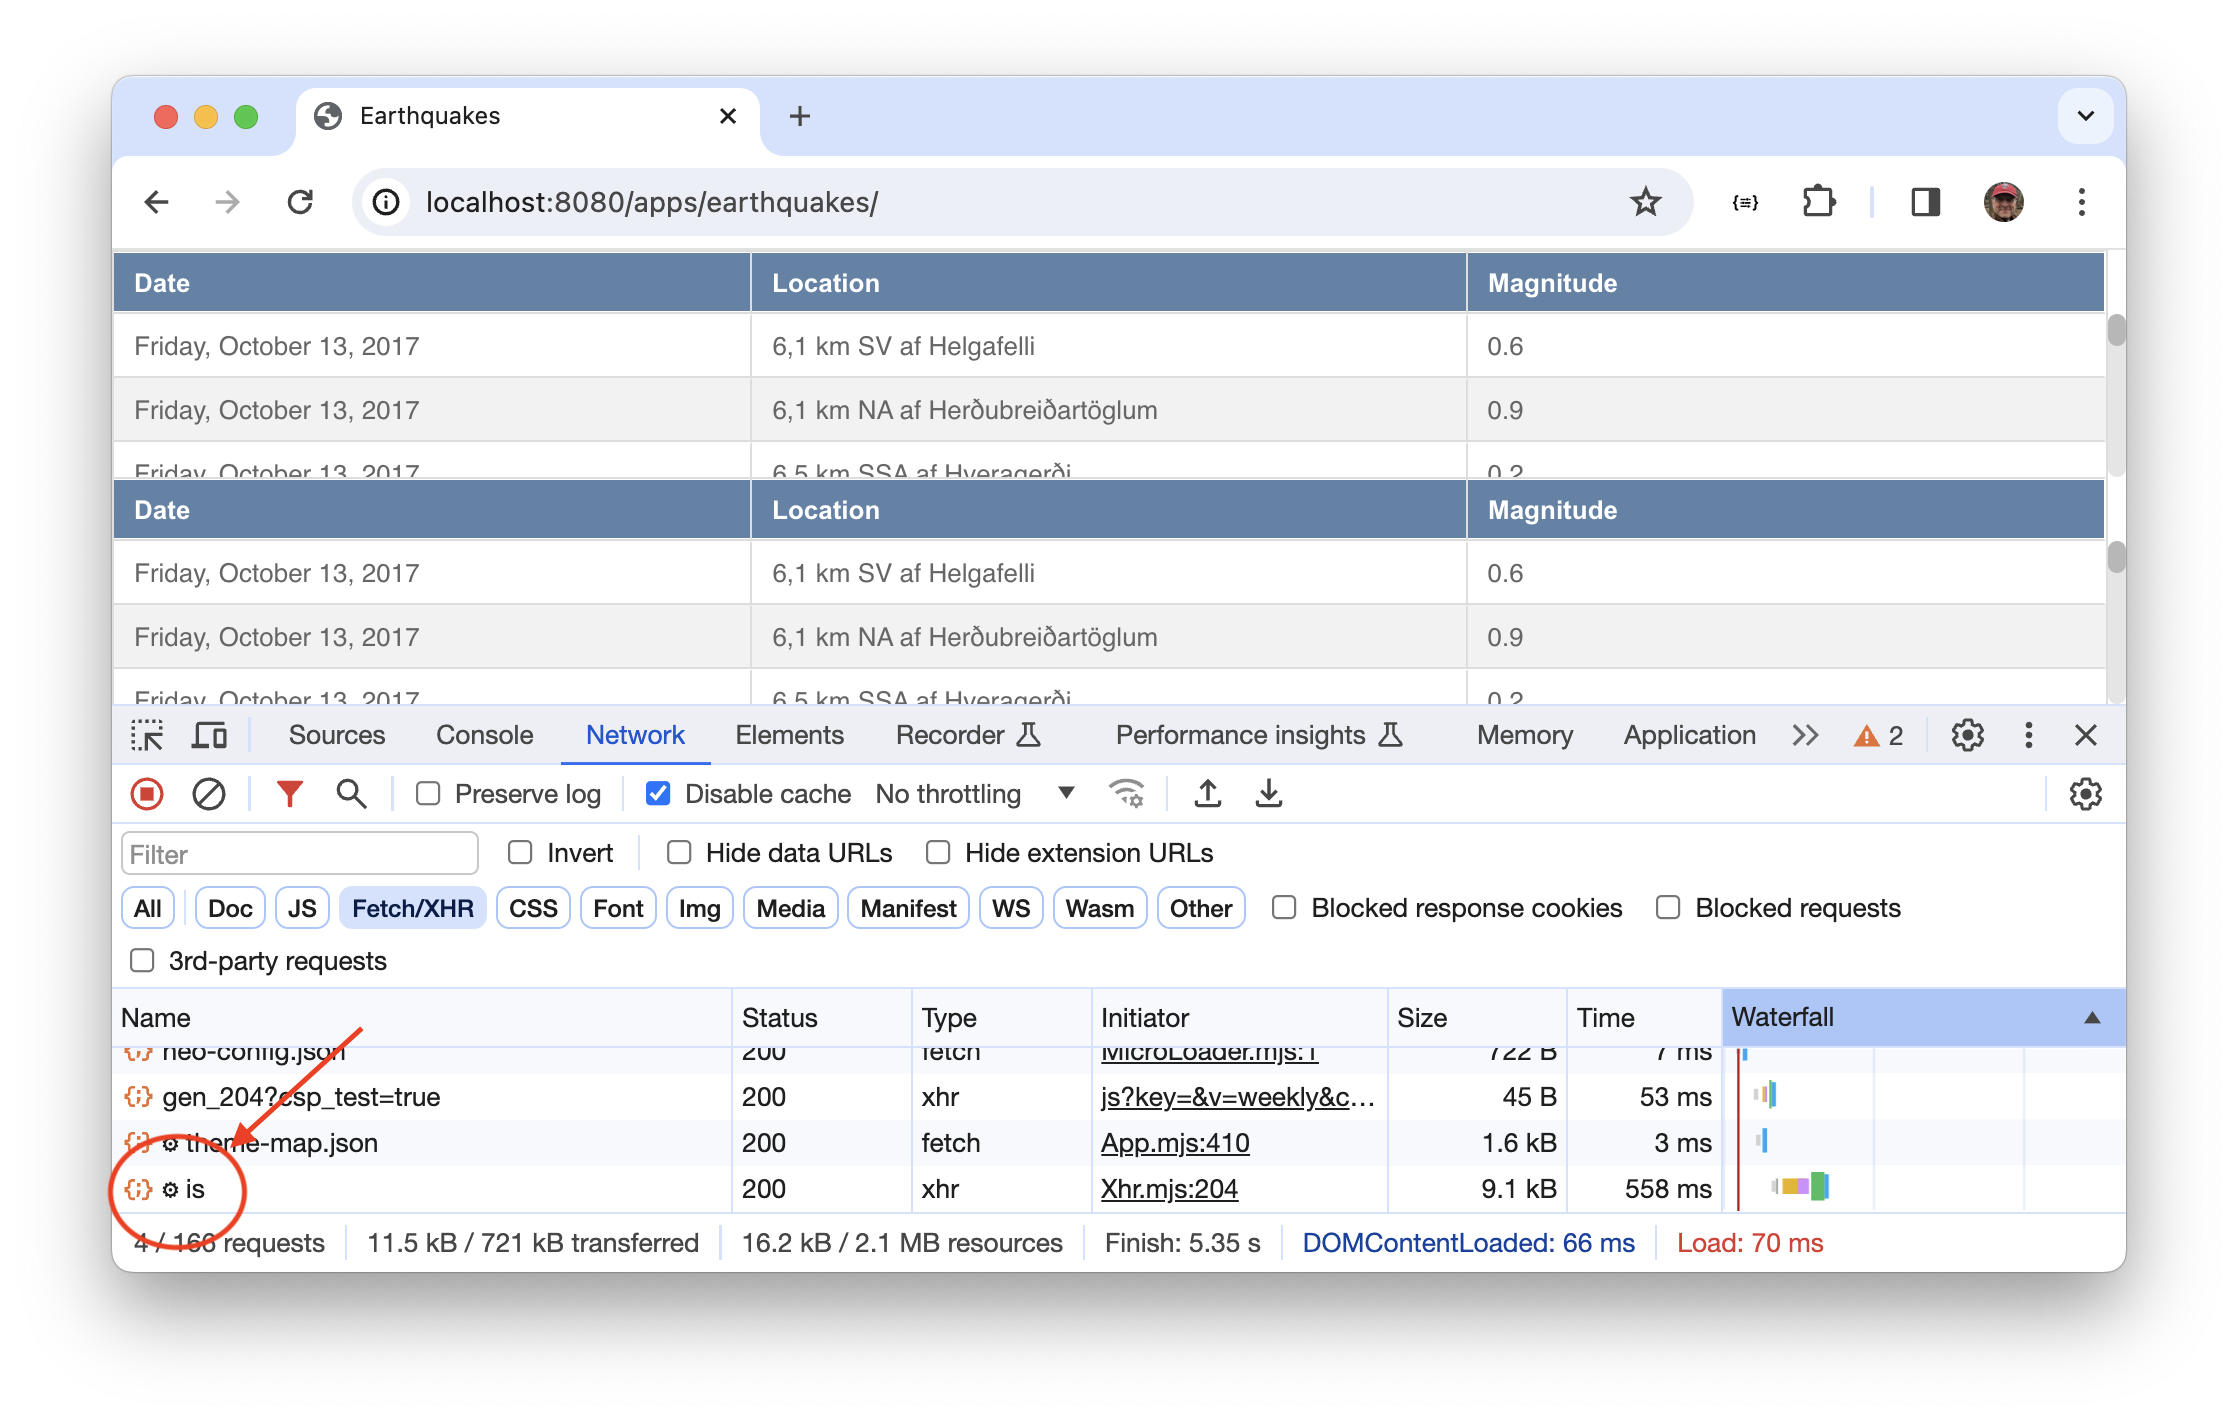
Save, refresh, and look at network traffic: you'll see a _single_ call to the web service.
 You can further prove we're using a shared instance by running these statements in the console.
```javascript readonly
a = Neo.findFirst({ntype:'earthquakes-main'}).stateProvider.stores.earthquakes;
b = Neo.find({ntype:'earthquakes-table'})[0].store;
c = Neo.find({ntype:'earthquakes-table'})[1].store;
(a === b) && (a === c) && (b === c) // true
```
You can further prove we're using a shared instance by running these statements in the console.
```javascript readonly
a = Neo.findFirst({ntype:'earthquakes-main'}).stateProvider.stores.earthquakes;
b = Neo.find({ntype:'earthquakes-table'})[0].store;
c = Neo.find({ntype:'earthquakes-table'})[1].store;
(a === b) && (a === c) && (b === c) // true
```
Use the state provider class
We configured the state provider in-line, in the `stateProvider` config at the top of `MainView`. But the starter app
has a `MainStateProvider` class. In theory, if you have a trivial state provider you could configure it in-line. But
in general you want to keep that code separate by coding it in a separate class. This is what we did for the
table config — we started by coding it in-line in the main view, then we refactored it into its own
class. The result was a simpler and more abstract main view. We want to do the same for the state provider.
Since the starter app already provides `MainStateProvider`, all we need to do is copy the `stores` property.
Here's the resulting code you should place into `MainStateProvider.mjs`.
```javascript readonly
import StateProvider from '../../../node_modules/neo.mjs/src/state/Provider.mjs';
import Store from '../../../node_modules/neo.mjs/src/data/Store.mjs';
class MainStateProvider extends StateProvider {
static config = {
className: 'Earthquakes.view.MainStateProvider',
data: {},
stores: {
earthquakes: {
module: Store,
model: {
fields: [{
name: "location"
}, {
name: "magnitude"
}, {
name: "timestamp",
type: "Date"
}]
},
url: "https://nameless-tundra-27404.herokuapp.com/go/?fn=earthquakes",
responseRoot: "data",
autoLoad: true
},
}
}
}
export default Neo.setupClass(MainStateProvider);
```
And you need to remove the `stores` config from the main view as follows.
```javascript readonly
import Container from '../../../node_modules/neo.mjs/src/container/Base.mjs';
import Controller from './MainViewController.mjs';
import EarthquakesTable from './earthquakes/Table.mjs';
import MainStateProvider from './MainStateProvider.mjs';
class MainView extends Container {
static config = {
className: 'Earthquakes.view.MainView',
ntype: 'earthquakes-main',
controller: {module: Controller},
stateProvider: {
module: MainStateProvider
},
layout: { ntype: 'vbox', align: 'stretch' },
items: [{
module: EarthquakesTable,
bind: {
store: 'stores.earthquakes'
},
style: {width: '100%'}
},{
module: EarthquakesTable,
bind: {
store: 'stores.earthquakes'
},
style: {width: '100%'}
}]
}
}
export default Neo.setupClass(MainView);
```
The refactorings to have separate table and state provider classes means the code is more modular, more reusable,
and each class is simpler than using complex source files that try to configure every detail.
## Google Maps Add-on
Neo.mjs has a Google Map component. This component is a little different from a button or table,
because it's implemented as a _main thread add-on_.
When you use Google Maps you use the Google Map API to ask it to draw the map and markers.
In a normal app, Google Maps &mdahs; and everything else — runs in the main browser thread.
But as you know, Neo.mjs logic runs in _neomjs-app-worker_. That means Neo.mjs has to pass instructions
run in _neomjs-app-worker_ to the main thread.
To handle this situation, Neo.mjs has the concept of a main-thread add-on, which is a class that exposes main
thread methods to the _neomjs-app-worker_ thread. In addition, if the library you're using has a UI, it's common
to also provide a wrapper class so it can be used like any other component within Neo.mjs. That's how Google
Maps is implemented: there's a main-thread add-on and a corresponding Neo.mjs component. The add-on is
specified in _neo-config.json_, and the component is imported and used like any other component.
How do you specify which main-thread add-ons you want? If you recall the script you used to create the starter
app, it has a step that asks what add-ons you want. That results in populating the `mainThreadAddons` property
in `neo-config.json`. We didn't choose Google Maps when we ran the script, but we need it, which means we'll
need to edit `neo-config.json`. Google Maps also requires an API key, which is also configured there.
The Google Maps component has a few key configs:
- `center:{lat, lng}`
- `zoom`
- `markerStore`
Marker store records are required to have these properties:
- `position` — the location of the marker, of the form `{lat, lng}`
- `title` — a description of the marker
## Lab. Use the Google Maps Main-thread Add-on
Get the code for the custom add-on
At the time this tutorial was written, the Neo.mjs Google Maps addon was about to be updated to
accommodate Google's "AdvancedMarker" class. Until that's ready, we're going to use a modified version of the add-on.
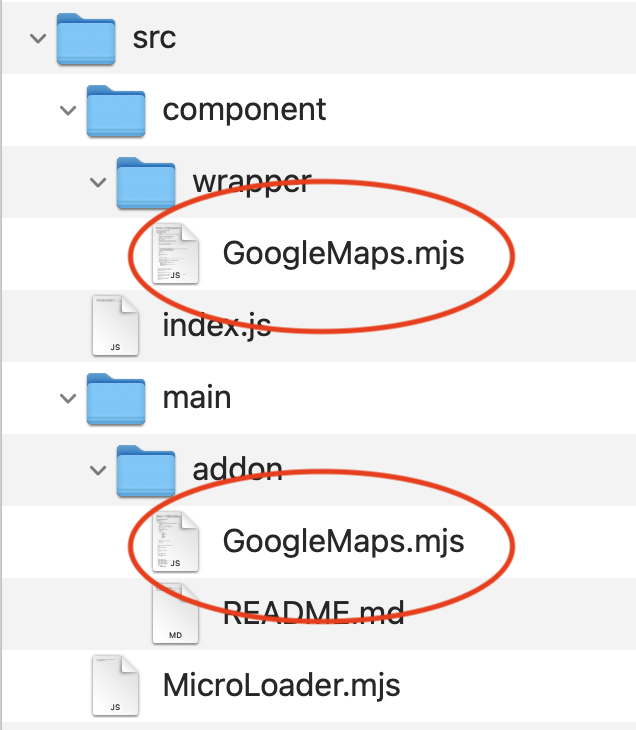
Download and unzip this file, and copy the two source files to the corresponding subdirectories in
your workspace's `src` directory. Note that `src` already contains some files, so don't replace the whole
directory, but instead, move the files to their individual locations.
src.zip
Specify the main-thread add-on
Edit `apps/earthquakes/neo-config.json` and add entries for the Google Maps add-on and the map key.
```json readonly
{
"appPath": "../../apps/earthquakes/app.mjs",
"basePath": "../../",
"environment": "development",
"mainPath": "../node_modules/neo.mjs/src/Main.mjs",
"mainThreadAddons": [
"DragDrop",
"Navigator",
"WS/GoogleMaps",
"Stylesheet"
],
"googleMapsApiKey": "AIzaSyD4Y2xvl9mGT8HiVvQiZluT5gah3OIveCE",
"themes" : ["neo-theme-neo-light"],
"workerBasePath": "../../node_modules/neo.mjs/src/worker/"
}
```
It's unusual to need to edit `neo-config.json`. The app theme is specified there, and so are main thread add-ons.
In our case, we're adding `WS/GoogleMaps` which in turn requires that we specify the map key. The `WS/`
prefix tells Neo.mjs that the add-on is in our workspace, rather than an add-on provided by Neo.mjs.
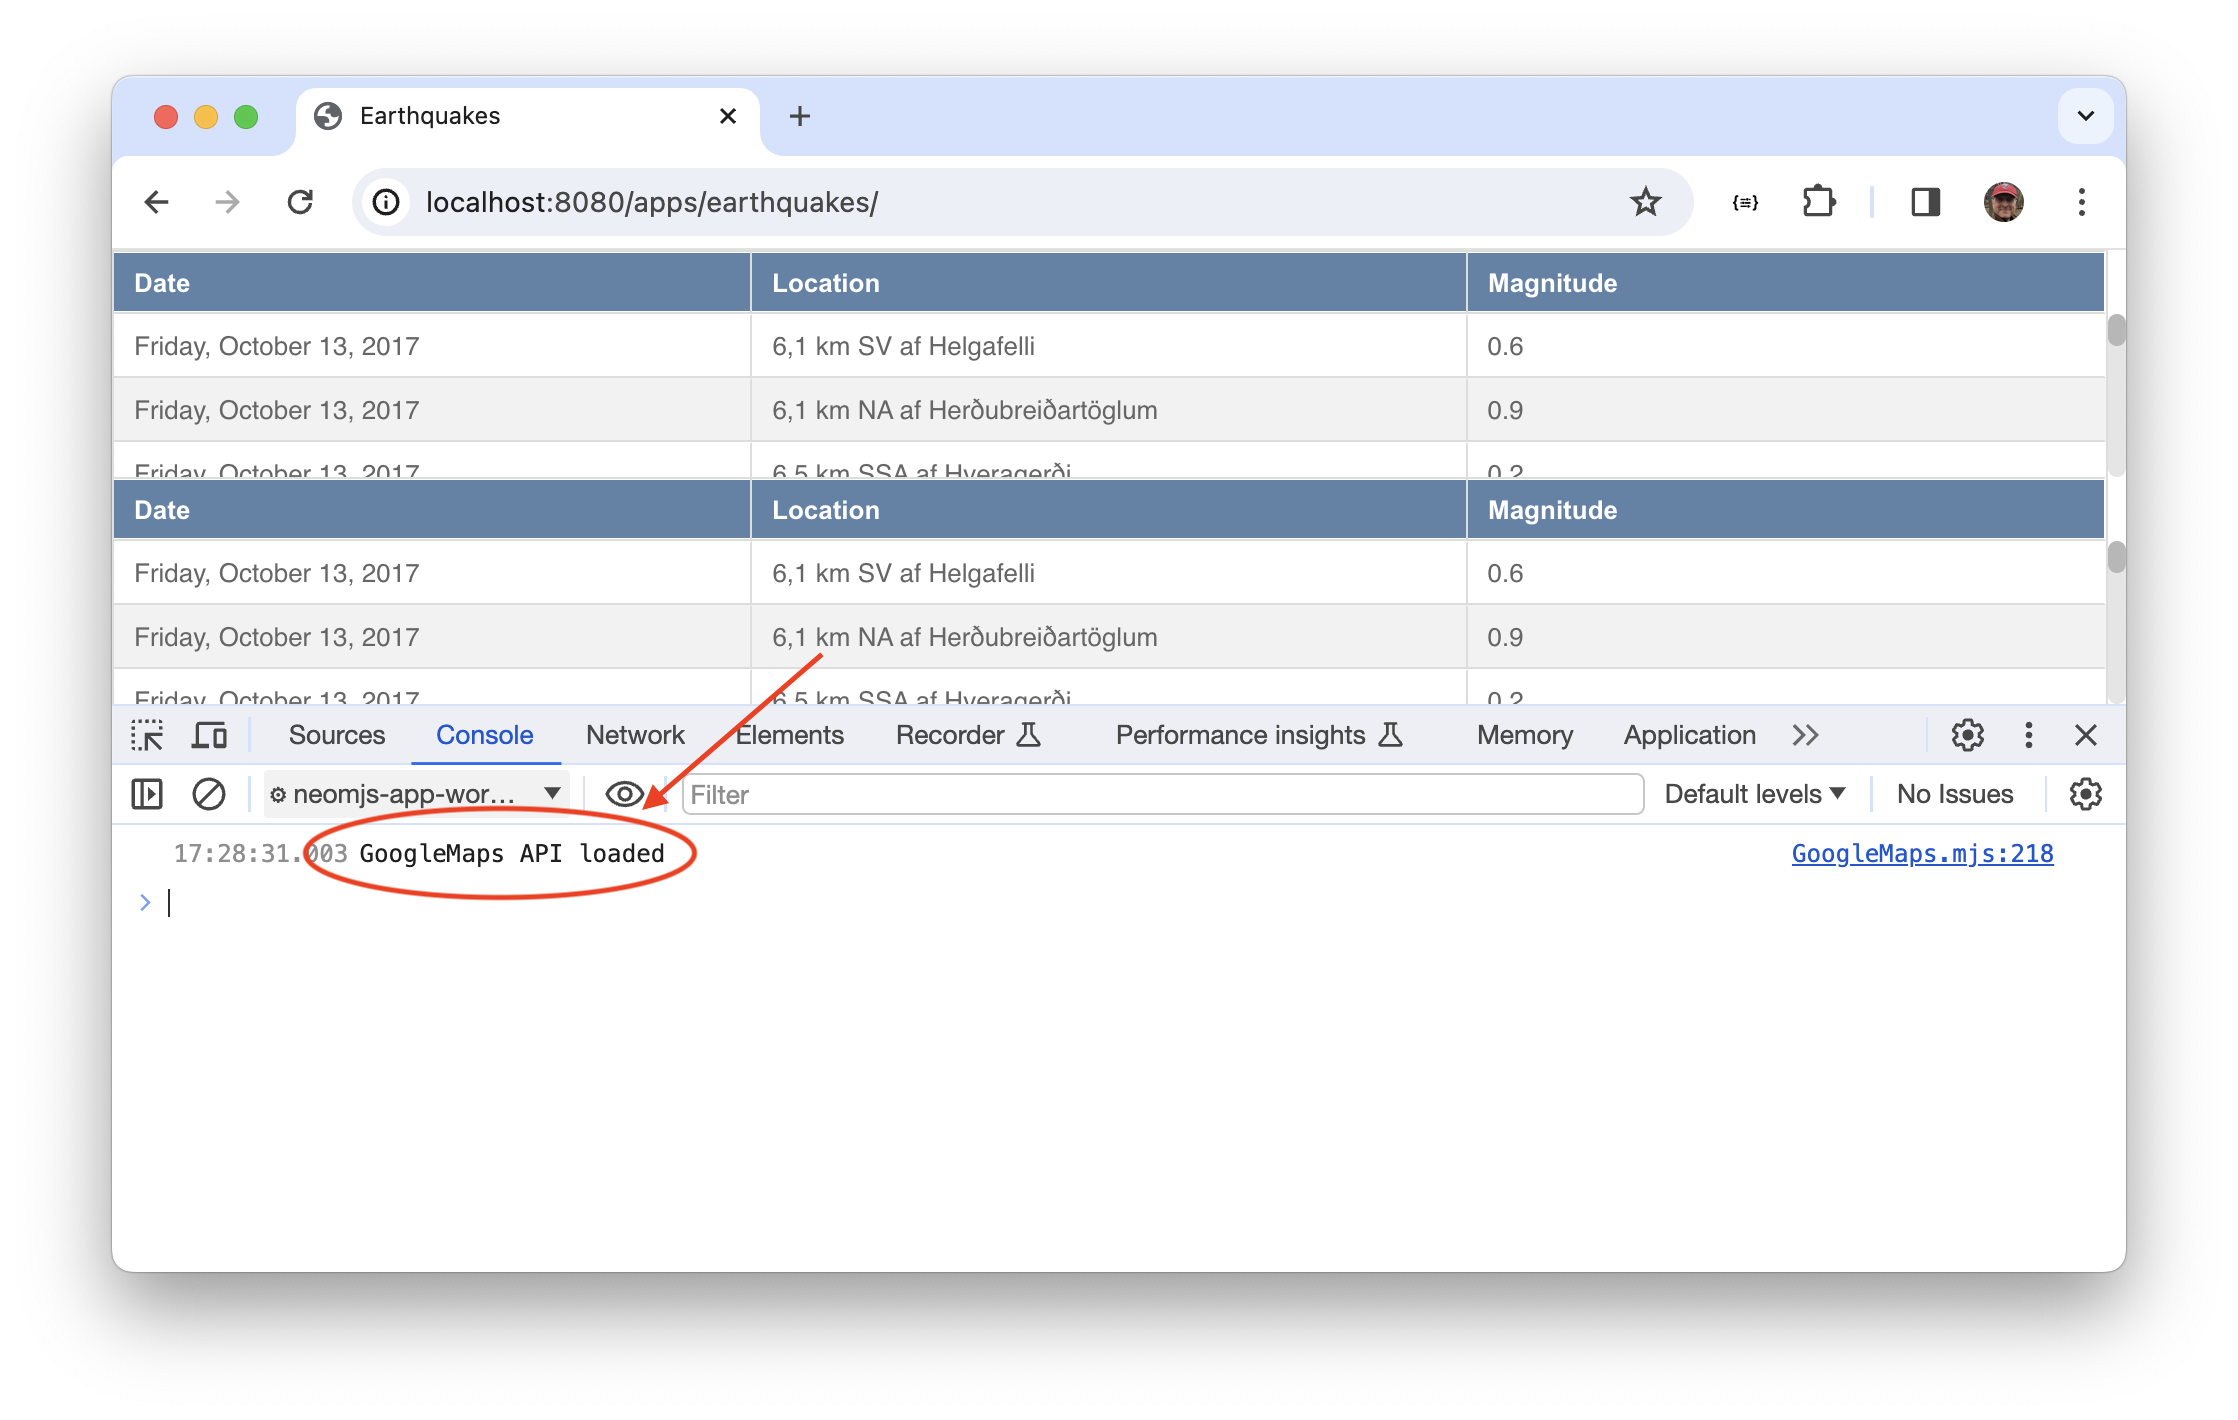
Save and refresh, and you'll see a console log emanating from the plugin.
Add the required fields to the records
The Google Maps component has a `markerStore` property, which is a reference to a store whose records have
the properties `title` and `location`, where `location` is of the form `{lat: 0, lng: 0}`. The `fields:[]`
lets us implement those via two properties:
- `mapping` — the path to a feed property holding the value
- `calculate` — a function that returns a value
Edit `apps/earthquakes/view/MainStateProvider.mjs` and modify `fields` as follows.
```javascript readonly
fields: [{
name: "location",
}, {
name: "magnitude",
}, {
name: "timestamp",
type: "Date",
}, {
name: 'title',
mapping: "location"
}, {
name: "position",
calculate: (data, field, item)=>({lat: item.latitude, lng: item.longitude})
}],
```
As you can see, _title_ is mapped to the existing feed value _location_, and _position_ is
calculated by returning an object with _lat_ and _lng_ set to the corresponding values from the feed.
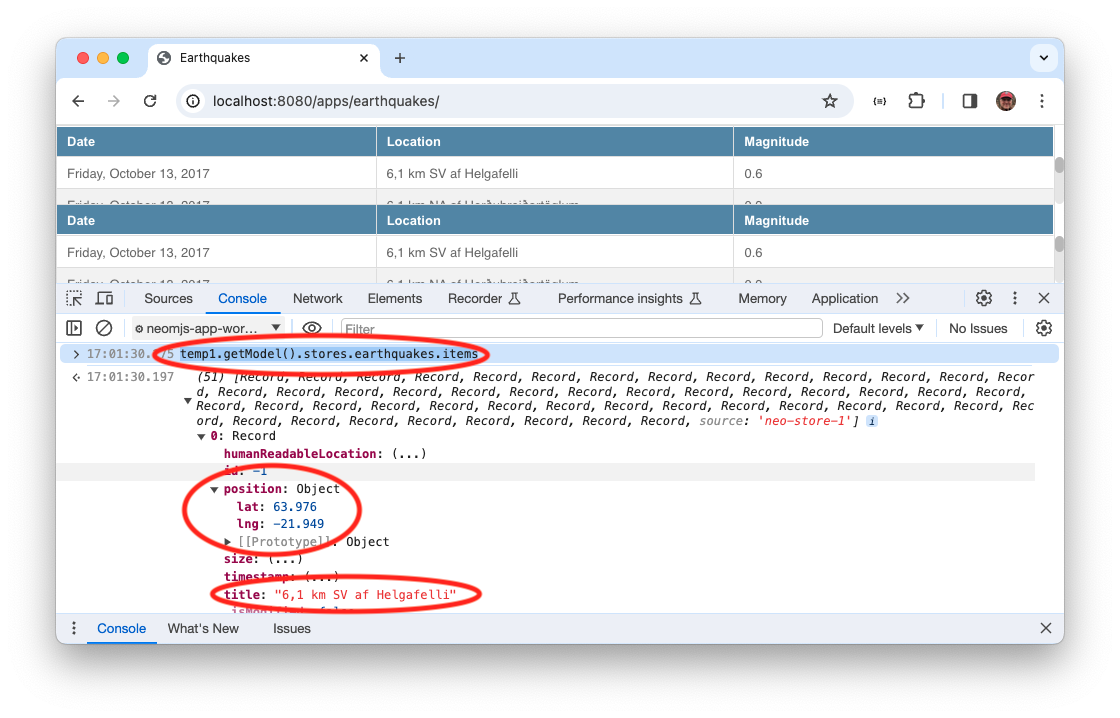
Save and refresh _earthquakes_. You can use the debugger to inspect the store via _Shift-Ctrl-right-click_ and
putting the main view into a global variable. Then run
temp1.getStateProvider().stores.earthquakes.items
Look at one of the items, and you should see that _title_ and _location_ are in each record.
Use the Google Map Component
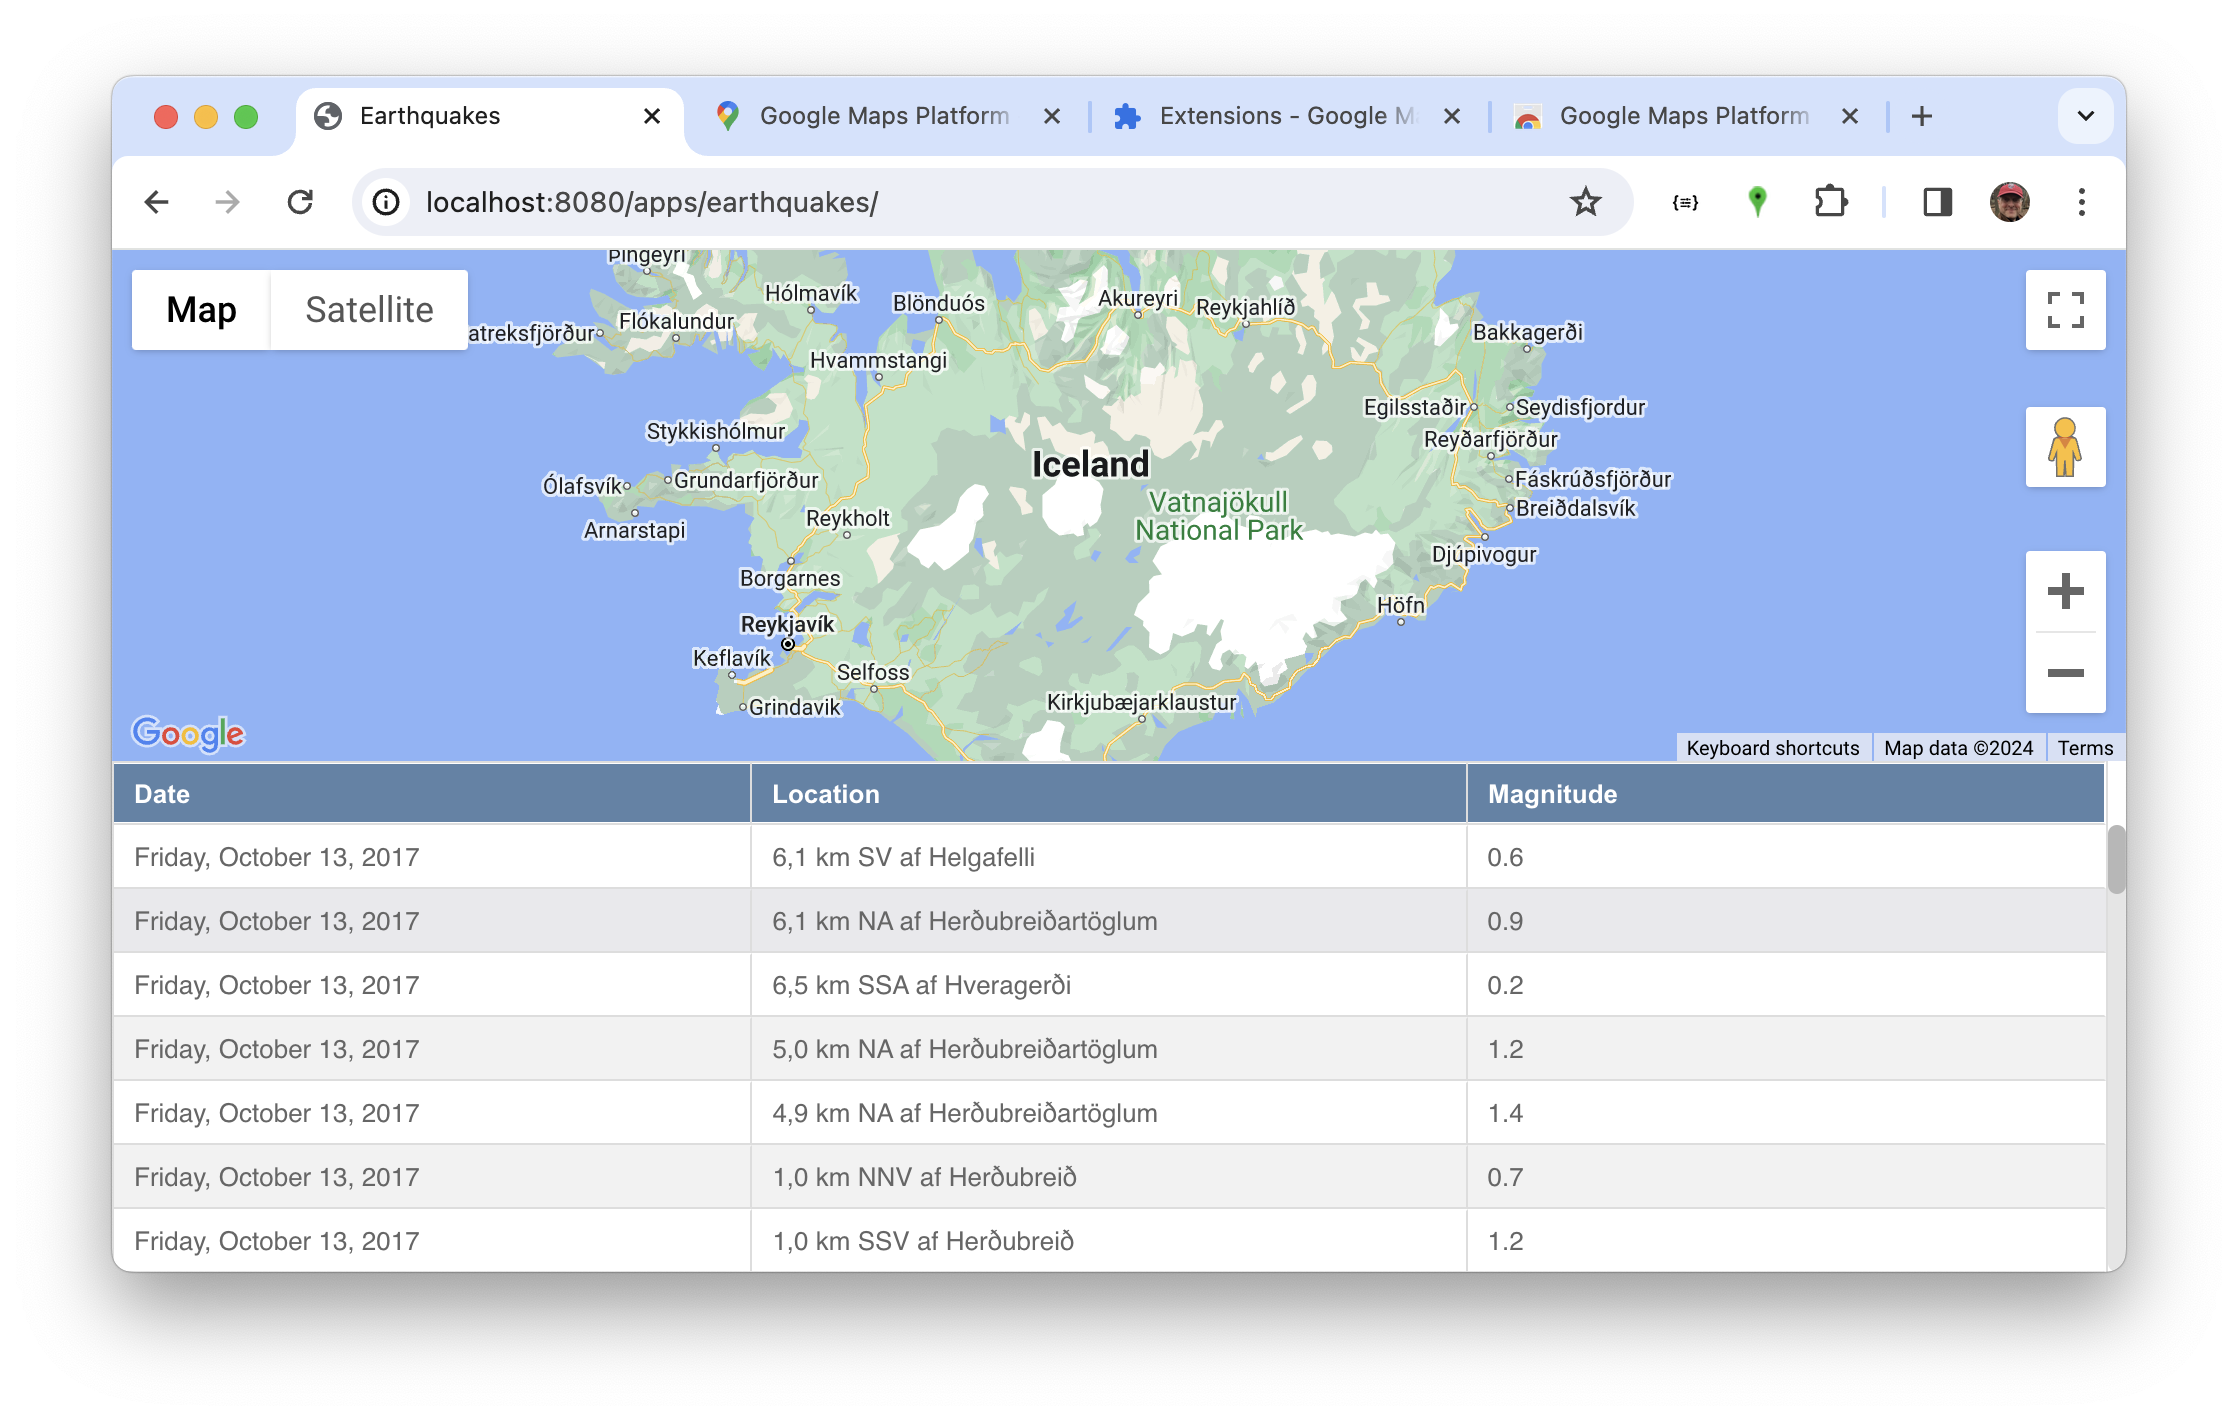
We're going to replace the top table with a Google Map. To do that we need to import the Google Maps component
and show it inplace of the top table. The map should be centered on Iceland.
```javascript readonly
{
module: GoogleMapsComponent,
flex: 1,
center: {
lat: 64.8014187,
lng: -18.3096357
},
zoom: 6
}
```
If we replace the top table with the map, `view/MainView.mjs` ends up with this content.
```javascript readonly
import Container from '../container/Base.mjs';
import Controller from './MainViewController.mjs';
import EarthquakesTable from './earthquakes/Table.mjs';
import GoogleMapsComponent from '../component/wrapper/GoogleMaps.mjs';
import MainStateProvider from './MainStateProvider.mjs';
class MainView extends Container {
static config = {
className: 'Earthquakes.view.MainView',
ntype: 'earthquakes-main',
controller: {module: Controller},
stateProvider: {
module: MainStateProvider
},
layout: { ntype: 'vbox', align: 'stretch' },
items: [{
module: GoogleMapsComponent,
flex: 1,
center: {
lat: 64.8014187,
lng: -18.3096357
},
zoom: 6
},{
module: EarthquakesTable,
bind: {
store: 'stores.earthquakes'
},
style: {width: '100%'},
wrapperStyle: {
height: 'auto' // Because neo-table-wrapper sets height:'100%', which it probably shouldn't
}
}],
}
}
export default Neo.setupClass(MainView);
```
Show the markers
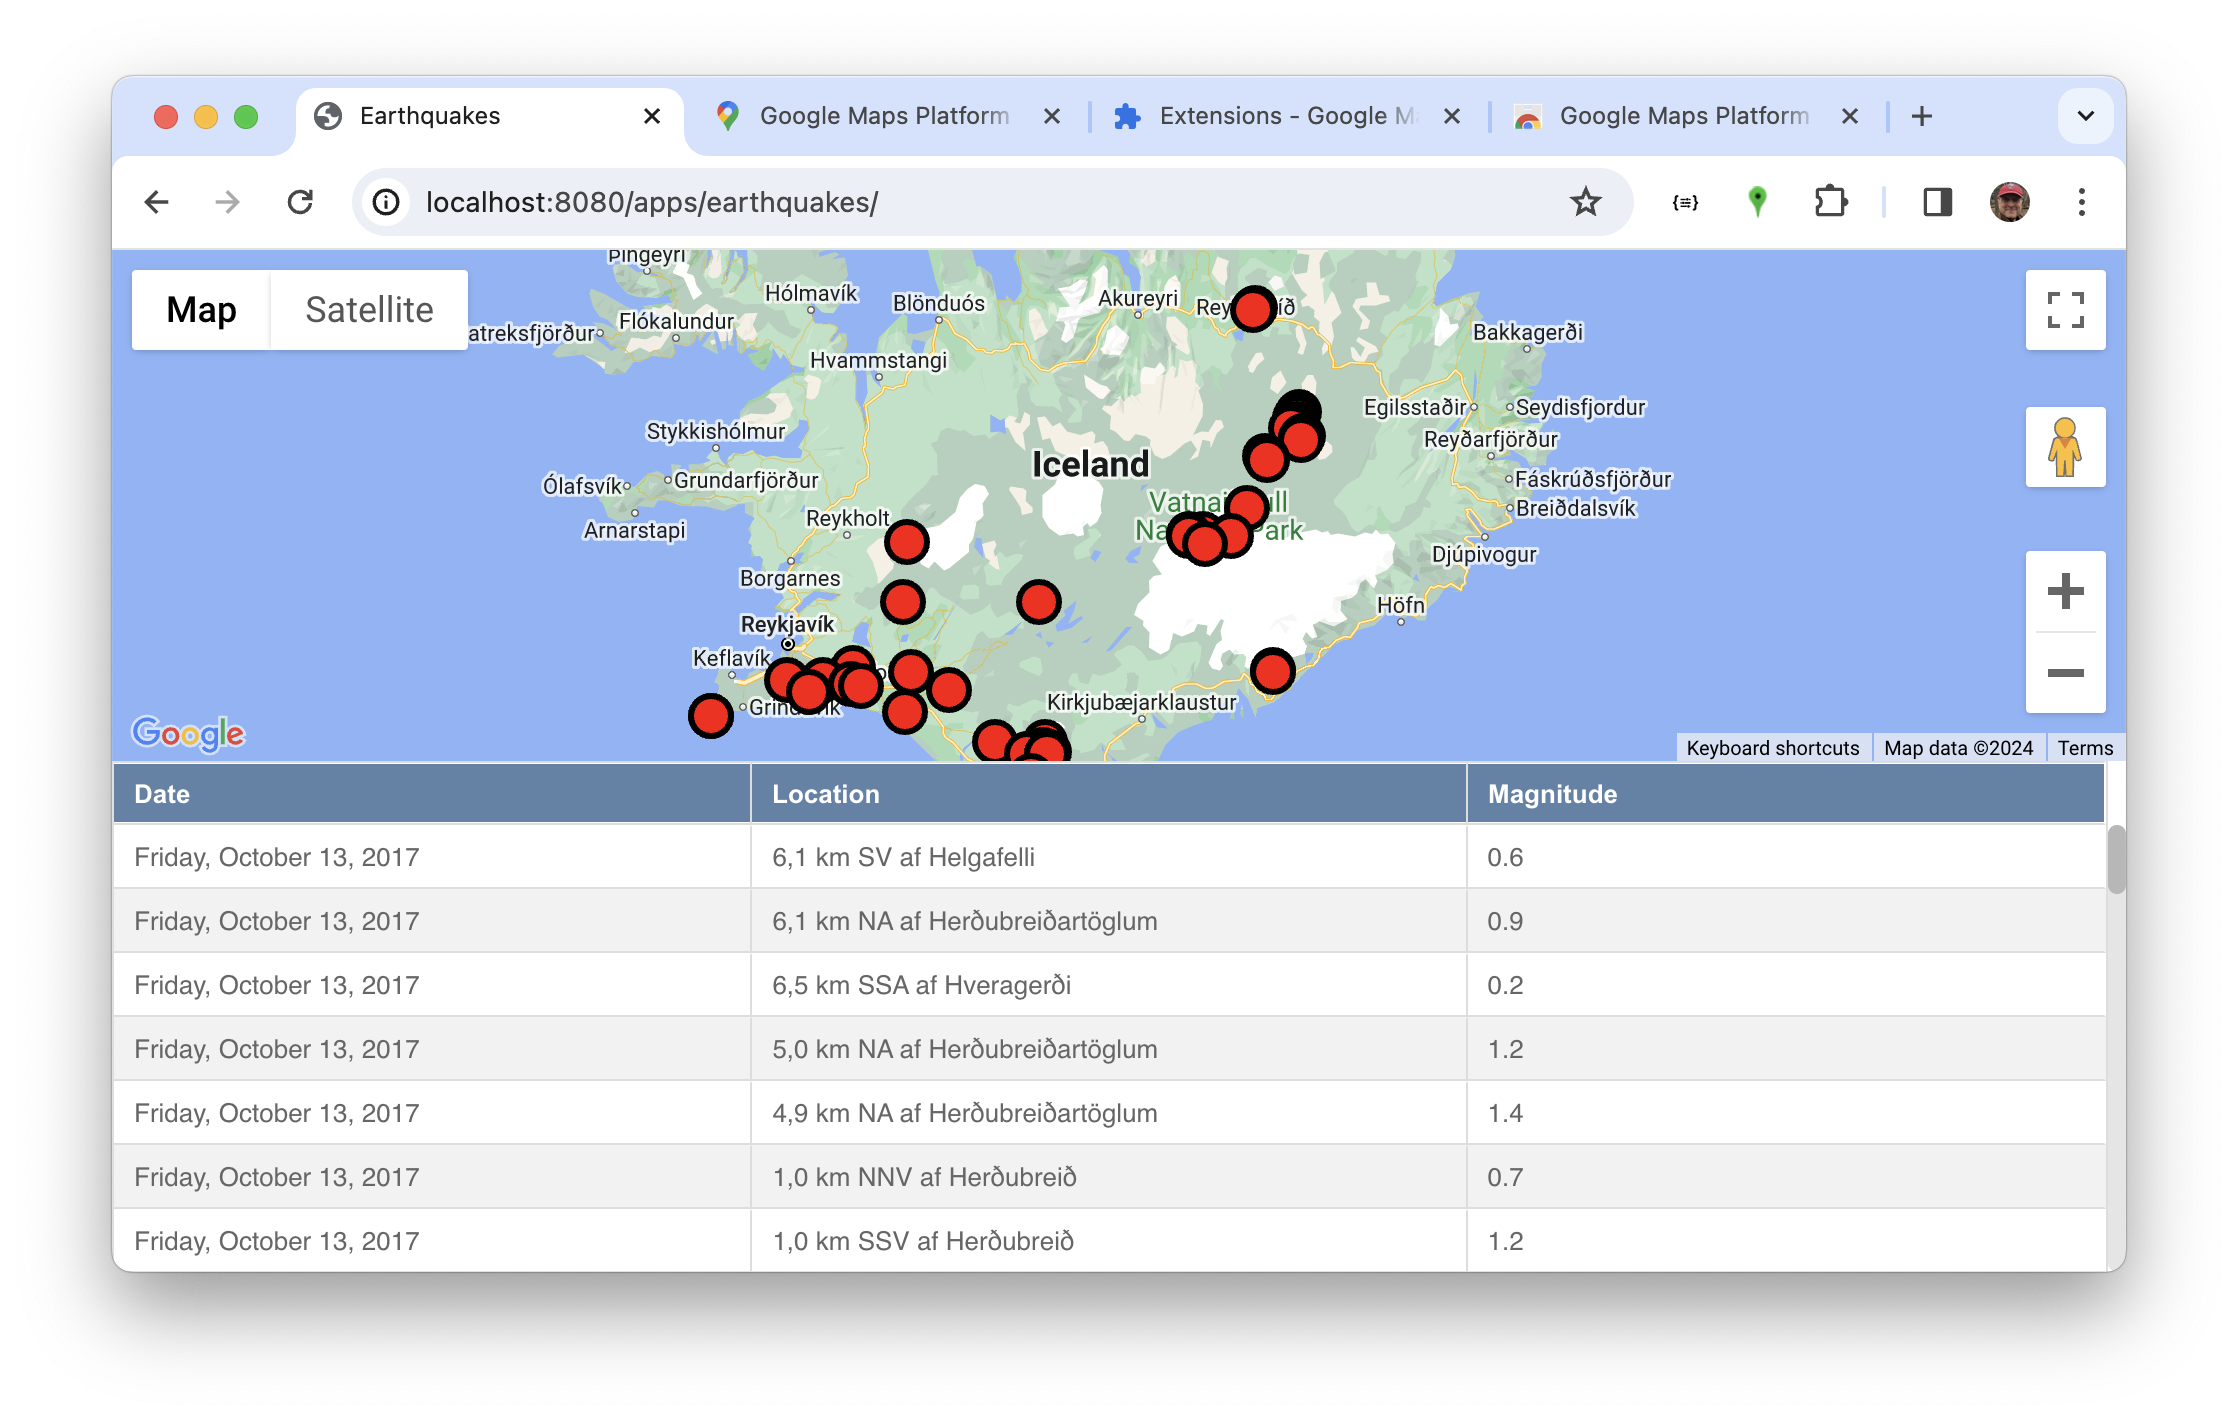
The markers are shown by setting up the marker store, which is a regular store whose records must contain
_location_ and _title_. We assign the store using a `bind`, just like we did with the tables.
Add this config to the map.
```javascript readonly
bind: {
markerStore: 'stores.earthquakes'
}
```
## Events
Neo.mjs has an `Neo.core.Observable` class that handles configuring listeners and associated event handler functions.
All components are observable, and some non-visual classes, like stores, are also observable.
Listeners are set up either declaratively, via the `listeners:{}` config, or procedurally,
via the `component.on()` method.
## Lab. Events
In this lab you'll set up an event handler for the table and map.
Add a listener to the table.View
Table Views fire a select event, passing an object that contains a reference to the corresponding row.
Add this table config:
```javascript readonly
viewConfig: {
listeners: {
select: (data) => console.log(data.record)
}
}
```
Save and refresh, then click on a table row. If you look at the debugger console you'll see the record being logged.
Just for fun, expand the logged value and look for the `magnitude` property. If you recall, that's a value from the feed, and one of the things we configured in the store's fields:[].
In the console, click on the ellipses by `magnitude` and enter a new value, like 2.5. (Don't enter a larger value, or you may destroy that part of Iceland.)
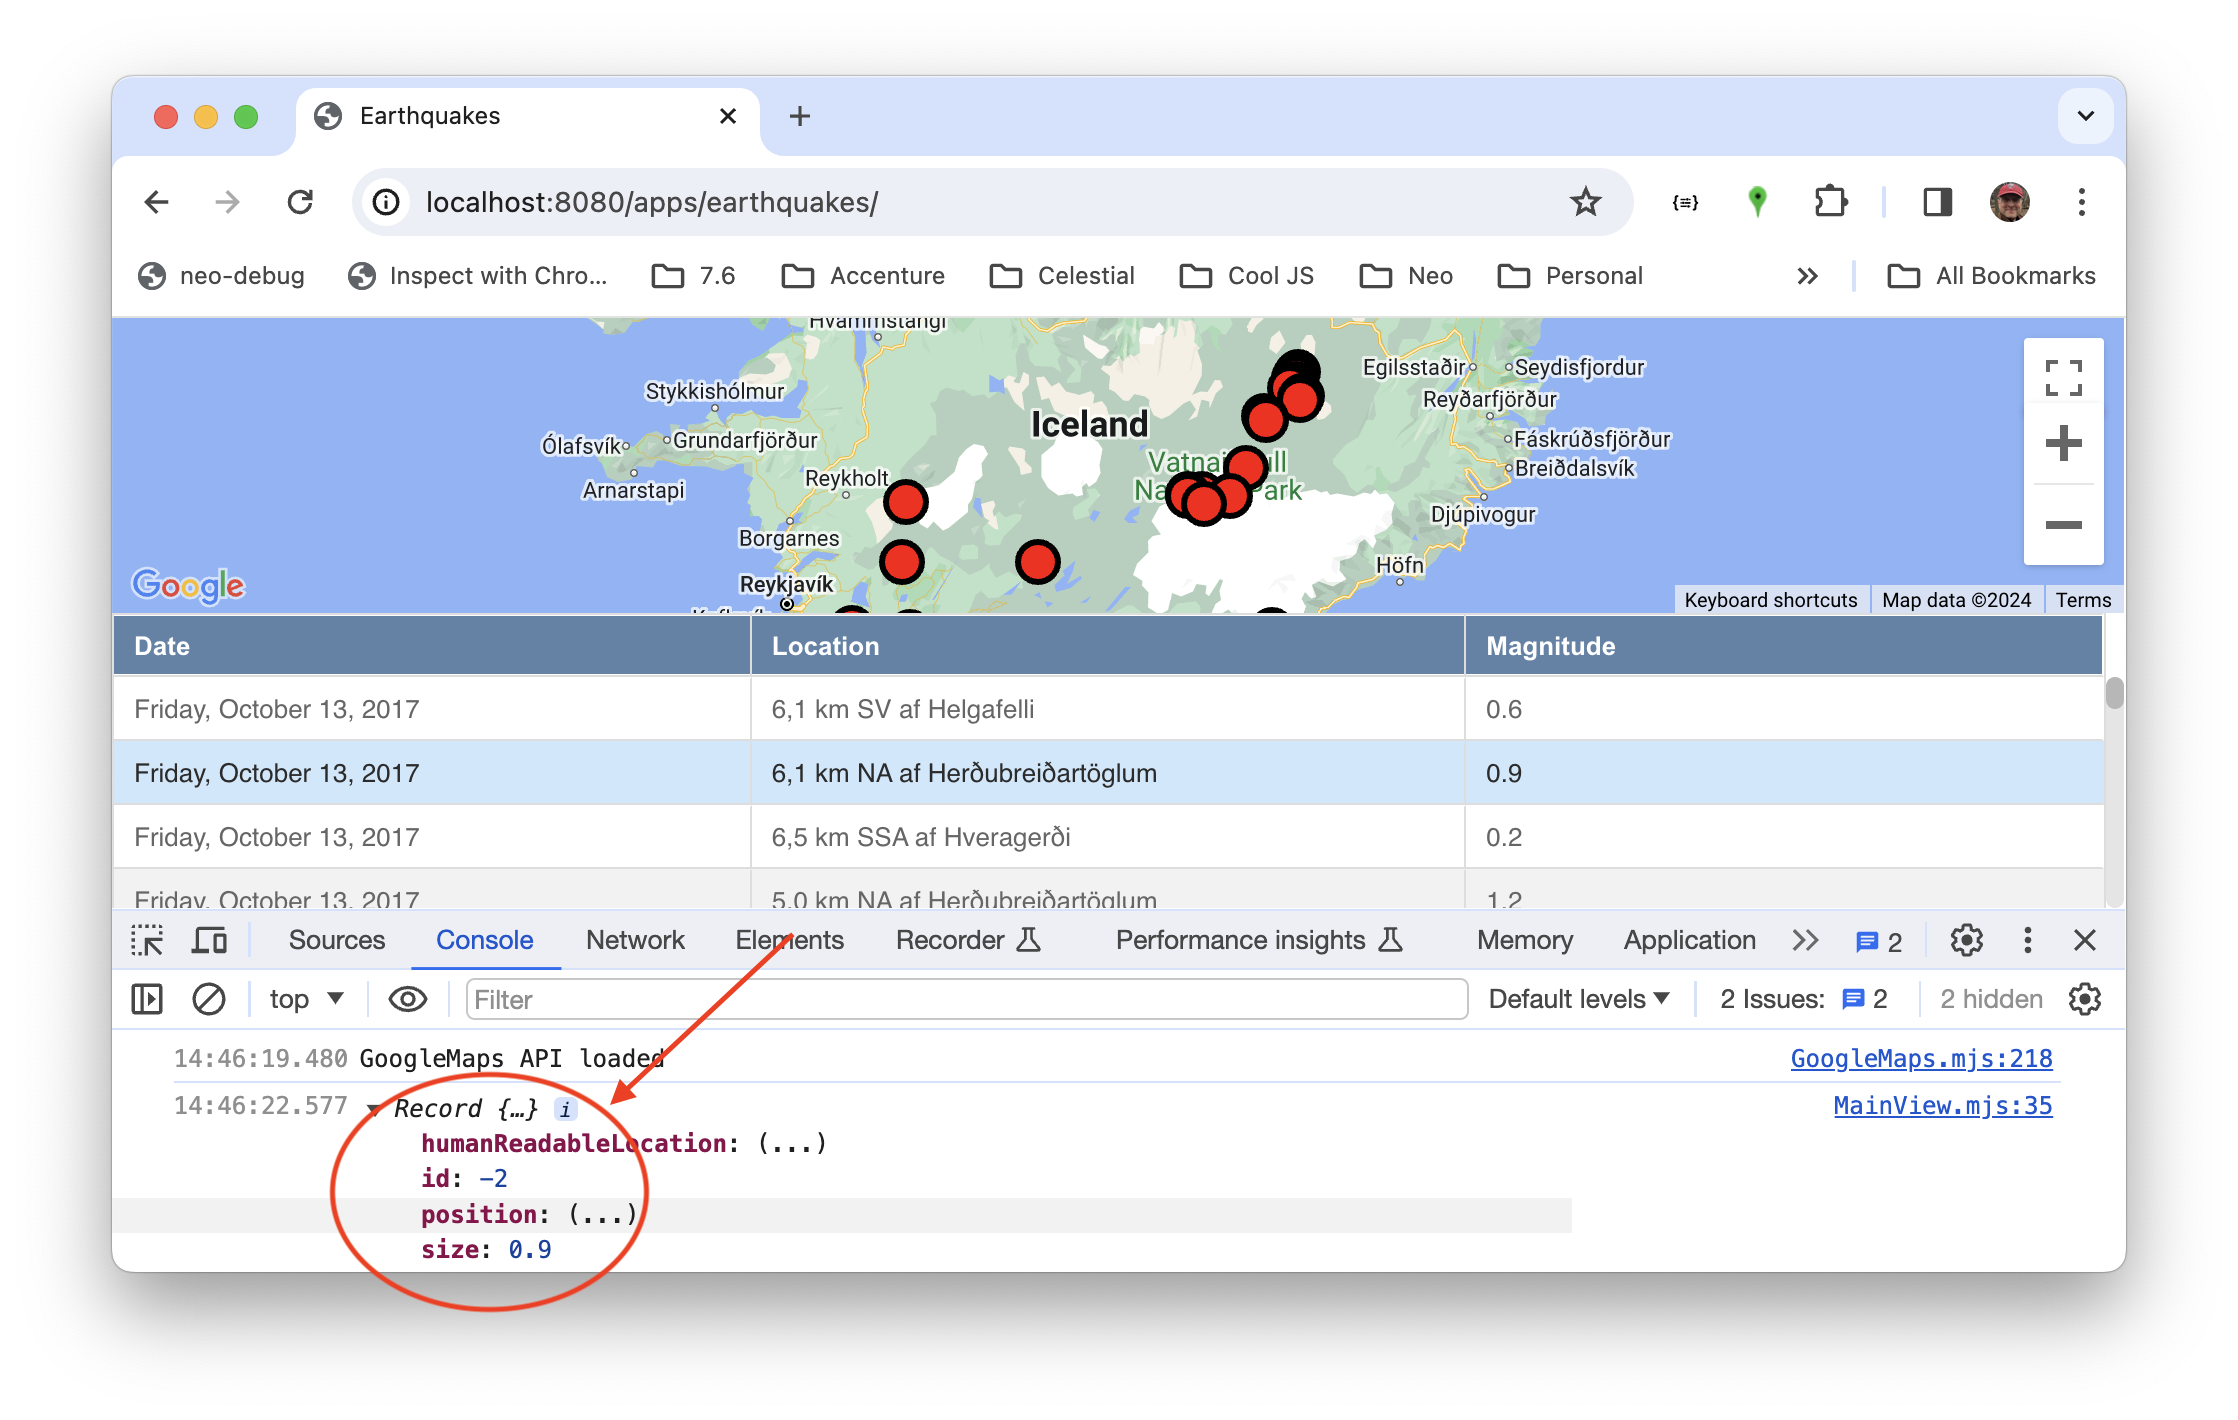 After changing the value you should immediately see it reflected in the table row.
Add a listener to a map event
Now add a `markerClick` listener to the Google Map.
```javascript readonly
listeners: {
markerClick: data => console.log(data.data.record)
}
```
Save, refresh, and confirm that you see the value logged when you click on a map marker.
## Summary
Congratulations on completing the tutorial!
The goals was to give you hands-on coding a simple app to let you get a feel for syntax
and to introduce some basic Neo.mjs concepts
- Declarative, abstract code
- Class-based coding, and the ability to extend any class, such as `view/earthquakes/Table.mjs`
- State providers, to share properties and objects, such as the store shared by the table and map
- Events, specified via `listeners:{}`
- Controllers, to hold event listeners and other procedural logic