# Pip.WebUI Getting Started Step 6. Add Nodes page with tiles view
[Go to step 5](https://github.com/pip-webui/pip-webui-sample/blob/master/step5/) to add settings, feedback and help pages.
### Create nodes tiles view
Create **/nodes** folder under **/src** and place there **nodes.html** file with the following content.
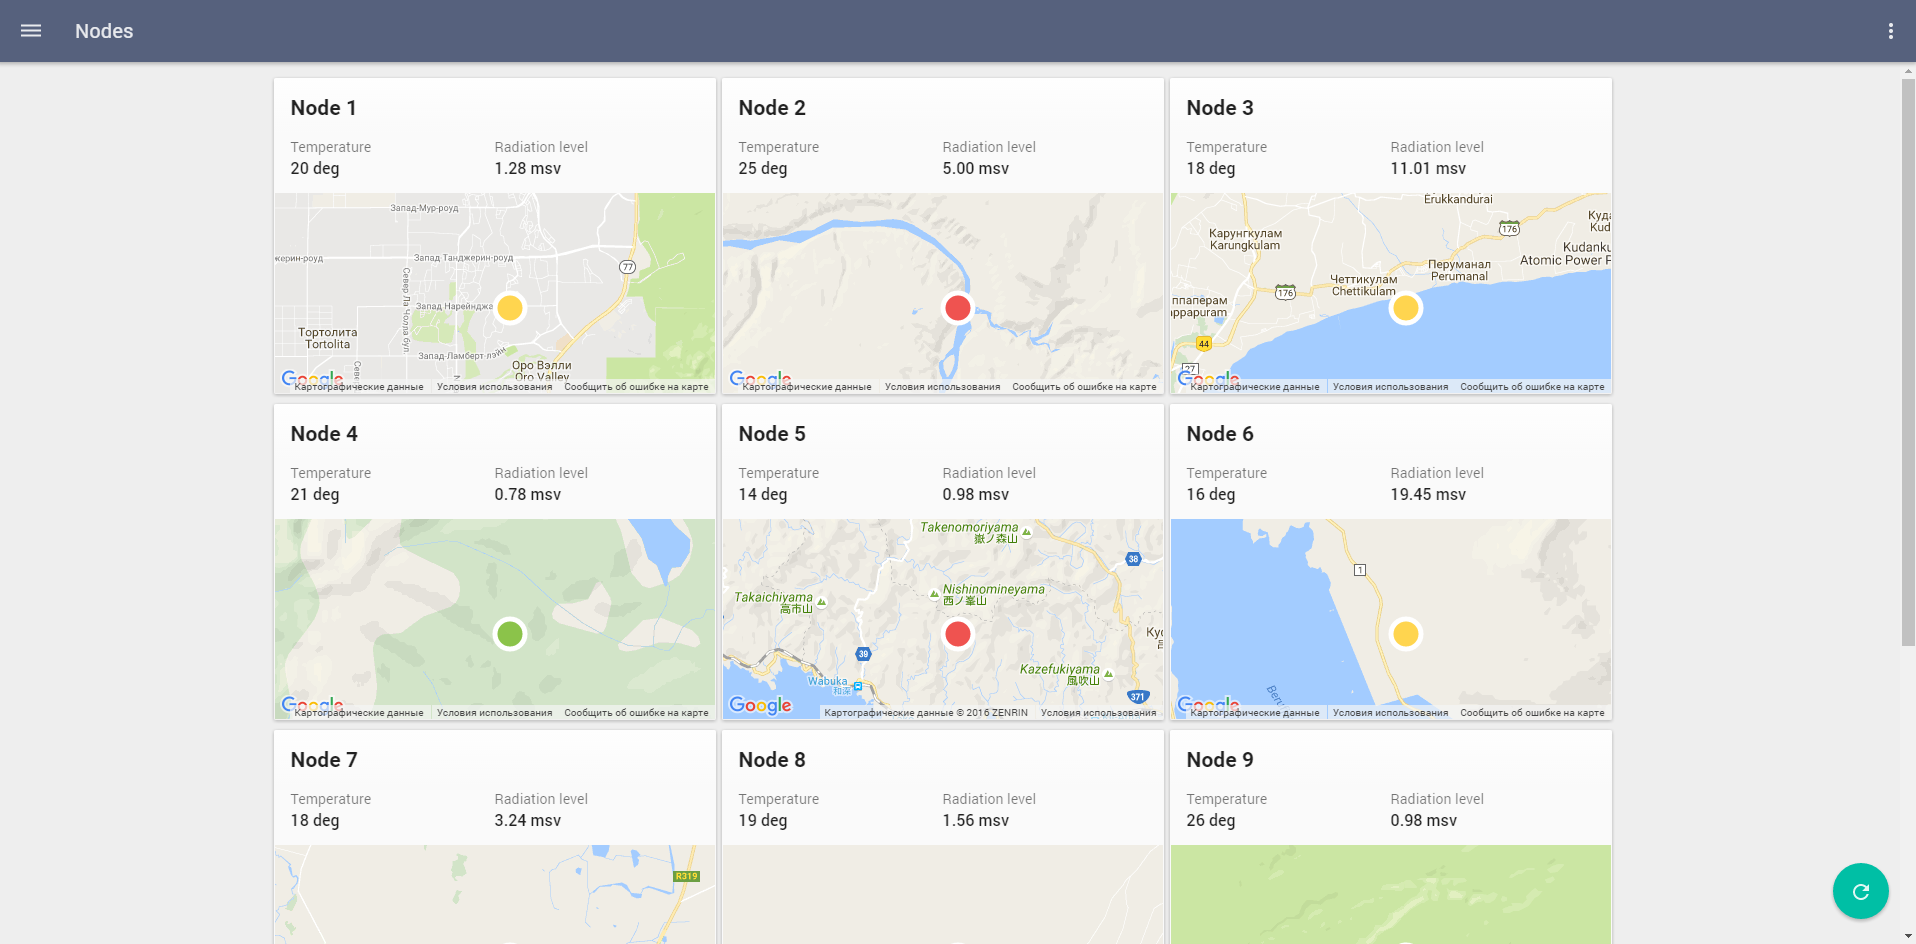
It will display a tile view with IoT nodes showing their name, measurements and current location:
```html
{{ node.name }}
Temperature
{{ node.temperature }}
Radiation level
{{ node.radiation_level }}
Refresh
```
### Create nodes controller
Todo: Each node shall have its own location!
Todo: Can we add the hook to resize tiles into the framework?
Create **nodes.js** file under **/src/nodes** folder and copy the following code there:
We will receive data from our test dataset. Use `$scope.dataSet.get('NodesTestCollection').getAll()` to read data from a set of 'NodesTestCollection'.
```javascript
(function (angular) {
var thisModule = angular.module('nodesModule', []);
thisModule.controller('nodesController', function($scope, pipAppBar) {
// Show page title
pipAppBar.showTitleText('Nodes');
// Show menu icon to open sidenav
pipAppBar.showMenuNavIcon();
// Show local page actions
pipAppBar.showLocalActions();
// Add shadow under the appbar
pipAppBar.showShadow();
// Get test data
$scope.nodes = $scope.dataSet.get('NodesTestCollection').getAll();
$scope.iconPath = 'M0,15a15,15 0 1,0 30,0a15,15 0 1,0 -30,0';
$scope.location_points = getLocations();
function getLocations() {
var points = [];
$scope.nodes.forEach(function (node) {
points.push(node.location_points);
});
return points;
}
});
})(window.angular);
```
### Add page into the application
Add **nodesModule** into the application module references in **index.js**:
```javascript
var app = angular.module('app', [
...
// Sample application modules
'nodesModule'
]);
```
Make changes to the routing states in the configuration section:
```javascript
app.config(
function (pipSideNavProvider, $mdIconProvider, pipAppBarProvider, pipAuthStateProvider,
pipSettingsProvider, pipHelpProvider, $urlRouterProvider, pipRestProvider) {
...
// Configure routing states
pipAuthStateProvider
.state('nodes', {
url: '/nodes',
controller: 'nodesController',
templateUrl: 'nodes/nodes.html', // <---- Pay attention!
auth: true
})
.state('events', {
url: '/events',
controller: 'eventsController',
template: '
Events Page
',
auth: true
});
...
}
);
```
Remove old **nodesController** from **index.js**:
```javascript
// Remove
//app.controller('nodesController', function($scope, pipAppBar) {
// ....
//});
```
Rebuild and reopen the application. You will see now:
Todo: Update the picture to remove that "special tile":
Resize the window and see those the page responses to fit a smaller screen:

### Continue
[Go to step 7](https://github.com/pip-webui/pip-webui-sample/blob/master/step7/) to add Events page with table view